ACOUSTICA VOCODER
A vocoder is a specialized type of multi-filter bank that imparts the tonal characteristics of one sound upon another. Vocoders are commonly used to create robot voice or choir effects by imparting the spectral character of a spoken or sung source (aka, the “modulator”) to a full-spectrum constant tone (aka, the “carrier”).
Generally speaking, the carrier audio should be something relatively constant with a lot of frequency content (e.g. a full synth wave, or white noise), and the modulator should contain constantly changing frequency and/or rhythmic content (e.g. a voice speaking or a drum loop).
QUICK START USING A MIXCRAFT VOCODER TRACK
Because they don’t make any sound on their own, vocoders can initially be confusing to set up, but we’ve greatly simplified configuration by providing the Vocoder Track type. This instantly sets up everything you’ll need for robota-matic vocoder bliss. Vocoder tracks are fully explained in the “Vocoder Track“ LINK HERE section, but we’ll cover them here as well.
The basic idea is that the modulator signal input imparts its character upon the carrier signal input. A crude analogy would be humming a pitch while cupping your hand over your mouth to change the sound - the constant hum would be the carrier signal, and the modulator would be your hand on your mouth.
The carrier and modulator signals must be properly routed for the vocoder to work correctly. You could manually set up the same configuration, but Mixcraft’s Vocoder Track makes this really easy by setting up everything in one step. Here’s a list of exactly what happens when a Vocoder Track is created:
• A Submix Track containing an audio track (Vocoder Modulator) and an Instrument Track (Vocoder Carrier) is created.
• Software Monitoring is enabled for the audio track. This lets you use a microphone or other input source for real-time modulation.
• The Mixcraft instrument preset Vocoder Saw is opened in the instrument channel, and the Acoustica Vocoder is inserted into the first effects slot.
• The Vocoder Modulator audio track is routed to the Acoustica Vocoder sidechain input. This is the secret sauce because the microphone audio (aka, the modulator) needs to control the vocoder.
VOCODER CONTROLS
Here we’ll go over what all of the Vocoder controls do.
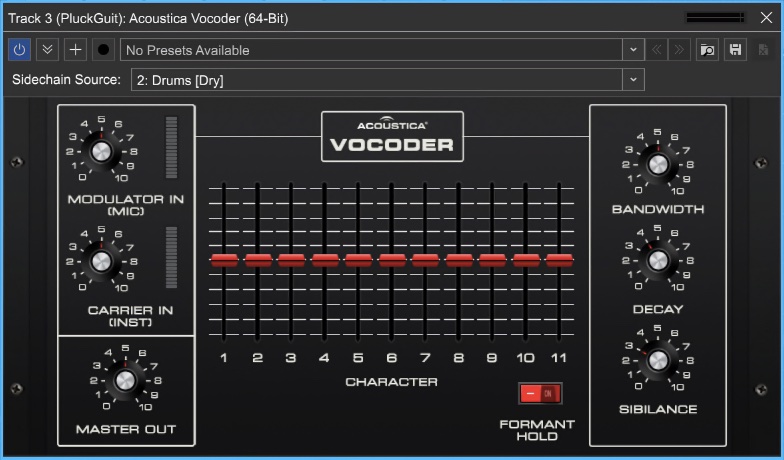
MODULATOR IN (MIC)
Use this knob to set the input level of the modulator signal. The bar meter should be set as with any other input level VU meter - keep it in the green and out of the red. Unlike a typical audio input, setting the input too hot won’t distort, but dynamic range and intelligibility will suffer.
Though this input is labelled Mic for clarity, any audio signal can be used, such as a pre-recorded vocal track, a drum loop, a rhythm guitar, or even an entire song. Signals with constantly changing frequency and/or amplitude tend to work best.
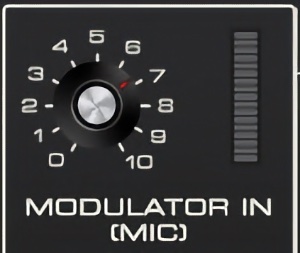
CARRIER IN (INST)
Use this to set the input level of the carrier input signal so it nominally sits in the full green/occasionally yellow region. This one will distort if the input is too hot, and probably not in a desirable way.
Because the constantly changing filter bank is effectively removing different areas of harmonics, the best choices for carrier audio are sources with a full-frequency spectrum and constant sustain. In synth world, this typically translates to wide-open sawtooth, pulse waves, or white noise. In real-instrument world, this would mean full-bodied string and brass sections, or even an organ (with all drawbars out). Dark, dull, or small sounds usually don’t make good carrier signals.
MASTER OUT
Sets the master output level.
BANDWIDTH
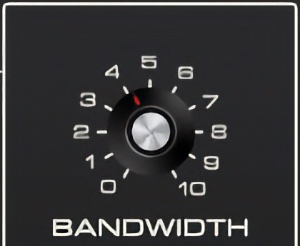
Sets the width or “Q” of all bandpass filters. Narrow bandwidths let less audio through, whereas wider bandwidths let more audio through for a denser sound. A good analogy would be to imagine water running through a comb with wide or narrow teeth.
DECAY
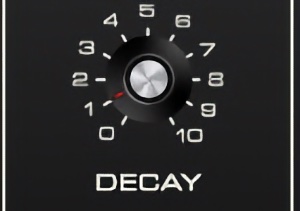
This sets how quickly the carrier's signal envelope followers recover to zero amplitude. Lower settings have a snappier, tighter sound (good when using drums or percussion as a modulator); higher settings are looser (a good choice when using vocals as a modulator).
SIBILANCE
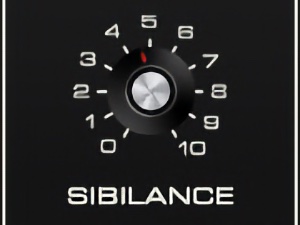
This adds high-passed white noise into the final signal when S sounds are detected. This helps speech intelligibility, because vocoders aren’t inherently good at detecting S sounds, and many carrier sources don’t have much energy in the S sound spectrum.
FORMANT HOLD

When the Formant Hold switch is on, MIDI sustain pedal messages will “freeze” the current positions of the carrier bandpass filters. This is useful if you’re speaking/singing into it, and you’d like a chord to sustain its current tonality curve for long durations (as opposed to speaking/singing until hyperventilation occurs.
CHARACTER SLIDERS
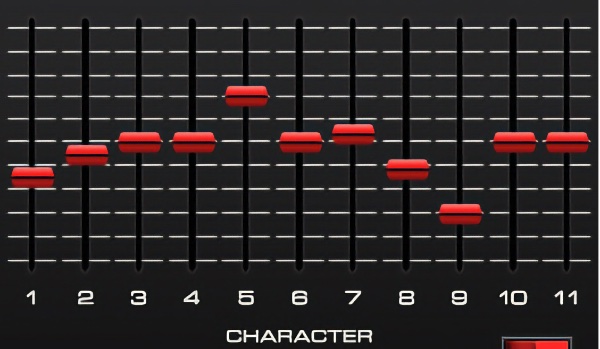
These controls act as individual volume controls for each of the carrier filter bands, and act as a graphic EQ of sorts. Unlike most other vocoders, bands can be turned down to zero, effectively turning them off completely for unique effects.
HOW THE VOCODER WORKS
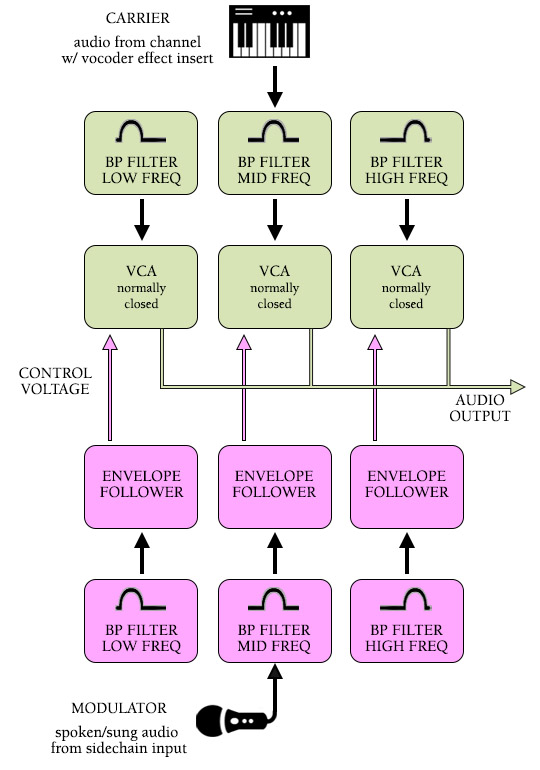
The Mixcraft Vocoder consists of two matching sets of ten bandpass filters (plus two highpass filters): one set for the modulator signal, and the other set for the carrier signal. Each bandpass filter covers a small “slice” of the audible audio spectrum - the eleven bands you see on the panel logically go from low frequencies to high frequencies. The number 11 slider is a highpass filter that handles the top end of the audio spectrum from 8k-20k.
The modulator signal is split and runs through all eleven filters. Each filter only allows a small area of the audio frequency range through. Immediately following each filter is an envelope follower, which is a special type of amplifier that converts incoming audio levels to a corresponding control voltage. So far, we have the incoming modulator signal being split into eleven separate control voltages, all changing independently and in real-time dependent upon the modulator audio’s energy across the frequency spectrum. Complexicated, right?
For the sake of clarity, we’ve simplified this to show only three bands in the block diagram on the preceding page, but the principle of dividing audio into “slices” is the same (more frequency bands/bandpass filters results in greater sound quality).
Now let’s move up to the carrier signal side and talk about what’s going on with its filters. The carrier signal also gets split and runs through the second set of eleven bandpass and highpass filters. These filters each route to the audio input of a standard voltage-controlled amplifier (or “VCA” for short). Remember all those control voltages from the modulator’s envelope followers? Those are connected to the carrier’s individual corresponding VCA control inputs.
If there is no signal present at the sidechain input, the carrier’s VCA’s are all closed. If the sidechain modulator signal contains audio energy in the 400 Hz area, the carrier filter/amp combos will “open up” in the same area of the audio spectrum, thus letting carrier audio in the 400 Hz area through. In reality, though, this is much more complex and nuanced, because different audio signals contain different energy levels across their frequency spectrum. This complexity is why vocoders can create such unique sounds (and also why a relatively simple set of filters can produce recognizable speech).
VOCODER SIGNAL ROUTING IN MIXCRAFT
We partially explained this in the Quick Start section, but here we’ll get down to the nitty-gritty.
As mentioned earlier, a vocoder needs a carrier (constant-ish sound) and a modulator (the sound gets imparted upon the carrier) audio signal.
THE CARRIER TRACK AND VOCODER PLUG-IN PLACEMENT
To be clear, the Acoustica Vocoder is an effects plug-in, not an instrument. Because it’s effectively applying a complex filter to the carrier signal, you’ll want to insert it into the first effects insert slot of the carrier track.

In the basic Vocoder Track setup, the carrier signal is a Mixcraft Synth String instrument - a MIDI instrument track with the vocoder inserted into its first effects slot. But the carrier track doesn’t have to be a MIDI instrument track; it could also be an audio track containing any kind of audio (a recording of some kind of steady-state audio with a broad frequency spectrum, for example). In this case, the vocoder plug-in would still be inserted into the first effects slot.
You don’t have to insert the vocoder in the first effects slot. It will work in any of the slots, but placing other effects before it in the chain may not produce desirable effects. It might be helpful to insert a compressor prior to the vocoder if the carrier signal’s level isn’t constant enough, or an EQ if there’s some kind of really nasty frequency bump going on. We don’t recommend inserting any kind of modulation, echo, or reverbs prior to the vocoder, because they’ll likely get mucked up - place those after the vocoder plug-in for best results. (A chorus plug-in after the vocoder is great for choral pad sounds.)
THE MODULATOR TRACK AND SIDECHAIN INPUT
The modulator track imparts its general frequency and amplitude content upon the carrier track. Ideally, it would be nice to have the option of using any audio signal in Mixcraft as a modulator. Mixcraft’s plug-in sidechain feature allows the routing of almost any signal to plug-ins with a sidechain input.
If you’ve already experimented with the Vocoder Track feature, you’ll see that the modulator and carrier tracks are placed above one another in a Submix track. This is done for clarity, but the placement of the modulator and carrier tracks in the track list doesn’t matter. (It may be helpful to break up their placement if you’re using a lead vocal track as a modulator, for example.)
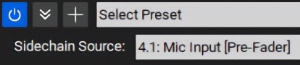
To select the sidechain modulator signal, click the Sidechain pop-up menu at the top left of the Acoustic Vocoder plug-in, and select the desired audio or MIDI instrument track.
REAL-TIME VOCODER OPERATION
If you’d like to use the vocoder live with a microphone controlling a live synth sound (as with a Vocoder Track), plug a mic into your audio interface, and make sure its audio track has the correct audio interface physical input selected as its input source. Also, make sure the track’s speaker icon is toggled on to enable real-time record monitoring.
If you’re using a virtual instrument as a carrier, select its track (or make sure the track’s Arm button is engaged). Now try holding down some keys on a MIDI controller while speaking into the mic and you should be vocoding successfully.
Remember that the modulator signal (i.e. microphone) controls frequency and amplitude, so you won’t hear any sound from the carrier (i.e. synth) unless you’re speaking into the mic. Furthermore, the vocoder modulator signal doesn’t care about pitch; this means the end result will be roughly the same whether you’re speaking or singing.
Getting Used To Live Vocoder Performance
Playing a keyboard while speaking into a vocoder can be an odd coordination at first, but it becomes natural pretty quickly. You’ll likely be tempted to try and sing every note at the correct pitch, but you’ll soon adjust to simply speaking, which is much easier.
VOCODER OPERATION WITH EXISTING AUDIO TRACKS
The vocoder can also use existing audio tracks as modulator and carrier sources. You could use a lead vocal track sidechain input to vocode an existing synth pad (for “standard” robot voice and/or choir sounds), or a drum kit or loop recording to modulate white noise or any kind of noise. Entire songs can even be used as modulator sources!
Bear in mind that the modulator, carrier, and main outs are all mono only,
Once you’ve got the vocoder up and rockin’, try manipulating the Character, Bandwidth, Decay, and Sibilance controls for a whole lot of sound variation.