SOUND EDITOR
Audio clip content can be edited by double-clicking a clip. This opens the Sound tab.
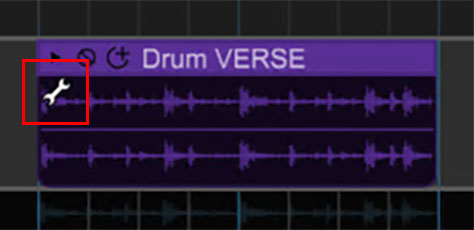
IA small wrench appears in the clip's upper left corner when a clip is currently being edited in the Sound tab. This makes it easy to determine which clip is being edited.
WAVE SNAP POINT, AUDIBLE CLIP REGION, LOOPING, AND PLAY HEAD
The looping and audible region of a sound has a white background. The unused parts of the sound are shown in green. If the clip is “closed down” smaller in the Main Clip Grid than the entire looped region, the unused section of the loop will have a gray background. The adjustable points in the waveform display are as follows:
• Snap Point Marker
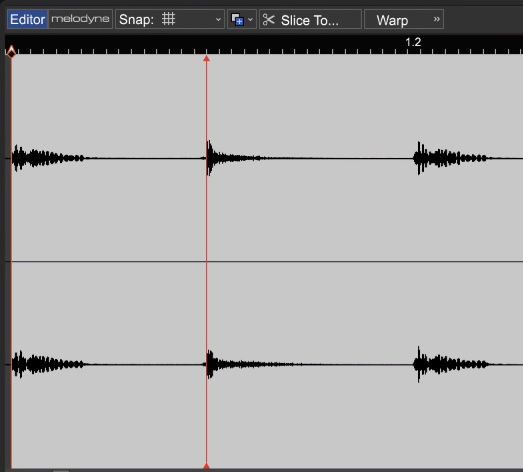
The red vertical line defines the position where a clip snaps to in the Main Clip Grid. Set the Snap Point marker by clicking and sliding at the marker’s top or bottom (the cursor will turn into left/right arrows), or by right-clicking and selecting Set As Start Time. Right-clicking and selecting Reset Start Time will return the Snap Point marker to its original position. Sometimes this guy likes to hide behind the Loop Start marker, so if you don’t see it, try moving the Loop Start marker (just remember to move it back where it needs to be).
• Loop Start
Defines the point where sound playback begins. To position Loop Start, click and drag at the top of the marker (the cursor will turn into left/right arrows). You can also set it by right-clicking in the waveform and selecting Set Loop Start.
• Loop End
Defines the point where sound playback ends, because all good loops must come to an end. To position Loop End, click and drag at the top of the marker (the cursor will turn into left/right arrows). You also set it by right-clicking in the waveform and selecting Set Loop End.
Loop points can be returned to their original positions by right-clicking and selecting Reset Loop Points.
• Playhead
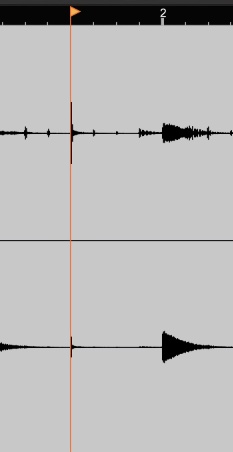
Just to keep things clear, that yellow line with the flag is the same Playhead as the one in the Main Clip Grid. You’ll notice that it moves in both windows simultaneously.
SOUND TAB TOOLBAR (WITH AUDIO CLIP SELECTED)
• Snap To Grid
This determines the snap value when selecting a waveform region, as well as moving the play insert and loop start/end markers. When set to Grid, items will snap to the ruler markings in the timeline, directly above the waveform. The ruler markings vary in size depending on the horizontal zoom level. Grid (Triplets) is best suited for music with a three feel, i.e. 3/4 or 6/8 time signatures.
• Copy Selection To
The Copy Selection To command exports the currently highlighted audio wave region to one of the following:
• Copy Selection To> Performance Panel
Places the selected region in the highlighted cell of the Performance Panel.
If no cell is currently selected, the sample will be placed at the first open location.
• Copy Selection To> Alpha Sampler
A new instrument track with an Alpha Sampler is created, and the selected region will be loaded into Alpha Sampler.
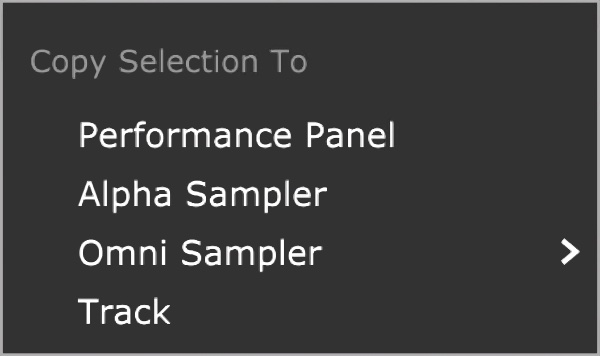
• Copy Selection To> Omni Sampler
If there are no instances of Omni Sampler in the current project, selecting Copy Selection To> Omni Sampler>New opens a new instrument track with an Omni Sampler, and the sample is placed on the C4 sample pad. If Mixcraft detects an existing Omni Sampler, this is displayed when Copy Selection To>Omni Sampler is displayed. At this point, you can export the audio region to an existing Omni Sampler, or select New to create a new Omni Sampler instance on a new track. Samples exported to an existing Omni Sampler instance will be loaded into the first open cell above C4.
• Copy Selection To> Track
The selected region is imported to a track in the Main Clip Grid. The region is placed at the current playhead location on the current audio track. If the currently selected track isn’t an audio track, the region is placed on the first audio track. (Be careful, the region can potentially land beneath existing audio - you won’t see it unless you slide the existing audio up or down.)
• Slice To…

The Slice To… button cuts up audio regions and exports the “slices” to the Performance Panel, Omni Sampler, or directly to a Mixcraft audio track. Though the audio slices can be any length, you’d typically use this for cutting up a section of the loop or a song into smaller chunks allowing you to create new beats or loops (using small slices), rearrange sections of a song (with larger slices), or anything in between. Clicking the Slice To… button opens this window:
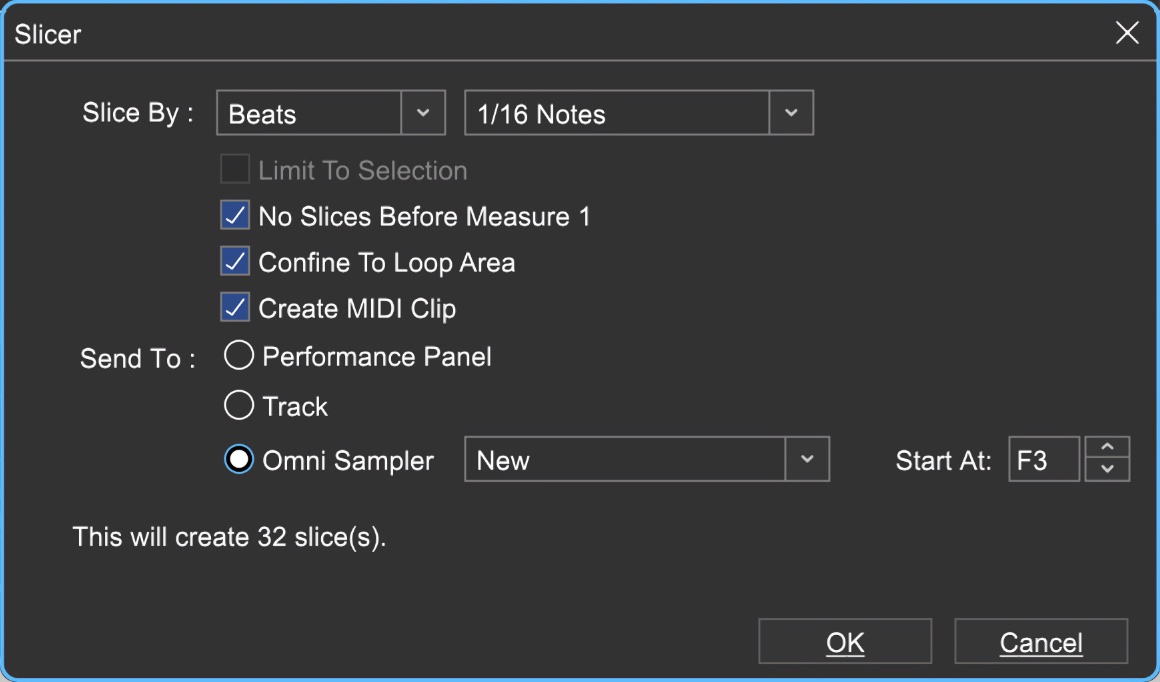
The Slice By pop-up menu selects from the following options that define how the sound will be sliced ‘n’ diced:
• Beats slices by the note value defined in the pop-up menu to the right. This works well for slicing beats and loops into small “chunks.”
• Measures works the same as Beats, but is defined in the number of measures in the pop-up menu to the right, making it more appropriate for larger chunks of music.
• Transients slices according to audio transients detected by Mixcraft. The sensitivity level is defined by the slider to the right according to the amplitude level in percentage; the lower the slider setting, the more sensitive, thus creating more slices.
• Warp Markers slices according to the location of warp markers; you must have warp markers already created in the audio region (see “Warp”).
• Limit To Selection
If a region of audio is currently selected, checking this box ensures that only audio within the selected region is exported as slices.
• No Slices Before Measure 1
This prevents the export of slices before the first measure of a loop. (Desirable if you’ve manually relocated a loop’s start point.)
• Confine To Loop Area
Checking this box ensures that slices are only exported from audio between the Loop Start and Loop End markers of the current clip.
• Create MIDI Loop
This creates a MIDI clip of all slices, playing consecutively and places it on the newly created Omni Sampler track at the current Carat location. Playing back this clip will sound exactly the same as playing the entire source loop, but now you’ll have the ability to edit each slice (or drum hit) in Mixcraft’s MIDI editors, opening the door to all kinds of creativity such as changing sounds, varying drum patterns, etc. If you like playing with beats, Create MIDI Loop is a powerful and fun feature.
• Send To
Selects the destination for exported slices.
• Performance Panel exports slices to the Performance Panel. The first slice appears in the currently highlighted grid location, and each additional slice lands in the next grid location to the right. If you’d like slices to land in on a particular track, it’s a good idea to highlight the desired grid location prior to exporting slices.
• Omni Sampler exports slices to individual Omni Sampler cells. If the pop-up menu to the right is set to New, Mixcraft creates a new track with a blank Omni Sampler loaded. If there are existing instances of Omni Sampler, these can be selected in the pop-up menu. To begin exporting, click OK. Exported slices begin loading at the cell number selected in the Start At selector. If a cells already contain samples, Mixcraft will skip them and continue loading at the next open cell location.
• Track exports slices to the currently selected audio track, beginning at the current playhead location in the Main Clip Grid.
• Warp

Warping audio lets you adjust the timing of audio by detecting the locations of transients or “hits,” then effectively time-stretching and -expanding small regions between transients within an audio file. This offers powerful creative and corrective options. Used on a smaller piece of audio, such as a drum loop, warping lets you correct the timing of poor playing, or re-quantize audio for different rhythmic feels. When applied to an entire song, warping makes it easy to lock up the tempos and feels of songs, allowing easy mixing and creation of song “mash-ups.”
Mixcraft’s warping tools are easy to use; not only can Mixcraft interpret tempo, time signature, and beat locations to assist in the placement of warp markers, Mixcraft includes an Autowarp function that automatically locates warp information and places warp markers.
HOW TO USE WARP
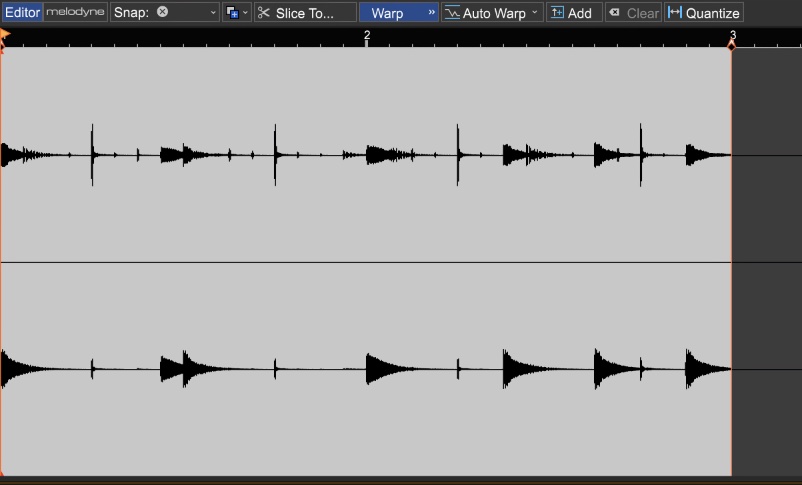
1. When Warp is clicked in the Sound Tab Toolbar, Mixcraft scans the currently looped audio region and makes educated guesses as to tempo, time signature, and beat locations.
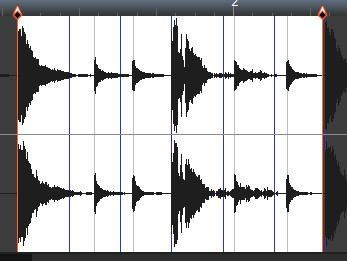
The blue lines shown display the predicted beat locations, and the black lines show transient hits. The blue and black lines have no effect on the sound, but the predicted beat locations are very helpful when placing warp markers as described on the next page.
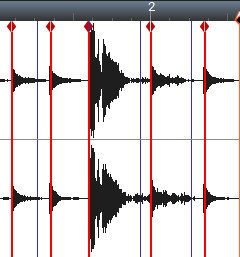
2. Once the predicted beat locations and transient hits are displayed, set the Audio Tab’s snap setting to Snap To Grid. (This makes the Caret snap to predicted beat and transient locations.) Now click on beats and transients to place the Caret, and add red Warp Markers by clicking the Add Warp Marker button in the toolbar (or right-click and select Add Warp Marker). If you don’t want neighbouring hits or audio areas to be affected, place “safety” Warp Markers on hits before and after the hits or areas to be manipulated.
3. Once Warp Markers are in place, they can be freely moved left and right to squeeze and stretch audio in time. It’s easiest to hear the effects of warping by pressing the green Sound tab play button and moving the Warp Markers in real-time during playback. Feel free to experiment - like all Mixcraft audio processes, warping is non-destructive, and its operation is easier to wrap your head around when you’re actually using it!
4. To remove a Warp Marker, right-click it and select Clear. To remove all Warp Markers from a loop, click the Clear button in the Sound Tab Toolbar.
• Autowarp
Autowarp analyzes audio material and automatically places Warp Markers at relevant points. It’s particularly useful for “mashup” mixes where two unrelated songs are to be mixed together. There are four strength settings ranging from sloppy to tight. Tighter settings add more Warp Markers and affect timing more strongly, whereas looser settings add fewer Warp Markers and have less effect on the timing of audio content. By all means, experiment, as different source material responds better to different settings.
• Warp Quantize

Warp Quantize allows audio material to be quantized much like MIDI notes by intelligently squashing and stretching rhythmic hits in the source material.
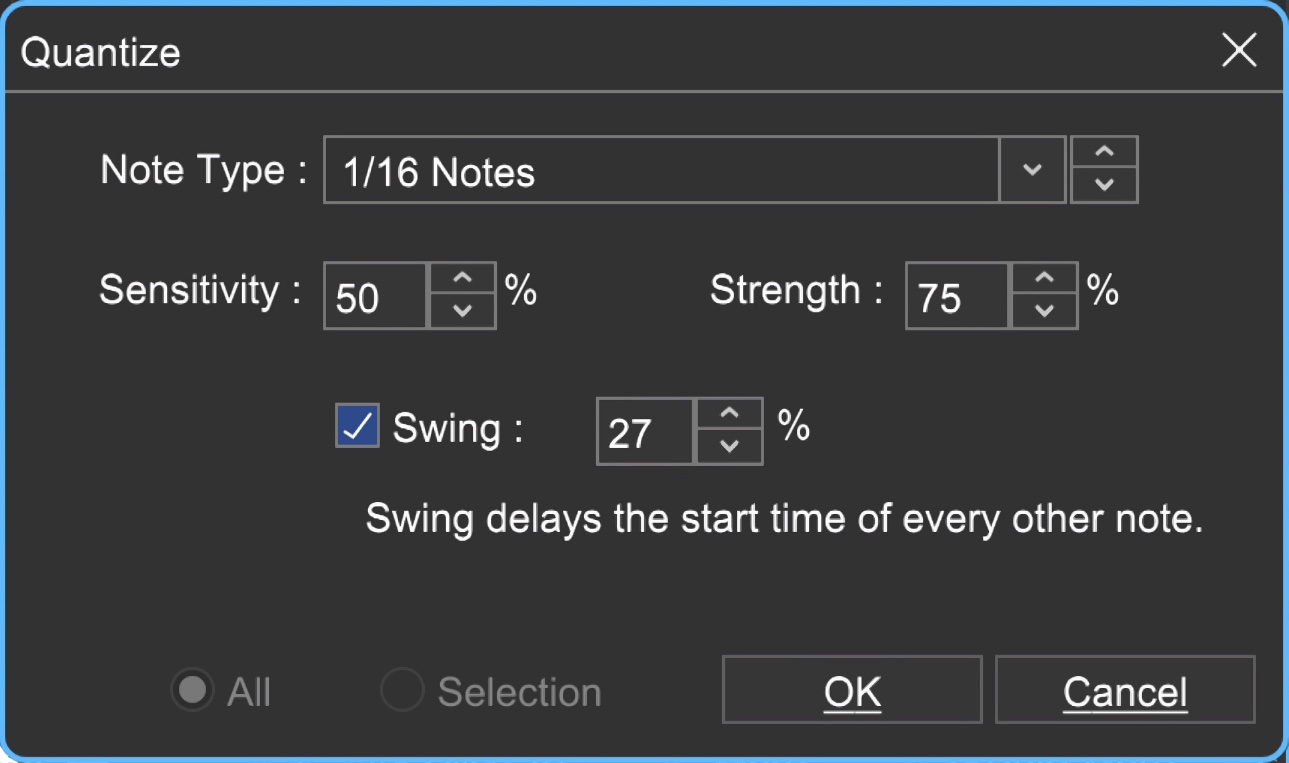
• Note Type
This is the quantize value; transients will be moved to the closest note value.
• Sensitivity
The amplitude a transient must reach before Mixcraft considers it a “hit” to quantize to.
• Strength
Regulates how close hits will be moved in time toward the quantize values. 0% won’t move transients at all, whereas 100% would move transients all the way to the quantize point.
• Swing
As stated on-screen, the Swing value delays the start time of every other note. Your ears will recognize this as the rhythmic feel of old blues music, “Take The A Train,” or any Bobby Brown hit from the 80s. The percentage sets how much every other note is delayed.
• All/Selection
A setting of All applies Warp Quantization to the entire audio clip. Selection quantizes only the highlighted region.