MIXER TAB
By now you’ve probably used the channel volume and pan controls in the track list. Basic mixes can be created this way, but the Mixer Tab offers far more creative options. All audio signals including audio, virtual instruments, and effects can be precisely controlled in the mixer window.
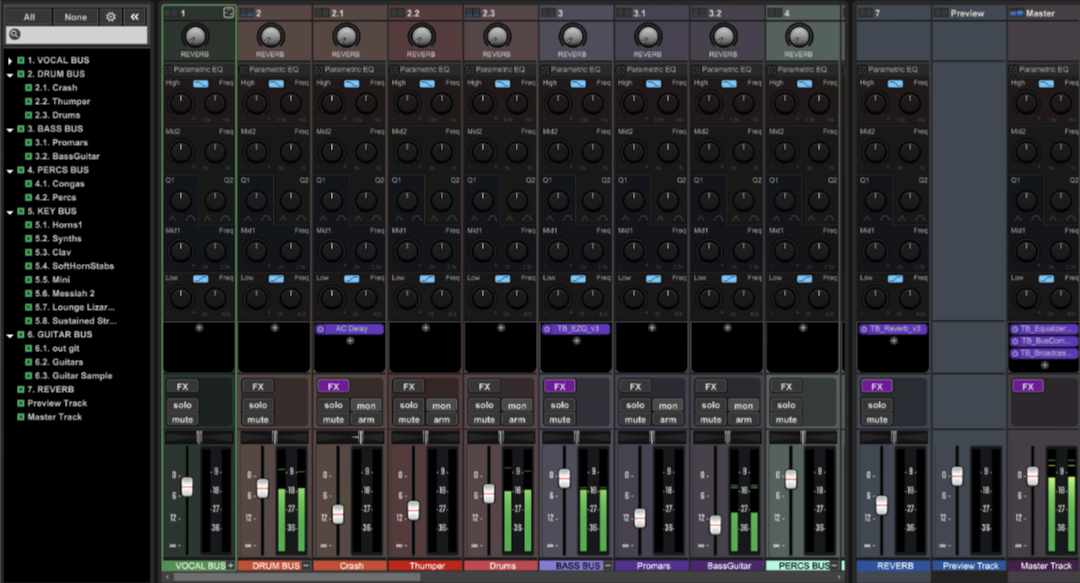
Each track is represented by a vertical channel strip containing a volume slider, pan control, EQ (low, mid, high), insert FX, record arm, solo, and mute buttons, plus an optional Send knob and Instrument button (some controls vary depending upon the track type). Keep in mind that tracks in the track list have a one-to-one correlation with mixer channels; in other words, each newly created track adds a new mixer track.
VIEWING, HIDING, AND RESIZING THE MIXER

To open the mixer at the bottom of the workspace, click the Mixer tab at the very bottom of the screen. To hide it, click the dash in the upper-right corner of the mixer, next to the Undock button.

To open the mixer in a separate window, click the Undock button. This is particularly useful if you’re using two displays (or one really big one). The Dock button in the top corner will “re-attach” the mixer to the bottom of the main Mixcraft window.

The overall height of the mixer can be adjusted by positioning the mouse pointer beneath Mixcraft’s transport; the cursor will become up/down arrows when it’s in the right spot. Dragging up vertically will extend the length of the channel faders. Dragging down will compress the size of the faders; once they’re dragged down to their minimum size, a scroll bar appears on the right side of the mixer allowing scrolling of the mixer view area. This lets you maintain the size of the track display area without totally squashing the mixer faders.
MIXER PANEL PREFS
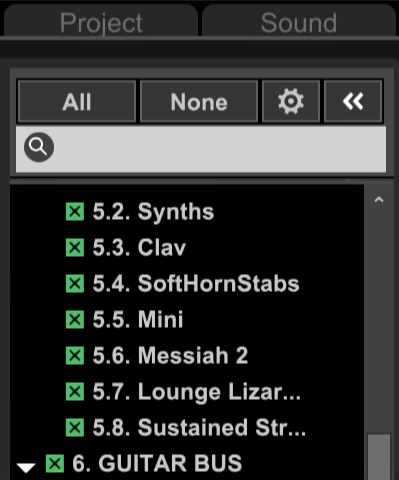
The mixer panel prefs area to the left of the mixer hides or displays individual mixer channels. This allows you to see only the tracks you’re currently working with. Hiding or showing tracks has no effect on audio; if you’re hearing a track but can’t see it, make sure it’s not currently hidden. Mixer tracks can be quickly hidden or displayed by clicking and dragging across multiple checkboxes - this can be combined with [SHIFT]+click to select or deselect individual tracks.
ALL/NONE SELECT BUTTONS
The All and None rapidly shows or hides all mixer channels.
MIXER PANEL PREFERENCES
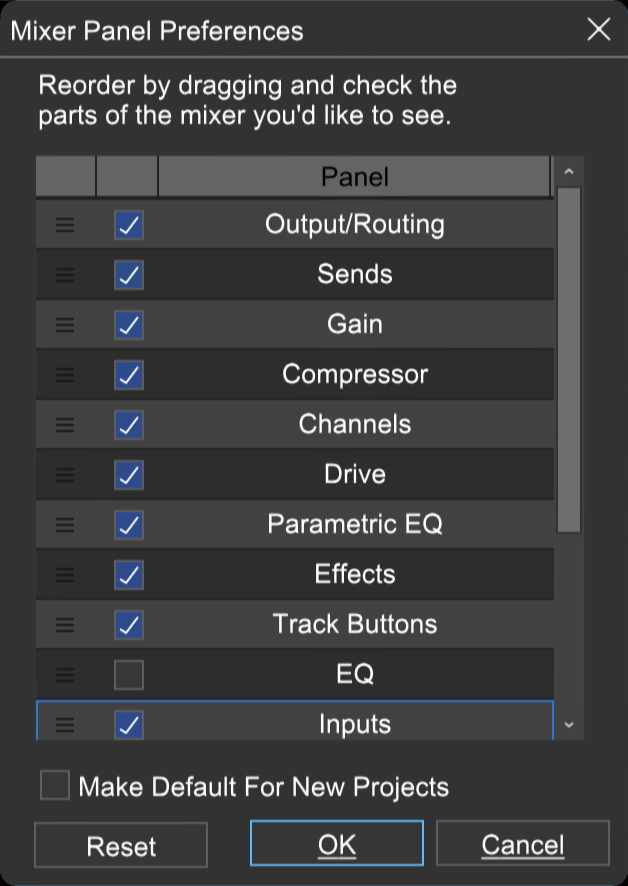
Clicking the small gear icon next to the All and None select buttons opens the Mixer Panel Preferences menu, for customization of mixer channel strips. Mixer control sections can be individually displayed or hidden using the checkboxes. The top-to-bottom arrangement of channel stripes is completely customizable by dragging and dropping sections in the desired order.
When you’re done arranging the mixer layout, click the X at the top right or the OK button. The Default button returns the channel strip components to their default arrangement in case things get really mucky.
Use the Make Default For New Projects checkbox to apply the current Mixer Panel settings to all newly created projects. Mixer Panel Preferences have no effect on the sound.
HIDE/SHOW MIXER PANEL PREFERENCES

Click this to hide or show the mixer panel preferences tab. Hiding it allows viewing of more mixer channels.
SEARCH FIELD
This can be helpful when track counts are large and tracks become hard to find. Here’s how to use it:
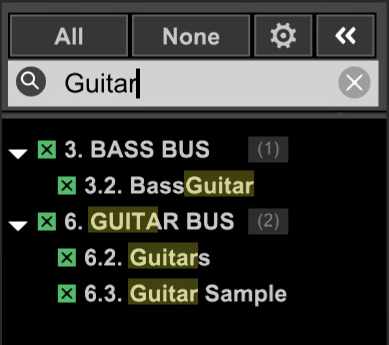
Click the None track select button - this will hide all mixer tracks. Now type the name of the track(s) you’re looking for. All mixer channels containing the entered text will show in the list. Click the X boxes next to the names to unhide their corresponding mixer channels.
SUBMIX TRACK AND MULTI-OUT INSTRUMENT CHILD TRACK DISPLAY
SubMix Tracks and multiple output Instruments Tracks have a master “parent” track as well as any number of associated “child” tracks. As in the Track List, the child tracks can be shown or hidden in the Mixer. Hiding the child tracks saves space in the Mixer, especially if you’re working on a smaller display. SubMix and multi-out Instrument tracks will show a small + or - button in their lower-right corner - click it to hide or show the child tracks.
SubMix Track with child tracks hidden:
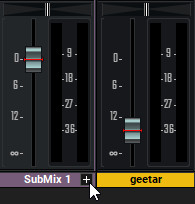
SubMix Track with child tracks showing:

Note: Child tracks in the Track List can be shown or hidden independently of child tracks in the Mixer, but none of this affects sound in any way.
SHOW/HIDE PARENT AND CHILD TRACK RIGHT-CLICK MENUS
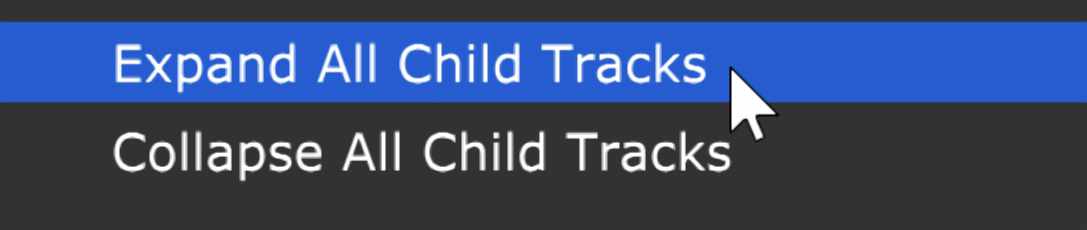
Right-clicking in the Show/Hide Tracks menu lets you quickly show or hide all child tracks in the current project.
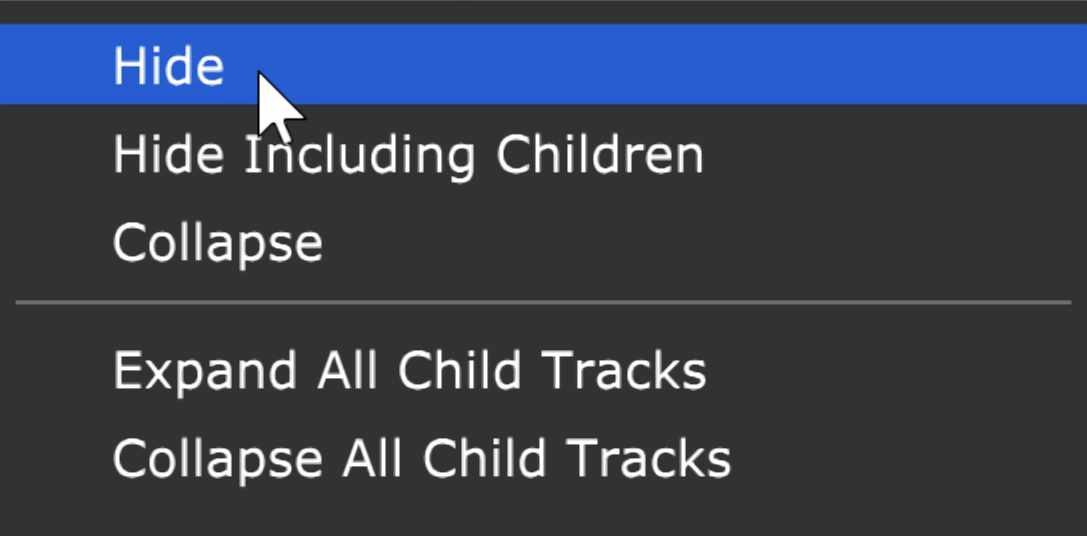
Right-clicking a parent or child track displays a few more options that allow the hiding of the parent and child or the child tracks only.
LINKED TRACK DISPLAY

If two or more tracks are linked (via the Track>Link menu or by right-clicking a track and selecting Link Selected Tracks when two or more tracks are currently selected), a chain icon appears at the top of the corresponding mixer tracks, as well as on the tracks in the Track List. Clicking on the chain icon unlinks the tracks.
MIXER SEND TRACK, OUTPUT BUS, PREVIEW, AND MASTER TRACK DISPLAY

Send Tracks, Output Bus tracks, Preview Track, and the Master Track always appear on the right side of the mixer, regardless of their position in the track list.
You’ll see a vertical divider bar near the middle of the mixer with audio, virtual instrument, video, and submix tracks on the left, send, output bus, and the master track on the right side of the divider. This makes it easier to visualize the mix signal flow. The vertical divider bar automatically moves dependent on how many send tracks and output bus tracks are used in the project. We like to place Send Tracks and Output Bus tracks at the bottom of the project track list to maintain consistency between the track list and the mixer window, but Send Tracks and Output Bus tracks can be placed anywhere in the track list.
PREVIEW TRACK
We haven’t mentioned the Preview Track up to this point, because it’s the only track type that doesn’t appear in the track window. The Preview Track fader appears in the mixer immediately to the left of the Master Track fader and affects the volume of Library tab sound previews, sounds played back in the Audio editing tab, and the “freezing ice” sound effect heard when tracks are frozen.
The mixer Preview Track is strictly a volume control and thus has no input or output menus, panning, track buttons, effects inserts, etc.
MIXER DELAY COMPENSATION, YOUR INVISIBLE FRIEND
Though not a visible control, we thought this would be a good time to discuss Mixer Delay Compensation. Sometimes plug-ins and instruments can introduce delays as a result of the brief time it takes for them to process sound. If this doesn’t get properly “reported” to the host app (i.e. Mixcraft), some audio tracks or effects busses will play back later than others. In some cases, this isn’t too noticeable (i.e. the wet signal of nine-second reverb on a Send Track), but in other situations, it can wreak havoc with the timing of your project (think 64th-note-quantized castanets).
In the past, this might necessitate inserting VST delay compensation plug-ins at various points in the mixer signal flow. As you might imagine, this could quickly get confusing, but fortunately, Mixcraft 10’s mixing engine design automatically allows for plug-in delay compensation on all mixer channels, including send knobs on instrument output tracks, sidechaining, etc. To put it bluntly, Mixcraft automatically compensates for latency introduced by plug-ins and virtual instruments and automatically makes sure everything plays back in perfect time. Hooray for mixer delay compensation!