CONFIGURING THE VOICE LIST
The most unique aspect of the Step editor is that unlike most other MIDI editors, Step editor does not display all MIDI notes. Not only can you choose which notes are displayed, you’re free to rearrange their order in the list at the left of the editor. This is very handy when working with drum parts, as the list can be set to display just the notes you’ll be using.
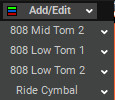
The list of notes is called the Voice List (to avoid confusion with the MIDI notes in the grid). Notes are always displayed top to bottom, i.e. highest notes are at the top, lowest notes appear at the bottom.
There are a couple of ways to add notes to the note list:
• If you’ve already recorded a MIDI clip, double-click the MIDI clip, and click the Step button in the toolbar. Mixcraft will automatically create a Voice List with all notes used in the selected clip. These can be edited with the Step Editor Voice Chooser keyboard by clicking the Add/Edit button (keep reading to find out how to use the Step Editor Voice Chooser keyboard).
• To create a custom Voice List from scratch, select an empty MIDI track in the Track List, right-click in the Main Clip next to it and select Add Instrument Clip to create an empty MIDI clip. Double-click the MIDI clip, and click the Step button in the toolbar. To add MIDI notes, click the Add/Edit button. This opens the handsomely rendered Step Editor Voice Chooser keyboard:

USING THE STEP EDITOR VOICE CHOOSER
To add notes to the Voice List with Step Editor Voice Chooser keyboard, simply click keys on the keyboard. Notes (i.e., voices) can be removed by right-clicking. The keyboard keys will turn beige for newly selected notes; keyboard keys turn green if there are notes in the grid already using the “voice”.
Select Mode
This mode limits note selections to a specific key signature, scale, or mode. If notes outside of the chosen key or scale are clicked, they won’t be added to the Voice List. Scale and mode choices include:
• Chromatic
• Major
• Minor
• Pentatonic Major
• Pentatonic Minor
• Dorian
• Mixolydian
• Harmonic Minor
• Blues
• Clear
This deletes all unused voices from the current Voice List. If there are notes “played” on the grid (i.e. MIDI events played or drawn in), the “used” voices cannot be deleted from the Voice List.
PREVIEWING NOTES IN THE VOICE LIST
Clicking the note name in the Voice List will sound the note.
CHANGING A NOTE IN THE VOICE LIST

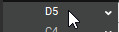
To change an existing note in the Voice List, click the down arrow next to the note name. A MIDI keyboard will open on-screen; simply click a new note. All notes in this row of the grid now play the newly selected note.
VOICE LIST RIGHT-CLICK MENU
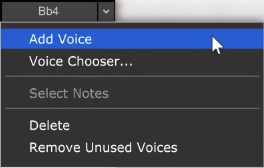
Extra functions are available by right-clicking a note in the Voice List, or in the gray area beneath it.
Add Voice
This opens a keyboard and lets you add new voice(s) by clicking a key (or multiple keys) on the displayed keyboard.
Voice Chooser
This is the same as clicking the Add/Edit button. It opens the Step Editor Notes Chooser keyboard and allows voices to be added or deleted from the Voice List.
Select Notes
Selects all notes played by the current voice in the grid. This is useful for moving a voice’s notes to a different voice (by dragging), or to quickly delete all of a voice’s notes.
Delete
Removes the voice from the Voice List and all notes for the voice on the grid. Careful with this one!
Remove Unused Steps
Deletes all voices with no notes on the grid.
If you’re using a drum virtual instrument, instead of notes, you can view the names of individual drums in the left column. In the Sound tab, select a drum map from the Map drop-down control. Mixcraft will choose the appropriate drum map if it is already mapped.
CREATING CUSTOM DRUM MAPS (ADVANCED)
To create drum maps with individual custom instrument names (per note), go to the %programdata%\Acoustica\Mixcraft\drum-maps\ folder. (if you’re using Mixcraft Home Studio, go to the %programdata%\Acoustica\MixcraftHS\drum-maps7\ ) Here you’ll find text files representing Mixcraft’s included Drum Maps. The text format is as follows:
[MIDI Note Number] [Drum Hit Name]
For example, if you had a virtual instrument called Big And Dumb Drums with a sound called Mega Kick on MIDI note 54, you would add the following line:
54 Mega Kick
The file would be saved as Big And Dumb Drums.txt in the %programdata%\Acoustica\ Mixcraft\drum-maps\ folder.
Once Mixcraft is restarted, the new Drum Map appears in the Scale/Drum Maps list.
The final step is to add a default mapping in order to automatically select the correct Drum Map when the Big And Dumb Drums virtual instrument is selected.
Open the file called Default-Drum-Mapping.csv in either Excel, Open Office Calc, or Google docs. The file is comma delimited for columns and quote (“) delimited for text. Fill in the following fields and save the document:
• Map File
The name of the file you just created, ie: “Big And Dumb Drums.txt”.
• VST GUID
This is a special value uniquely identifying the VSTi. Open up your Log file after having used the plug-in to get its VST GUID. Your log file will be located at
%appdata%\Acoustica\Mixcraft.
The following example shows how to find the GUID for the Bass Synthesizer VSTi.
15:39:16 [635 mils] : VST: C:\Program Files (x86)\Acoustica Mixcraft 10\ VST\3rdParty\Alien 303 Bass Synthesizer.dll”
15:39:16 [635 mils] : VST found in the registry.
15:39:16 [635 mils] : {4A2F286F-0000-0000-0000-000000000000}
• VST Name
If there isn’t a GUID, use the exact name from the log file.
• Preset #
This is the preset the drum patch resides on.
• Comments
No need to keep those comments to yourself; put them here.
Once you’ve defined the above parameters, save the file and load the virtual instrument.
What’s the difference between a Voice List and a Drum Map?
Good question. A Voice List is the list of notes you see displayed in the Step Editor. Depending on how you’ve configured it, it will consist either of boring MIDI note names (i.e. C4, C#4, D5, etc.) or slightly-more- exciting text names, such as “kick drum”, “snare”, “tambourine”, etc. The important thing to remember is that the Voice List only shows the voices you’ve selected to display (using the Add/Edit button).
A Drum Map is a small document stored on your hard drive containing a list of names for each instrument in (usually) a multi-sampled drum kit. The Voice List may or may not currently display all the instrument names in the Drum Map. When a Drum Map is loaded, you can add or hide specific sounds using the Add/Edit button. If you’re computer-savvy, you can create your own custom drum map templates. \
MIDI CONTROLLER INFORMATION
Beneath the Step Edit grid is where MIDI controller data can be seen. This section is functionally identical in Step Edit and Piano Roll Edit modes. For the full lowdown on using Mixcraft’s powerful MIDI controller data viewing, creation, and editing functions please see the “MIDI Controller Information” section in the MIDI Editors: Piano Roll chapter.