PERFORMANCE PANEL CLIP SOUND TAB PARAMETERS
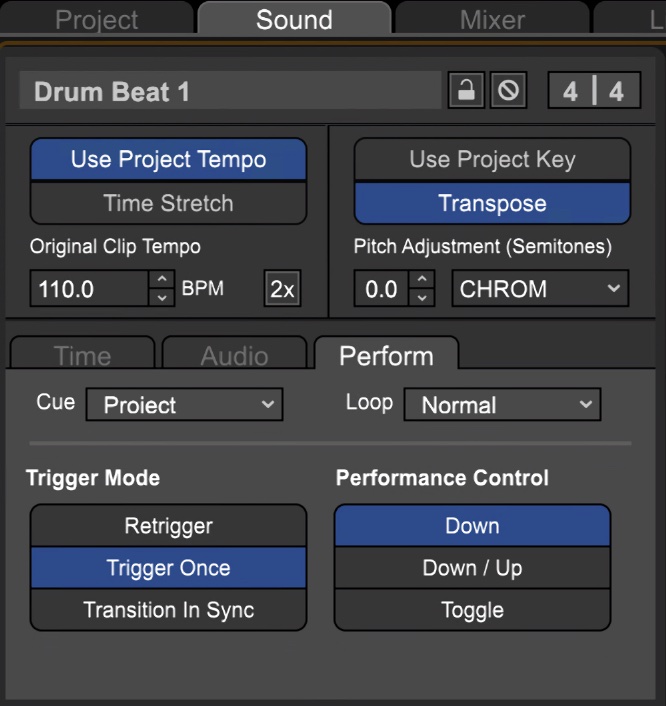
In addition to the Performance Panel controls described above, most of which affect all clips simultaneously, Mixcraft includes a number of parameters that let you customize the behavior of individual clips. To access these parameters, double-click a clip in the Performance Panel. The Sound tab opens, and you'll see a number of options.
Cue (Sound Tab)
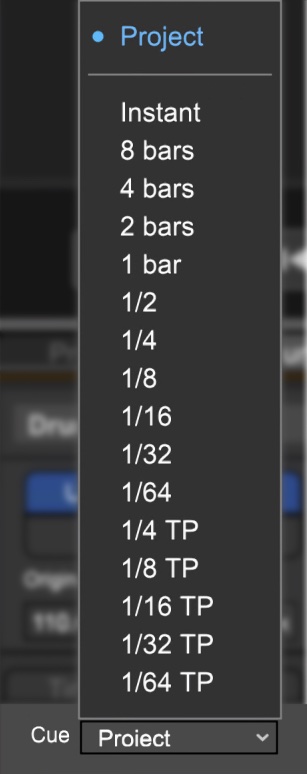
This works just like the Cue pop-up menu described in the Performance Panel Controls section - it defines how long Mixcraft will wait to switch playback from one clip to another when a play button is clicked for a new clip in the same column, but it applies only to individual clips. If the Sound tab Cue pop-up menu is set to Project, then the clip will behave as selected in the pop-up menu at the top of the Performance Panel controls (i.e. the clip won’t behave differently than normal).
If the Sound tab Cue setting is set to any value other than Project, its setting will override the global cue setting for individual clips. This is pretty important, so let that sink in. In practical application, this offers a lot of flexibility for customizing the behavior of individual clips. Note that clips in the Performance Panel default to Project setting unless the setting is individually “customized” in the Performance Panel Sound Tab.
Loop
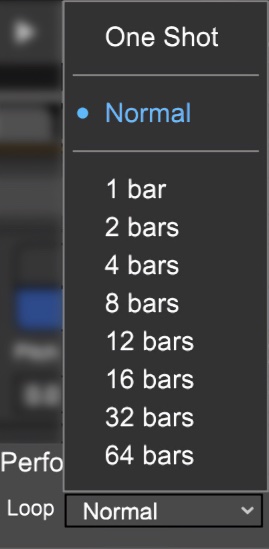
This determines the looping behavior for individual Performance Panel clips.
- One Shot
The clip plays one time only. This is useful for non-looping sound effects, drum sounds, or orchestra hits, in case you’ve time-travelled back to 1991. You’ll likely want to set the Cue value to Instant to ensure that the sound triggers immediately (because it’s a real buzzkill when that orchestra hit triggers four bars after you hit the button).
- Normal
Clip playback will loop when the clip reaches its end.
- Note Values
The clip will loop when it reaches the selected bar value. This is relevant if the clip’s total length is longer than the chosen value setting.
Embedded Tempo and Key Information
Most of the clips in Mixcraft’s included library contain “built-in” tempo and key information (the exceptions would be things like one-shot sound effects that don’t have discernible rhythmic timing or a musical key signature). This gives Mixcraft a timing and key “roadmap”, allowing multiple clips to automatically lock in time and play in musically relevant keys without user intervention - in other words, they just work. Yay for technology!
Trigger Mode
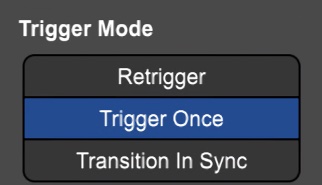
This lets you customize how loops trigger when their play button is pressed.
• Retrigger
The clip will repeat from its start each time the play button is clicked. If global or Sound Tab>Perform Tab>Cue is set to any value other than Instant, Mixcraft waits until the set note value has elapsed, then retrigger in time with the project metronome.
• Trigger Once
Once play has been initiated for a clip either with its own play button or with the Set Play button above, the clip continues to play until it is stopped with one of the stop buttons in the same row, the master stop button in the upper left corner, or Mixcraft’s transport stop button (or spacebar). Trigger Once is a good option for “foundation” beats intended to play continuously during performances.
• Transition In Sync
Similar to Retrigger mode, but instead of starting at the beginning of the clip when the play button is clicked (after the Cue value elapses), the newly selected clip continues playing at the same position as the currently playing clip. In other words, if the currently playing loop is at beat three at the transition point, the new clip will play from beat three.
Transition In Sync works well in live performance because it allows seamless transitions between clips and prevents multiple clips from becoming “turned around” in time from one another (i.e. the downbeat plays on the wrong count).
Performance Control
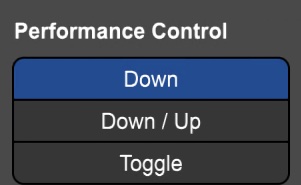
Specifies clip behavior when the mouse button is clicked or a button is pressed on a hardware USB controller.
• Down
Clicking a clip play button will start playback. Dependent upon Trigger Mode setting, the clip will continuously loop or play through one time. You can think of Down mode as similar to striking a note on a piano while holding down the sustain pedal.
• Down & Up
Clips only play when the play button is held down - pressing down initiates playback, letting up stops it. This works best with the Cue time set to Instant, for example, for temporarily dropping a fragment of a loop or musical passage into a mix. If Cue is set to any value other than Instant, you’ll need to hold the play button until the Cue note value time elapses, then clip playback begins.
• Toggle
This works like an on/off switch: press play to start a clip, and press again to stop it. Note that the Cue setting affects the clip’s start and end points - Mixcraft waits for the Cue value to elapse before starting to play, and if the play button is pressed again before the Cue value has elapsed, playback continues to play for the duration of the Cue value.
Instantly Add An Entire Song Kit To The Performance Panel
Here’s a super-neato “hidden” right-click command that lets you add an entire pre-configured song kit to the Performance Panel in a single mouse click.
In the Library tab, make sure “Library” is set to “Loops”, and “Sort By” is set to “Song Kit”. Once you’ve selected a song kit, right-click on one of its sounds in the right-side column and choose “Add Song Kit To Performance Panel”. An entire pre-arranged “song” is automatically set up in the Performance Panel with tracks logically assigned by instrument type.