OPERATIONS COMMON TO ALL CLIP TYPES
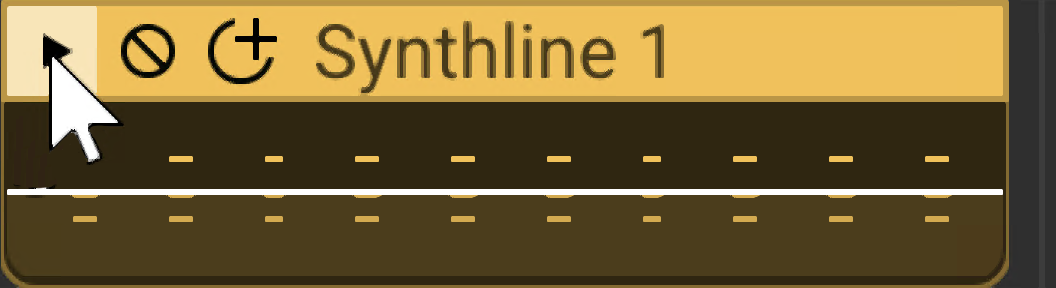
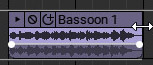
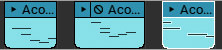
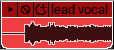
CLIP HEADER BUTTONS
At the top of every clip next to its name are three tiny buttons:
• Play
Clicking the play icon at the left of the clip button plays the clip once through.
• Mute
This silences the clip. The clip turns gray and [Muted] appears beside its name. Click again to unmute it. You can also mute clips by highlighting them and selecting Sound>Properties>Mute in the Main Screen menu.
• Duplicate
Creates copies of the clip immediately to the right.
MOVING/DELETING/LINKING/LOCKING CLIPS
• Moving Clips

Clips can be freely moved in the Main Clip Grid by clicking and dragging the title bar area. Clips can also be moved using the keyboard. Highlight the clip or clips to be moved, and press the arrow keys. The clip(s) moves based on the current Snap setting.
Holding down the [SHIFT]key temporarily bypasses the Snap setting, allowing clips to be positioned freely.
To move lock clip time offset (i.e. horizontal position) while moving, hold down [CTRL]+[SHIFT] when dragging.
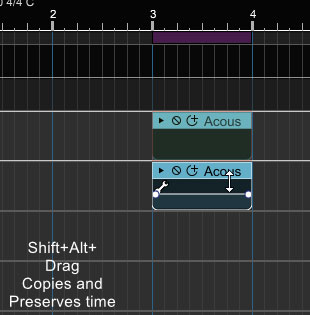
To make a copy of a clip while maintaining time offset, use [ALT]+[SHIFT]+drag.
• Deleting Clips
Select a clip or group of clips and then select Edit>Delete from the Main Window, or press the [DEL] key.
• Deleting Parts Of Clips
If a section of a clip is selected, only the selected part will be deleted. For example, if you’ve recorded a singer and there is an extra audible breath, select the unwanted area and delete it. Holding [SHIFT] while clicking will delete the entire clip (or clips if multiple regions of multiple clips are currently selected).
• Linking Clips
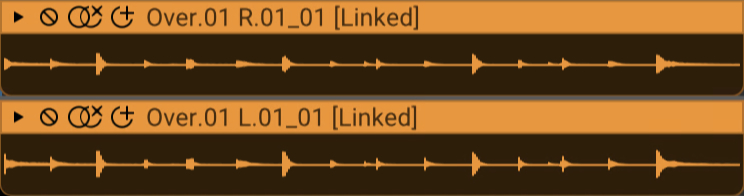
Related clips can be linked together letting them move as a single unit. This is useful when moving video clips with associated audio, multiple-mic drum recordings, or layered background vocals.
To link clips together, select the clips and click Edit>Link Selected Clips in the Main Window menus or by right-clicking one of the selected clips. To unlink clips, click the two rings/X button on the clip, or choose Edit > Unlink Selected Clips from the Main Window menus. If there are multiple clips linked together, unlink one by choosing Edit>Unlink This Clip.
• Locking Clips
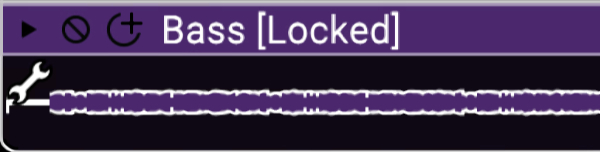
Clips can be locked to prevent them from being moved or resized. To lock a clip(s), select it, then click Sound>Properties>Lock from the Main Window menus (or by right-clicking the clip). Clips can be unlocked the same way; simply click in the same menus to uncheck locking. Clips can also be locked and unlocked in the “Sound Tab.”
• Cropping and Trimming Clips
The start and end of any clip can be trimmed. Moving the mouse to the left or right edge of a clip changes the cursor into a left/right resize arrow. Hold the mouse down and drag horizontally to resize or trim. The left or right edge will quantize to the current Snap setting - change the value to Off for a precise setting. If multiple clips are selected, all clips will resize simultaneously.
• Crop From A Selection
A specific region can be cropped by making a selection over a clip, or a group of clips, and selecting Edit>Crop from the Main Window menus or by right-clicking and selecting Crop.
Before cropping:
After cropping:
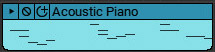
• Looping Clips
To create additional loops of a clip, move the mouse onto the left or right edge of the clip. The cursor turns into a left/right arrow. Click and drag the right edge of the clip; when the length of the clip exceeds the length of the Loop Start and Loop End points (defined in the Sound tab), a new loop begins.
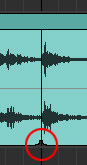
The indentations at the bottom of a clip indicate the loop start and end points (we’ve highlighted the indentation with a red circle in the screenshot at the left). Additional loop copies can be created by clicking the Add One Loop button to the immediate left of the clip name - it’s the one that looks like a + sign with a semi-circle.
• Remove Space Between Clips
This eliminates silent gaps by moving clips together. It does not combine clips into one big sound - it just scoots clips closer together. Select Edit>Remove Space Between Clips from the Main Window Edit menu.
• Cutting/Copying/Pasting Clips
To cut and paste a clip, select a clip, or a portion of one, by dragging over it. Select Cut from the Main Window Edit menu, then click in the Main Clip Grid to position the Caret in the desired destination. Select Paste from the Edit menu to paste to the Caret location.
Copying clips works exactly as above - select Copy instead of Cut, and the original clip will remain. You can also Cut, Copy, or Paste by right-clicking the mouse.
• Alt-Drag Copying
To duplicate selected clips, hold down the [ALT] key and click-drag a copy of the clip to a new location.
MERGING
To merge two or more audio or virtual instrument clips on the same track, select the clips and then click Sound>Merge To New Clip in the Main Window menus or in the right-click menu.
Before a merge:
After the merge:
Reasons To Merge Clips
• Multiple virtual instrument clips are on one track and you’d like to print out sheet music for the entire track, but the notation view only displays one clip at a time. Merging clips together allows notes to appear correctly in the notation view.
• Multiple audio clips have been recorded with the same noisy air conditioner in the background and you’d like to use the noise reduction function to remove the A/C noise all at once (instead of applying it to each clip individually).
• The current project has hundreds of clips and the workspace is getting confusing and slow. Merging the clips into one sound reduces computer resources for increased speed and additionally, unclutters the workspace
• The left or right corner of a MIDI clip has been resized leaving a “gray area” when editing in the Piano Roll, Step, and Score editors. Merging will erase the gray area and leave only the “used” section of the MIDI clip.
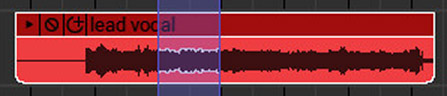
SELECTING CLIPS
A selection is an area of clip highlighted for editing.
• Drawing A Selection
Click and drag the cursor over a region to create a selection. The selection is displayed as a transparent purple rectangle. Selections obey the Snap setting. (“Transparent Purple Rectangle” is a fabulous name for a psychedelic band.) The selection drag may be started on the timeline, a clip, or a track body.
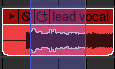
• Selecting An Individual Clip or Multiple Clips
To select an individual clip, click on its title bar. The clip will have a white outline when selected. To select multiple clips, hold down the [CTRL] key and click on the title bars of the clips to be selected.
• Selecting A Region of a Clip
To select part of a clip, click and drag in the bottom section of a clip (beneath the Title Bar). The cursor will change to an I-beam to simplify selection.
Selection Shortcuts
Action | Shortcut | Description |
|---|---|---|
Select all clips on a lane | [CTRL]+[SHIFT]+[ALT]+A | Choose Track> Lanes >Select All |
Select all clips on a track | [CTRL]+[SHIFT]+A | Choose Track>Select All Clips On This Track. Alternatively, double-click a track header. |
Select all clips in project | [CTRL]+A | Choose Edit>Select All |
Unselect clips | [ESC] | Deselect any selected clips. |
Select next clip | [TAB] | A quick way to select the next clip. |
Select previous clip | [SHIFT]+[TAB] | A quick way to select the previous clip. |
• Other Selection Operations
Once regions are selected, they may be cut, copied, and pasted. Here are some less obvious region selection operations:
• Boosting or reducing audio levels
• Normalizing clips
• Creating fades
• Removing space between clips
• Cropping clips
• Setting Loop to Crop
• Linking clips
• Trimming silence
• Merging clips
INSERTING TIME INTO A PROJECT
Regions of time may be inserted into the project. This automatically repositions all markers, automation, and clips. This is useful if, for example, you need to make space in the middle of a song to add an additional chorus.
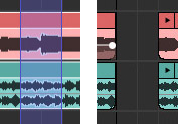
To insert a region of time, create a selection in the Timeline by click-dragging either in the Timeline, or in an empty area of the Clip Grid. Select Edit>Insert Selected Time in the Main Window menus, or by right-clicking in the Timeline. The two screenshots at the left show the resulting effect on the timeline and clips. All other clips, markers, and automation to the right of the insertion point advance in the project.
REMOVING TIME FROM A PROJECT
Removing works just like inserting time, only in reverse. It deletes markers, automation, and clips in the removed section and repositions existing markers, automation, and clips. It's useful, for example, if you'd like to shorten a sax solo in the middle of a song (because who wants to listen to that nonsense, am I right folks?!?).
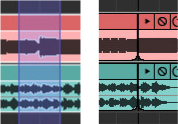
To remove a region of time, create a selection by click-dragging either in the Timeline or in an empty area of the Clip Grid. Select Edit>Delete Selected Time in the Main Window menus, or by right-clicking in the Timeline. The screenshots at the left show before and after removing time. All clips, markers, and automation in the deleted region are removed, and the remaining clips, markers, and automation slide to the left.