PIANO ROLL TOOL BAR

In this section we'll go over the buttons and functions in the top toolbar directly above the Piano Roll grid.
MAIN EDITING TOOLS
There are four main editing tools available in the Piano Roll Editor toolbar:
• Arrow Note Selection Tool

Used for note selection, moving, and editing note durations. It can be selected with the keyboard shortcut Q.
• Pencil Tool

Used for drawing new notes in the Piano Roll grid. The duration of new notes is selected with the note duration buttons to the right. The Pencil tool can be selected with the keyboard shortcut W.
• Paint Tool
Like the Pencil tool, the Paint tool is used to draw notes directly into the grid, but note durations are selected by clicking to place the note, then dragging to the right to set duration (note durations will snap to the current Snap Value setting). The Paint tool "remembers" its most recent duration; single-clicking in new grid locations creates new notes with the same duration as the most recent painted note.
• Eraser Tool

Clicking notes with the Eraser tool removes them from the grid. It can be selected with the keyboard shortcut E.
STEP RECORD
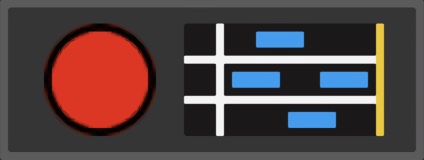
Step Record allows MIDI notes to be entered sequentially in non real-time.
Step Entering Notes
When the Step Record button is enabled (red light flashing), successively played notes will appear in the grid. The note length will conform to the current setting of the Note Duration buttons - the actual length of time notes are played has no effect on their duration in the grid. Note velocity is defined by the Default Velocity setting.
Moving the Cursor
The left and right arrow keys on the QWERTY keyboard move the cursor forward and back by the current Snap setting value. This is useful for adding “rests” to note sequences.
Step Entering Chords
Multiple notes (i.e. chords) can be entered by simply playing multiple simultaneous keys. You don’t have to hit all chord notes at the exact same time - Mixcraft waits until all keys have been released before advancing to the next step.
Exiting Step Record
Clicking the button will exit Step Record mode. Changing focus, i.e. clicking in any other window, will also disable Step Record mode.
Deleting Notes and Chords
Notes can be deleted by moving the cursor to note start positions and pressing the (DEL) key. All notes at the current cursor position will be deleted.
NOTE DURATION BUTTONS

These work in conjunction with the Pencil tool and Step Edit modes when adding new notes to the grid. Choose whole-note, half-note, quarter-note, eighth-note, sixteenth-note, and thirty-second-note values. You can also select the dotted- and triplet-note modifiers for converting standard note values to dotted and triplet values. The keyboard shortcuts (CTRL)+1, (CTRL)+2, etc. can be used to change durations.
DEFAULT VELOCITY

Specifies the velocity for new notes added with the Pencil and Paint Brush tools.
MIDI CHANNEL
Sets the MIDI channel for the currently selected note or notes. The MIDI channel number can be set either with the up/down buttons or by clicking on the number and entering from the keyboard.
NOTE COLOR
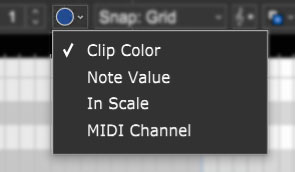
Defines how color will be applied to notes in the Piano editor.
Clip Color
Notes in Piano editor are the same as the clip color in the Main Clip GridNote
Colors are assigned by pitch.In Scale
Applies colors based on whether notes are within the Original Clip Key. Notes within the scale are green, notes outside of the scale are gray.MIDI Channel
Colors are assigned according to the note MIDI channel.
SNAP
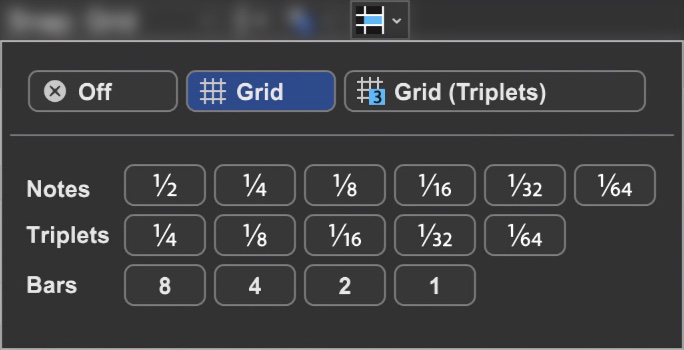
Determines the minimum note value that notes will snap to when creating new notes, moving pre-existing notes, and moving loop markers. Dependent upon the current zoom view level, the Snap To Grid setting automatically changes the snap value to the current grid size. This setting works well in most situations. If you’re working on a track with a three-count-based time signature, use the Snap To Grid (Triplets) settings.
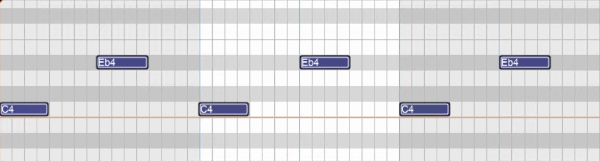
SCALE SNAP

Enabling the Scale Snap button forces notes in the grid to conform to the Original Clip Key setting to the left:

COPY SELECTION TO
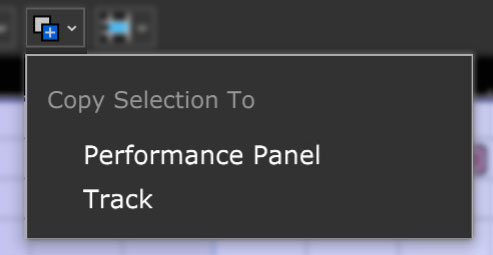
Copies the currently selected Piano Editor notes to a new Performance Panel clip in the first open clip grid location on the currently selected track, or a newly created clip in the Main Clip grid, at the playhead location on the currently selected track.
PROCESS MIDI NOTES
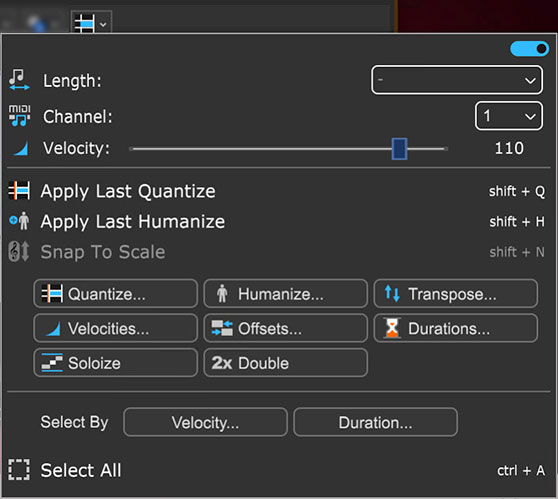
• Menu Persist Switch
The blue horizontal slider at the top-right of the menu enables persistent menus. When enabled, the right-click menu stays open while multiple functions and options are selected; to close the right-click window, simply click anywhere outside of it.
If the Menu Persist slider is disabled, the right-click window automatically closes when a single action or option is selected.
• Length
Sets the length of the currently selected note(s) to a musical value using the popup menu.
• MIDI Channel
Sets the MIDI channel of the currently selected note(s) using the popup menu.
• Velocity
Sets the note velocity of the currently selected note(s) using the horizontal slider. (BTW, The Brewtown Eatery in Milwaukee has delicious horizontal sliders for just $1 each!)
• Apply Last Quantize (Selection)
Applies the most recently used quantization to the currently selected note or notes.
• Apply Last Humanize (Selection)
Applies the most recently used humanization to the currently selected note or notes.
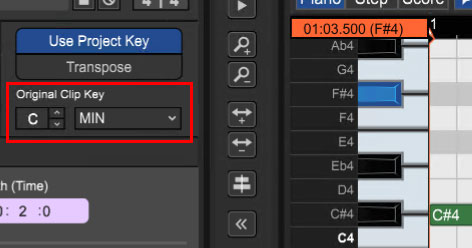
• Snap To Scale (Selection)
Conforms selected notes to the Original Clip Key setting. If the key hasn't been altered, the menu will be grayed out. You can alter the clip key setting here:
• Quantize...
Quantization is the process of moving notes closer to a set note value or “grid,” in order to tighten the timing of sloppy performances.
Note Type
Specifies the snap setting to quantize to.If this is set to eighth-note but you’re actually quantizing a whole note, it will not adjust the length of the note to an eighth-note, but rather align it to the closest eighth-note.
If the Start Times box is checked, then the start times of each note will be quantized to this note type.
If the Note Ends box is checked, then the end times of each note will be quantized to this note type.
Strength
Specifies how much notes will conform to the Note Type quantize value. For example, if Strength is set to 50%, notes will be moved exactly halfway from their current position to the selected Note Type quantize value.Start Time - Click the checkbox next to Start Time and then choose a Note Type setting. Mixcraft adjusts all notes to the closest beat or partial beat, based on the Note Type.
Note Ends - Mixcraft adjusts the note endings to the closest beat or partial beat, based on the Note Type.
Swing - If you want to quantize with swing, click Swing and choose an intensity %. Swing will offset every note that is on an odd beat, depending on the quantize note start setting.
For example, if you had a recording of eighth notes, set the Note Type to eighth-notes and then set swing to 30%; every other eighth-note would be offset by 30%.Before: “Unswung” eighth notes:
After: Quantized eighth notes with a 35% swing. Swingin’, baby!
All / Selection - Choose whether to quantize the selected notes or all the notes in the current virtual instrument clip.
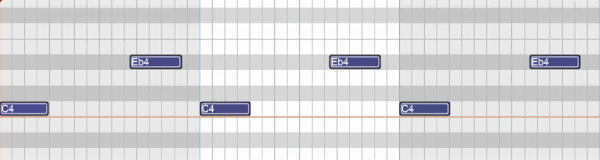
Before quantizing:
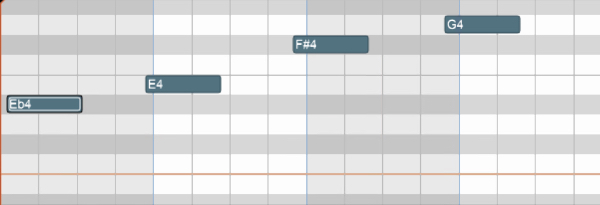
Afterquantizing Start Times and Note Ends to 1/8 Note:
• Humanize...
Humanizing is the process of adding a random and more “humanized” feel. When entering MIDI data via the mouse and using snap, music can sound stiff and artificial; Humanize lends a more natural feel.
Note Start and Duration
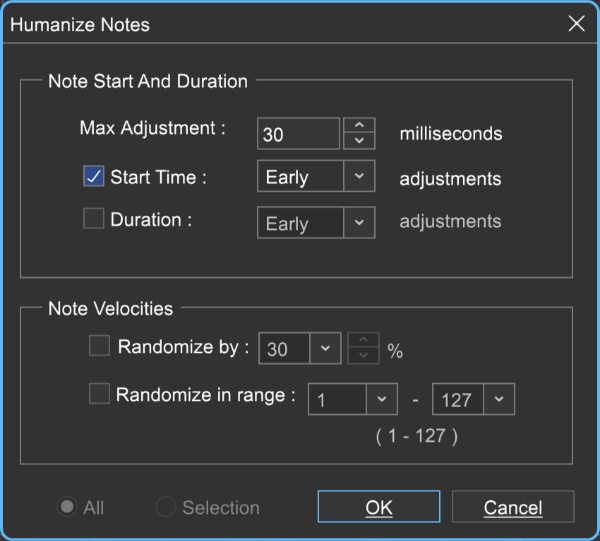
Max Adjustment - The maximum note duration to humanize towards.
Start Time - Specifies humanizing the start time with options for Random, Early, or Late timing.
Duration - Specifies humanizing the start time with options for Random, Early, or Late timing.
Note Velocities
Allows randomization of note velocities with following options:Randomize by - A percentage of the original note value.
Randomize in range - A new note velocity is randomly chosen in the range entered.
All / Selection - Choose whether to edit the selected notes or all the notes in the current virtual instrument clip.
Before humanizing - velocities the same on every note:
After humanizing - randomized velocities:
• Transpose...
The Transpose dialog allows the shifting of all notes or selected notes in a clip by octaves or semitones.
Transpose By - Choose Octave(s) or Semitone(s) from the Transpose By drop-down menu, then enter the amount and click OK. To transpose selected notes only, click the Selection radio button.
• Velocities...
The Note Velocities dialog allows adjustment of all or selected note velocities. A MIDI velocity indicates how hard the note has been struck. The range is from 1 to 127.
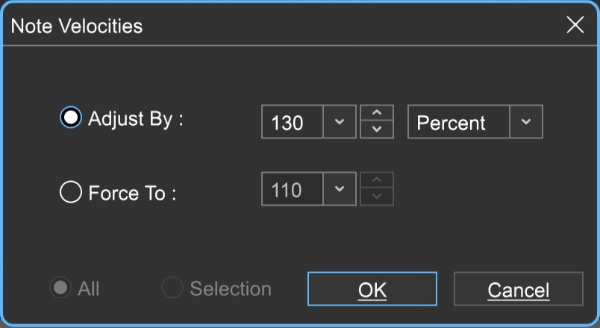
Adjust By
Adjust velocities by a specific percentage.Force To
Specify a velocity to adjust all notes to. The valid range is from 1 to 127.All or Selection
Choose whether to edit the selected notes or all the notes in the current virtual instrument clip. (This applies only if a region of notes has been highlighted within the Piano Editor.)
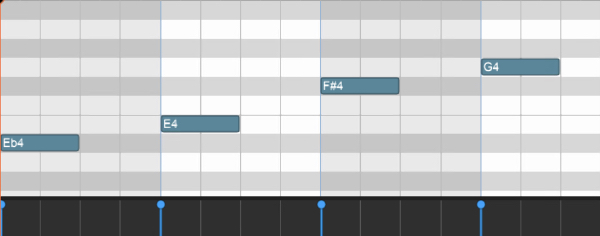
• Offsets...
Allows adjustment of all notes or the selected notes time offsets.
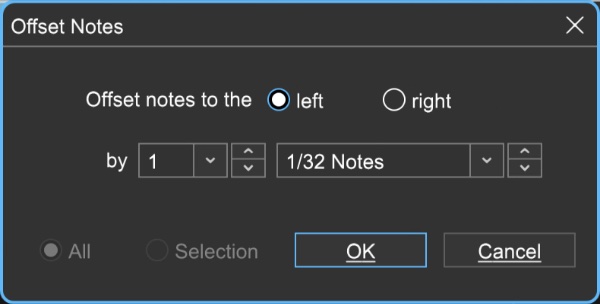
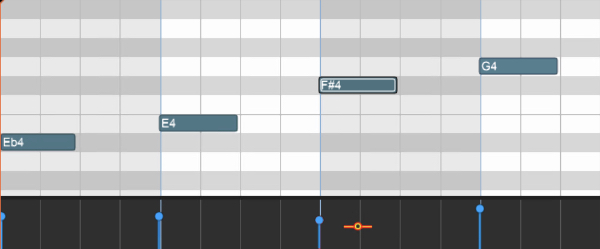
Offset notes to the
Choose left or right.by
Sets the offset amount - select the desired note value here.All or Selection
Choose whether to edit the selected notes or all the notes in the current virtual instrument clip. (This applies only if a region of notes has been highlighted within the Piano Editor.)
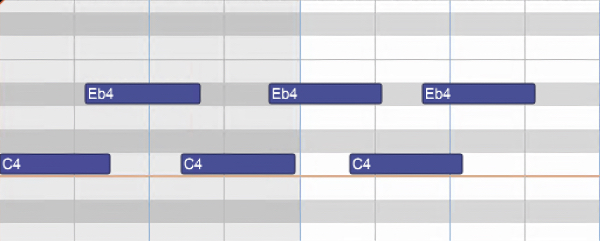
• Durations...
Note Durations allows adjustment of all notes or selected note durations.
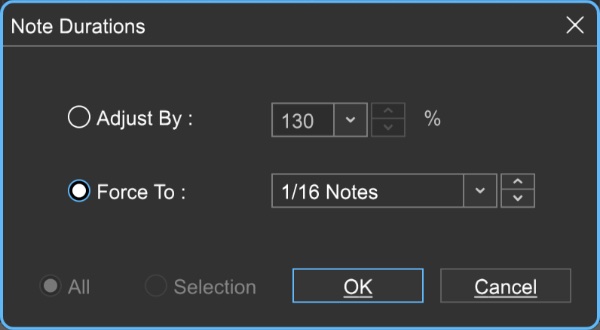
Adjust By
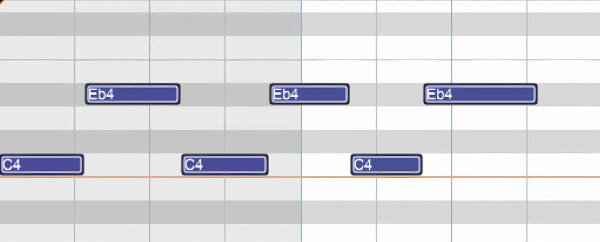
Adjusts notes durations by a percentage.Force To
Select the desired note value here.All or Selection
Choose whether to edit the selected notes or all the notes in the current virtual instrument clip. (This applies only if a region of notes has been highlighted within the Piano Roll Editor.)
• Soloize
Soloize is a unique function that modifies the note data in a MIDI clip by forcing it to play one note at a time - in other words, it eliminates legato overlaps.
Before soloizing:
After soloizing:
• 2X Double
Duplicates the current clip and merges them, creating one large double-length clip. Before doubling:

After doubling:
• Select By
Velocity
Allows notes within the clip to be selected within a velocity range. The field on the left sets the low velocity; the field on the right selects the high velocity.Add notes to currently selected notes
Checking this retains currently selected notes.
Duration
Allows notes within the clip to be selected according to length. The field on the left sets the basic note duration value, and the percentage field on the right sets an additional "more than or less than" vicinity for note selection.Add notes to currently selected notes
Checking this retains currently selected notes.
• Select All
Selects all notes in the current clip.