RECORDING MIDI TRACKS
Unlike an audio clip, which contains an actual recording of digitized sound data, a MIDI Clip contains MIDI notes. Think of MIDI clips as a sort of computerized player piano ... a MIDI clip contains digital on/off messages saying, “hey computer instrument, play these notes at this time please.” It can also contain fairly detailed information about how to play said notes: loud or quiet, dark or bright, or perhaps with or without vibrato.
There are a number of ways to create MIDI clips, but the most common way is to plug in a USB MIDI controller keyboard, press the Record button, and tickle the ivories (plastics?). If you have a USB MIDI controller, plug it into an available USB port on your computer. If you don’t have a USB keyboard controller, you can input notes directly from the computer keyboard using Mixcraft’s Musical Typing Keyboard. For more info, see Musical Typing Keyboard (MTK).
SETTING UP A VIRTUAL INSTRUMENT FOR PLAYING AND RECORDING
A Virtual Instrument is like having keyboard instrument that lives inside the computer. Mixcraft includes a bunch of them, so let’s open one.
First, create a new virtual instrument track. Click the +Track button at the top left, and select Insert Virtual Instrument Track. Now click the track’s piano keyboard icon. This opens a dialog box where instruments can be selected:
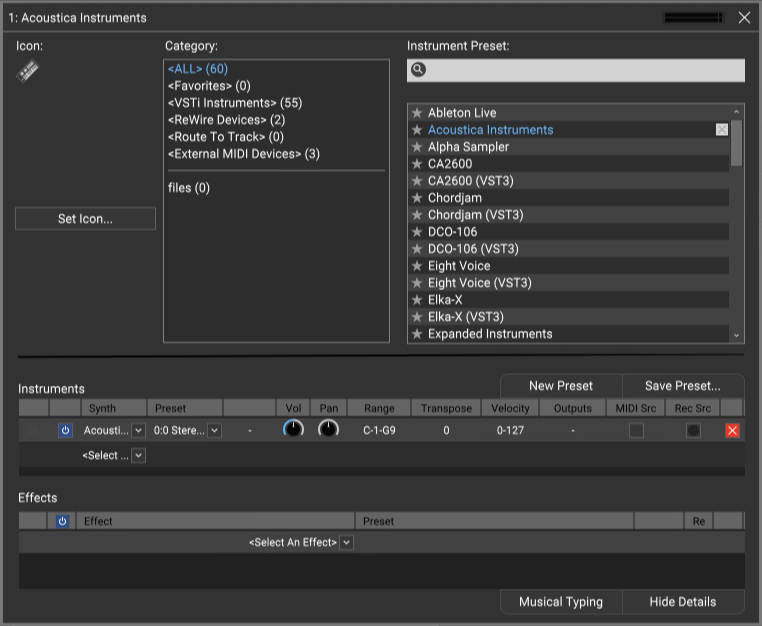
The list on the left side displays categories for quick access to various sound types. If you’ve already installed third-party instruments, click the <VSTi> category and they’ll show in the column on the right. Hardware MIDI instruments can be used by selecting External MIDI Devices (like that DX21 that’s been collecting dust in your uncle’s closet next to his MC Hammer pants). Otherwise, choose a sound/instrument from the right-hand column. When you’ve made your selection, click the X in the upper-right corner.
SETTING UP THE METRONOME
The metronome lets you play in time with the project’s tempo during recording. To turn on the metronome, click the metronome button in the middle of the transport:
This opens the Metronome Settings dialog:
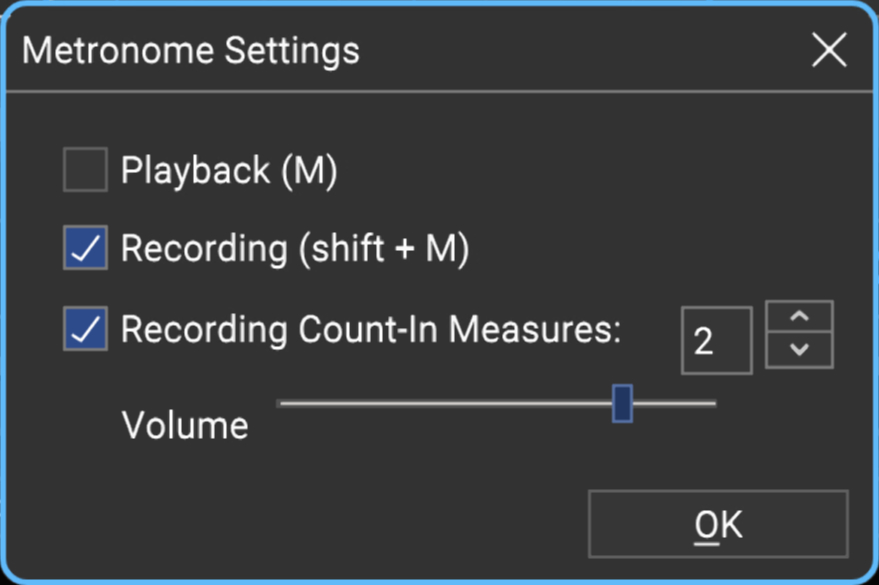
Check the Recording box. This makes the metronome click during recording. Checking the Playback box makes it click during playback, but we can leave this off for now. If it isn’t already checked, check the Recording Count-In Measures box.
SETTING TEMPO

The tempo is displayed in beats-per-minute in the transport bar. To adjust the tempo, hover the mouse and use the arrows either on the left to adjust in 1 BPM increments, or use the arrows on the right to adjust in 1/10th of BPM increments. To enter an exact tempo, click on the numbers and enter the desired tempo.
If you’re recording MIDI, you can set the tempo to a slow rate during recording to simplify playing and then speed it up later (and tell everyone you’re a virtuoso keyboardist).
LET’S RECORD!
Upon pressing the Record button, a countdown occurs before the recording begins. The number selector lets you choose the length of the countdown. Unless your computer and MIDI keyboard are really far away from each other, choosing 1 or 2 bars should give you plenty of time to get those fingers poised. Hit OK when you’re done. Once you’ve configured when the metronome plays, you can quickly toggle the metronome on and off by pressing the M key on the computer keyboard.
We’re almost there! Let Mixcraft know where to begin recording by positioning the Caret in the grid. This can be done by either clicking on the timeline at the top of the main window or by clicking anywhere in the Main Grid. We recommend positioning the Caret exactly on a number (e.g., 1, 2, 3).

To simplify positioning the Caret, make sure Snap To Grid is selected in the Snap menu at the top of the screen.
Make sure the track is armed for recording - if it’s not red, click on it. Now click the red Record button in the transport (that’s the one with the red dot), wait four clicks for recording to begin, and lay down some rock. When you’re done, click the Record button again to stop (you’ll notice the red circle turns into a square while recording), or just hit your computer’s space bar. You should see something like this:

To create more MIDI tracks, select empty tracks in the Track List on the left of the screen and add more instruments as described above.
CHOOSING THE MIDI RECORD INPUT
By default, Mixcraft listens to all MIDI channels for each track, letting you record multiple tracks of virtual instruments at the same time.
Clicking the down arrow next to the Arm button lets you specify the MIDI input and MIDI channel the track listens to. For example, if you have two keyboards and want to record each keyboard on a different track:
1. Set keyboard one to send on MIDI channel 1 and keyboard two to send on MIDI channel 2.
2. Click the Arm button on track 1 and select All Input Devices to Receive From MIDI channel 1.
3. Click the Arm button on track 2 and select All Input Devices to Receive From MIDI channel 2.
Alternatively, you could split one MIDI keyboard into two sections, sending the first section or range of notes to MIDI channel 1 and the second range of notes to MIDI channel 2. This would allow one keyboard to behave like two separate ones. (You may need to check the keyboard’s owner’s manual to see if it’s capable of sending separately channelized MIDI zones.)
RECORDING MULTIPLE TRACKS SIMULTANEOUSLY
Multiple virtual instrument MIDI tracks can be recorded simultaneously. Simply click the arm button for each track to be recorded. To record from multiple sources or MIDI channels, click the down arrow beside the Arm button, then choose the MIDI input device and/or the MIDI channel you’d like the track to record from.
AUTOMATIC QUANTIZATION
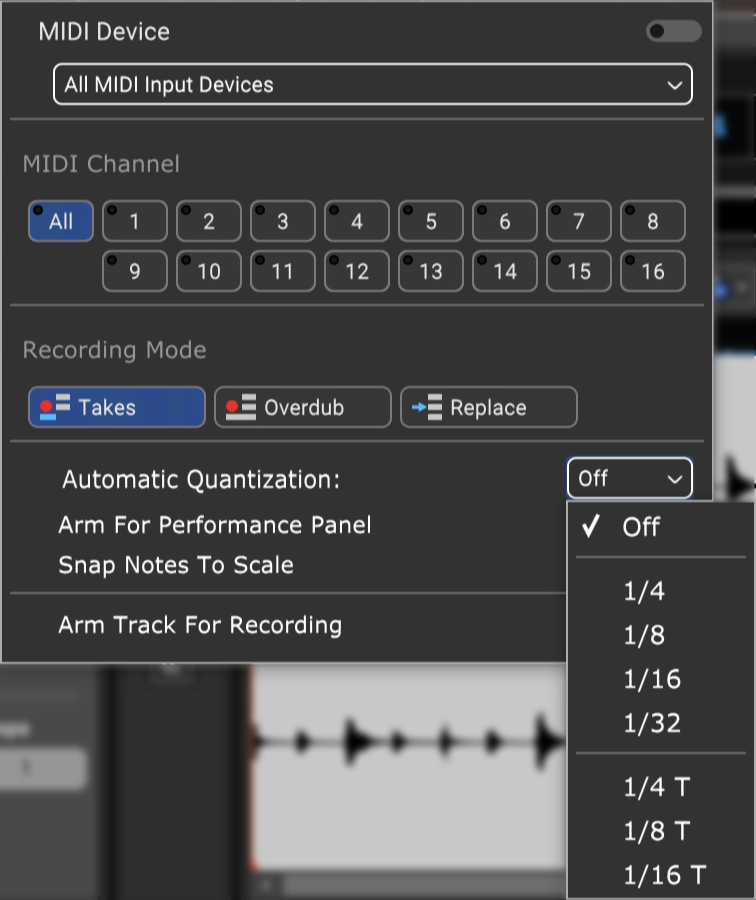
Quantization automatically “rounds off” the locations of MIDI notes on the grid in order to clean up minor timing mistakes in performances (or major ones). Quantization is typically done after recording a MIDI performance, but Mixcraft also lets you quantize “on the way in” during recording by clicking the Arm button down arrow and selecting a value from the Automatic Quantization dropdown menu, followed by a note value. Setting to 1/16 notes is usually a good place to start in most instances.

The word Arm turns yellow when Automatic Quantization is engaged.
If you’d rather quantize after recording, right-click a MIDI clip and choose MIDI Editing>Quantize... following recording.
LANES
Lanes allow multiple tracks of audio (or MIDI) to occur on the same channel. New lanes are created automatically when looping is enabled in Takes or Overdub recording mode.
ADDING LANES
Empty lanes can be manually added by right-clicking in the Main Clip Grid and selecting Lanes>Add (or with the shortcut [ALT]+L). If multiple tracks are selected, extra lanes will be added to all selected tracks.
DELETING LANES
A track’s bottom-most lane can be deleted by right-clicking and selecting Lanes > Delete. To delete unused lanes, right-click and select Lanes>Delete Empty Lanes (or with the shortcut [ALT]+K).
MUTING LANES
All clips on any lane can be muted or unmuted by right-clicking on an empty part of a lane and clicking Lanes>Mute All or Lanes > Unmute All.
LANE MIDI CHANNEL ASSIGNMENT
Separate MIDI channels can be assigned to individual lanes when using Virtual Instruments. This is particularly useful with multi-timbral instruments. To assign MIDI channels, right-click an empty part of a lane, and select Lanes > MIDI Channel, followed by the desired MIDI channel for the lane.
RECORDING MODE
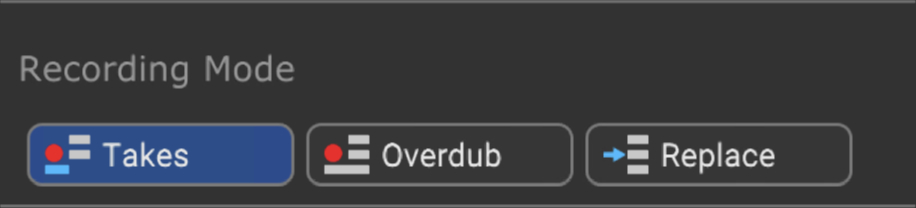
There are three recording modes:
• Takes
• Overdub
• Replace
To choose a recording mode, click the down arrow next to the track Arm button and select Recording Mode:
Recording Mode can also be selected by right-clicking in the track header or by clicking Track>Recording Mode in the Main Window menus. Recording Mode can be set independently for each track in a project.
The default Recording Mode for audio and MIDI can be independently set in
Preferences>Recording in the Main Window menus.
• Takes
Takes mode is useful for laying down multiple performances without starting
and stopping each time. It’s generally used in conjunction with Loop Mode, wherein a section is looped and each cycle records a new “take” (see Loop Recording below). Mixcraft automatically creates recording Lanes to accommodate each pass.

As new takes are recorded, the clips of previous recording passes are automatically muted. Take clips can freely be moved to their own instrument tracks.
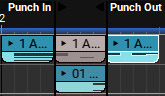
When Takes mode is used in conjunction with a punch in/out, it creates a clip on a new lane in the punch area but only mutes the portion of the audio clips in the punch area.
• Overdub

In this mode, all previous clips are heard during recording. Virtual Instrument (MIDI) tracks default to Overdub mode. This works well for quickly stacking parts. Each new recording is placed on a new lane. Overdub mode is the default Recording Mode for MIDI tracks.
• Replace

As you might suspect, replace mode will simply replace any clips underneath the new recording.
• Loop Recording
Loop recording allows the recording of multiple takes or overdubs without stopping the transport.
To create a loop, click the Loops mode button in the Transport, then drag the Loop Start and Loop End markers in the Timeline to set a loop area.
Be a Loop Mode Ninja
A faster way to set loop points is to drag a purple highlight area either in the Timeline or Main Clip Grid, then click the Loop button. This automatically sets the in and out points to the beginning and end of the highlight region. (You can also use the[L] key shortcut to toggle loop mode on and off.) Remember that the Snap setting affects where the loop region markers land; we recommend setting this to Snap To Grid or Bar for more congruent clips.
• Punch In/Out
Punch In/Out recording lets you place markers that define where to start and end recording.
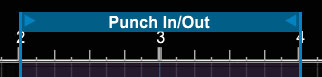
To mark a region for punch in/out recording, click the Punch In/Out button. Set the Punch In and Punch Out handles in the Timeline.
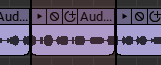
After setting up a punch area, press record, and the new recordings will be created inside the punch start and end markers.
You can use the same technique described in the “Be A Loop Mode Ninja” sidebar on the previous page for setting Punch In/Out locations.