APPENDIX 1:
USING MELODYNE FOR BASIC VOCAL TUNING
MELODYNE, MEET MIXCRAFT - AN INTRODUCTION
Not only is Celemony’s awesome Melodyne tuning software included with Mixcraft 10 Pro Studio (see the sidebar), but we’ve taken it one step further: instead of operating as a standard VST plug-in, Melodyne functionality is integrated into the clip sound edit window. This makes using it really easy.
When using the standard Melodyne plug-in version, it’s first necessary to transfer audio into Melodyne in real-time (essentially playing back the audio material so Melodyne can “record” it for editing), but Mixcraft 10’s built-in Melodyne architecture eliminates this step for a much smoother workflow.
Note that the standard VST plug-in version of Melodyne Essential is included with Mixcraft 10. This is primarily for folks who already have songs using the original plug- in version, but under just about any other circumstance, using Mixcraft’s built-in Melodyne functionality is the best choice.
WHAT DOES MELODYNE DO? IS IT HARD TO USE?
Melodyne may look a little intimidating when you first open it, but rest assured, basic (and great-sounding) vocal tuning is easily accomplished. Before we get to the exciting “do this, then do that…” section, it’s important to understand the underlying concept of Melodyne.
Most vocal tuning plug-ins correct pitch in real-time, modifying the audio as it plays back; in fact, this is how most VST effects plug-ins work. Melodyne operates differently; audio material is loaded into Melodyne and analyzed prior to playback.
Mixcraft takes care of this task transparently and automatically when audio is selected for editing. Once analyzed, Melodyne places the notes on a grid similar to Mixcraft’s piano roll edit window. From here, you can freely move note “blobs” up or down to change their pitch, left or right to move them in time, or even stretch or compress individual notes. This offers amazing freedom not only for pitch and timing correction, but also for creatively modifying and retooling performances.
An Offer You Can’t Refuse
If you’re using the standard version of Mixcraft, it’s worth it to upgrade to Mixcraft 10 Pro Studio for the addition Melodyne alone. Upgrading from standard Mixcraft to Pro Studio is actually less expensive than buying Melodyne Essential, plus you get a ton of killer instruments and effects. Operators are standing by! (get more info on upgrading at www. acoustica.com)
HOW TO TUNE A VOCAL TRACK, LICKETY-SPLIT
For this example, we’ll assume you’ve already recorded a vocal take. In the basic project shown below is a drum loop, a bass line, and a lead vocal:
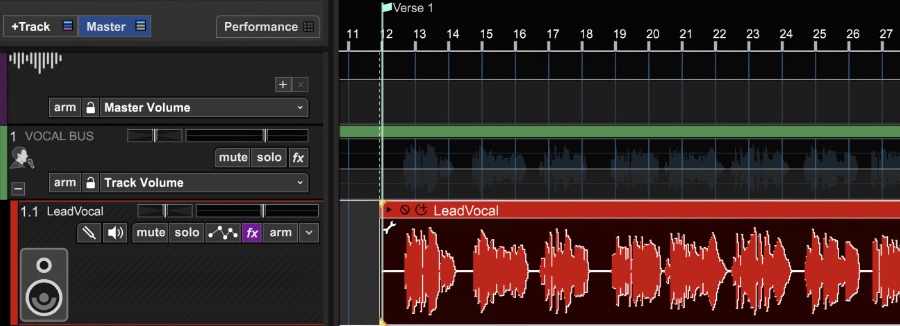
If the vocal track contains multiple clips, it’s helpful to merge the clips together into one. You can do this by selecting all clips on the track then right-clicking and selecting Merge. Now double-click the vocal clip to open it in the Sound editor, and click the Melodyne button.

If you’re opening Melodyne for the first time, you’ll most likely see something like the window below. Because Celemony (makers of Melodyne) is a separate entity from Acoustica, you’ll need to register Melodyne to activate it, but we the good folks at Celemony make this process pretty painless and quick.
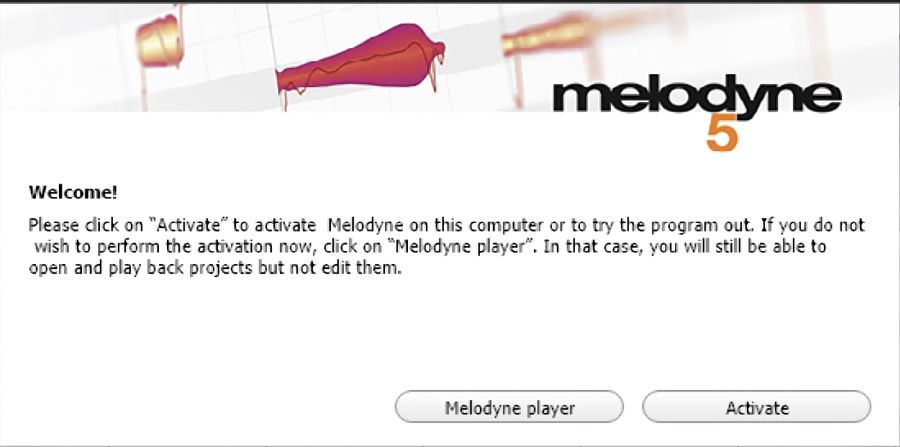
We’ll assume you’ve got Melodyne up and running at this point.
Begin by making sure that Melodyne is set to Clip mode; that’s the icon that looks like a little orange blob.

If you know what key the song is in, now is a good time to set the key signature in Melodyne. Remember that there is no correlation between Mixcraft’s project key setting (the one you set in the transport section) and Melodyne’s key signature setting, so you’ll want to set the key in both places.
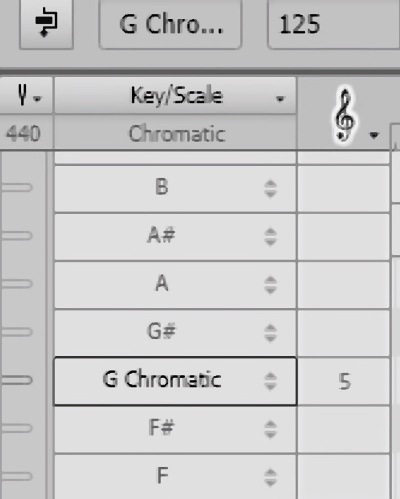
To select the key signature, click on the list beneath Scale. More than likely you’ll be looking at something like the image below where the text is tiny and hard to read.

This is easily remedied by clicking the arrow tool, then scrolling down and selecting the magnifying glass tool from the toolbar. Click-dragging in Melodyne’s edit grid will let you adjust size vertically and horizontally.
Now that we can easily read the key signatures, click the appropriate key to select it. (See the Key Party! sidebar on the next page) If you’re not sure what key the melody is in (or the key is frequently changing), you can leave the key signature setting as is.
Now we’re ready for Melodyne to do its magic. Click the Correct Pitch Macro button in Melodyne’s top toolbar. It looks like this:

This opens up the Correct Pitch Macro window:
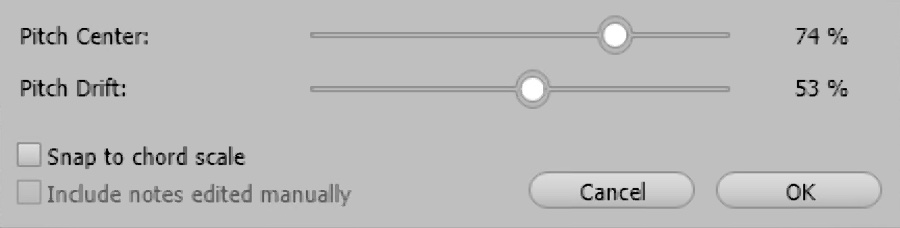
If you’ve set a key signature, check the Snap to <key here> checkbox to ensure that Melodyne snaps notes to that key and scale. If this box is left unchecked, Melodyne will snap notes to chromatic half steps. If the vocalist is relatively on pitch, this usually works fine; if they’re a little squirrely, you may need to move notes around on the grid, but that’s fun and easy (we’ll get to that).
The Pitch Center slider moves notes up or down toward the next closest quantization step - either the next closest note in the Snap to key setting or the next closest half-step if the Snap to box is left unchecked. The higher the Pitch Center percentage setting, the closer the note “blobs” will move toward the target scale pitch - think of Pitch Center as general tuning strength control.
The Pitch Drift slider affects fluctuations that happen during a single note’s duration. A good example of this would be when a long, held note begins to go flat over time. The higher the Pitch Drift percentage setting, the more Melodyne will “reel in” these fluctuations and hold notes to correct pitch.
You’ll be able to see the note blobs and pitch line move as you slide the Pitch Center and Pitch Drift sliders. Once you’ve got them set, click the OK button and you’re done. You can listen to the results by hitting the play button in Mixcraft, or you can start and stop playback of the soloed vocal within Melodyne by clicking in Melodyne’s ruler area.
Key Party!
When setting key signatures, remember that oftentimes a major or minor melody line will contain one or two notes “outside” of the standard major (aka Ionian) or minor (aka Aeolian) scale. Unless you’re getting down with some angular Balinese or Hungarian jams, more times than not, the correct melodic scale will be the aforementioned standard Ionian major or Aeolian minor but beginning on a different note than the key of the song. This is the basic concept behind scale modes. In case you spent Music Theory 101 rockin' Sammy Hagar on your Walkman, you can bypass all that smarty-pants theory stuff and determine the correct scale notes by playing all of the pitches of the song’s melody on a keyboard, and seeing which standard major or minor key scale pattern the melody notes “fit” into. Use this key to set Melodyne’s correction.
CHANGING PITCHES OF INDIVIDUAL NOTES
You don’t have to tune all the notes in a clip simultaneously. You can highlight an individual note or multiple notes for tuning either by dragging a box around note blobs, shift-clicking to select sequential notes, or control-clicking to select non-sequential notes (or any combination thereof).

Occasionally Melodyne’s pitch detection algorithm will incorrectly detect note pitches, causing it to correct to the wrong pitch. You can fix this by selecting the Arrow Tool and grabbing the offending note blob to move it up or down the grid.
Before you start moving note blobs, you’ll want to check the Pitch Grid setting. Click Options>Pitch Grid. You’ll have three choices:
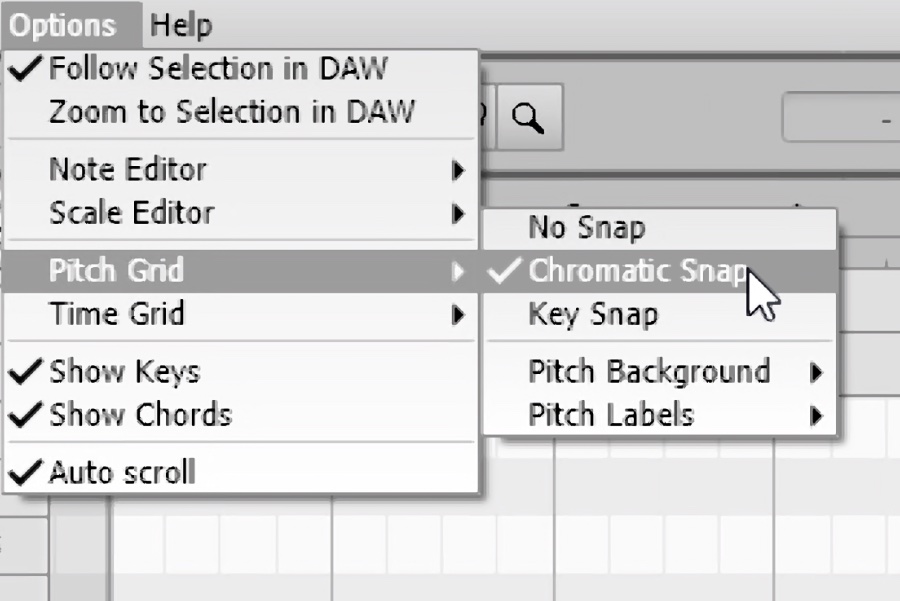
• No Snap
This allows notes to freely slide to any pitch. This can be useful for fixing up oddball notes that aren’t sitting right, but it’s easy to get in trouble with No Snap.
• Chromatic Snap
Notes move up or down in half-step increments but maintain their “fine” position. In other words, if the note has already been tuned, it will stay correctly tuned relative to the scale when moved to a different note. (Chromatic Snap was also a kickin' a capella R&B group that I saw open for New Kids in '86)
• Scale Snap
Notes move up or down in accordance with the selected scale and key signature settings.
It should be easy to see how creating “customized” melodies is as simple as moving MIDI notes around in Mixcraft’s Piano Roll edit window. You can even duplicate the clip in the Mixcraft workspace, then move the notes in the secondary clip to create harmonies. Things will start sounding funny if notes are moved too far away from the original pitches, but hey, it worked for Art Of Noise and they had positively archaic technology compared to the awesome sauce that is Mixcraft and Melodyne!
• Remove Melodyne

Clicking this removes all edits made with Melodyne, shuts off Melodyne for the clip and switches the Sound tab editor back to the default wave editor.
SOME CLOSING ADVICE ABOUT PITCH CORRECTION
Unless the performance is really amiss (we like to use the term “bad”), try to avoid automatically cranking the Pitch Center and Pitch Drift sliders up to 100% in order to maintain some human performance aspect. The best pitch correction happens when you can’t tell it was used.