PERFORMANCE PANEL CONTROLS
PERFORMANCE BUTTON

Click the Performance button above the Track List to hide or view the Performance Panel grid (or press the P key).
SETS
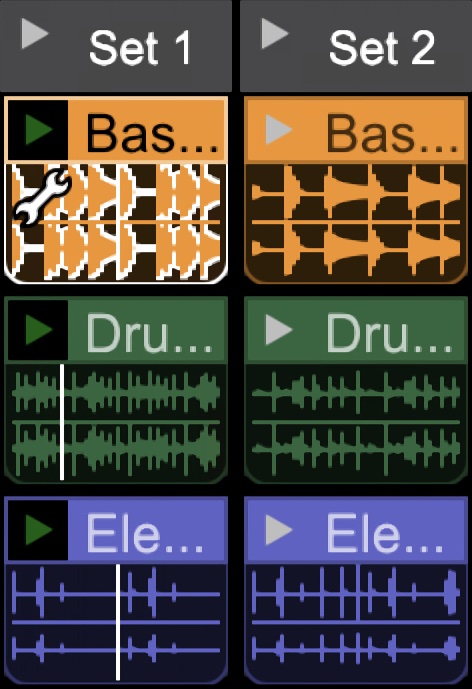
A Set refers to a group of clips that play concurrently. Sets are arranged horizontally across the grid with each set consisting of one or more loops arranged vertically “on top of each other”. You can create as many sets as you like - to add more empty sets, simply click the +add button above the Performance Panel. To rename a Set, double-click on the text, type a new name, and press return (or click outside of the text box area).
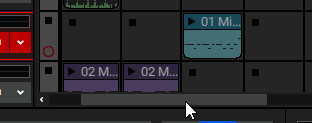
PERFORMANCE PANEL GRID
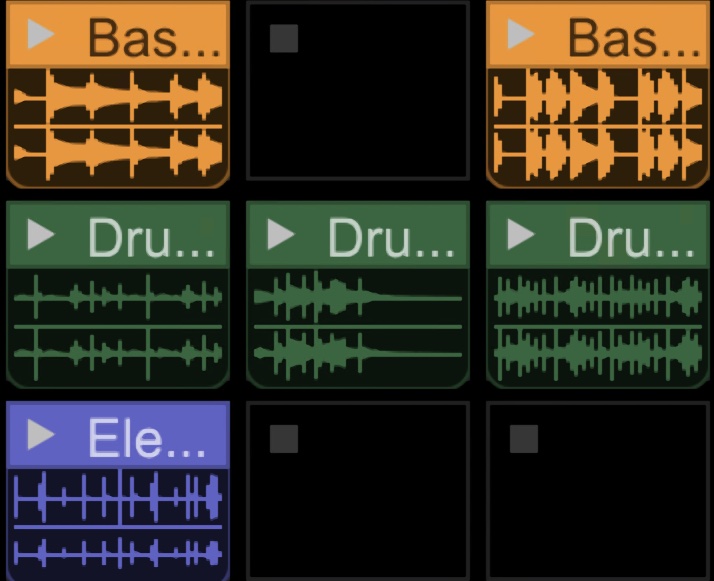
The grid where clips are dragged and dropped for playback.
GRID PLAY AND STOP BUTTONS
You’ll find numerous play (right-facing black arrow) and stop (small black square) buttons along the top columns, left-side rows, in blank cells and in the corners of clips. These toggle the start and stop of playback of individual clips, entire sets, or tracks.
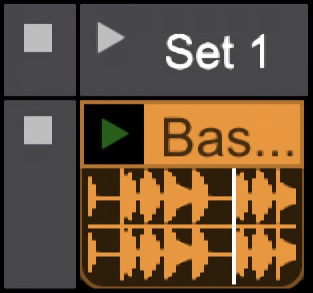
PERFORMANCE PANEL RECORD ARM/DISABLE ARM BUTTONS
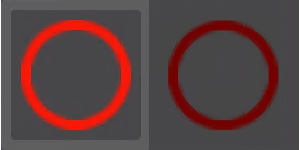
When a track is Record Armed, square Performance Panel Record Arm buttons appear in the row next to the grid. These prepare all grid locations in that row for recording. If the track has more than one recording lane, you’ll see Performance Panel Record Arm button for each lane. Clicking on the solid red button next to the track header disables grid recording; the solid red button turns into a red circle (no fill) and the cell record buttons turn into “standard” square stop buttons. This lets you record clips into the main track area as usual (i.e. not the Performance Panel).
When a track is armed for recording, tiny solid red Record buttons appear in all empty grid locations in the associated track row. If the track has more than one recording lane, you’ll see Performance Panel Grid Record buttons in all empty grid locations in all recording lanes.
+ ADD

Clicking this adds more blank set locations to the right of the last set. All set locations may not be currently visible depending on the Performance Panel view width.
To view all current sets, scroll sideways, or enlarge the Performance Panel view width. To make the current view wider, position the cursor on the leftmost area of the main clip grid (the grid on the right side of the screen where you usually play and record clips, not the Performance Panel Grid); you’ll know you’re in the right place when the cursor turns into left/right arrows. Hold the mouse button and drag left or right.
SOLO

The Performance Panel Solo button mutes all clips in the main grid during playback. This allows you to use the only the Performance Panel for audio and MIDI clip playback. This is very useful in live performance applications. When the Solo button is clicked, all clips in the main clip grid will turn gray. To unmute them, click the Solo button again.
ARM

Clicking the Arm button causes any playback of sets to record in the main clip grid. This is a powerful tool for song creation, enabling continuous recording of set group performances, including changing sets, muting and soloing of clips and more. It’s especially fun and creative when using a hardware USB grid controller. Keep in mind that Performance Panel “recordings” don’t actually create new audio files on your hard drive, they only create new clips in the Main Clip Grid that refer to existing audio files. This means you can go nuts creating songs without filling your hard drive!
CUE

The Cue button defines how long Mixcraft will wait to switch playback from one clip or set when play buttons are clicked during playback. Select from the following note values:
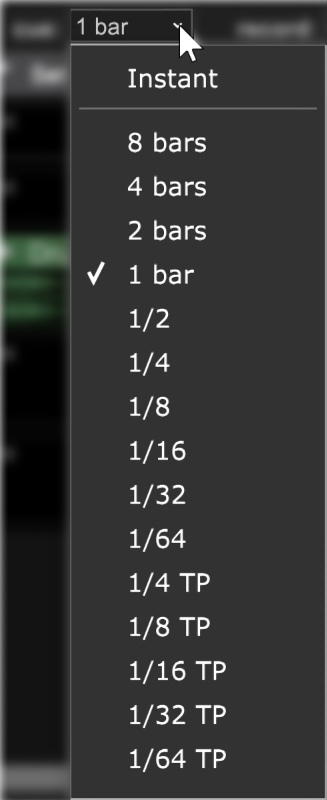
At any setting other than Instant, Mixcraft always switches exactly on the beat, which is tremendously helpful for keeping playback on the beat and in sync. When Cue is set to any value other than none, the clip’s Play arrow will flash indicating it will begin playing following the length of time specified by the Cue setting. We recommend beginning with 1 Bar or 2 Bar.
If Cue is set to Instant, clips and sets will switch immediately upon pressing the play button. This isn’t usually desirable when switching loops, because loops can easily get off time from the project metronome. There are times when you’ll want to set Cue to trigger individual sounds in the grid immediately when clicked(for one-shot drums or sound effects with an external pad controller, for example), but since the Cue button affects all clips in the Performance Panel, it’s a better idea to set the Cue parameter individually for specific grid locations; this overrides the global setting.
(See Performance Panel Sound Tab Parameters in the next section.)
RECORD

Defines the length of recordings when recording directly to the Performance Panel. Clicking it opens a pop-menu where the recording length for Performance Panel clips can be set.
