PLUG-IN MANAGER
The Plug-In Manager lets you enable and disable virtual instruments and plug-ins, as well group and sort plug-ins when loading using Collections.These are handy if you have a large number of plug-ins; they can be used to create groups for most frequently used plug- ins, organize specific types of plug-ins, etc.
To access the Plug-In Management window, click on the Mixcraft File menu at the top left and select Plug-In Management. You can also access the Plug-In Management Window via File>Preferences>Plug-Ins>Manage Plug-Ins.
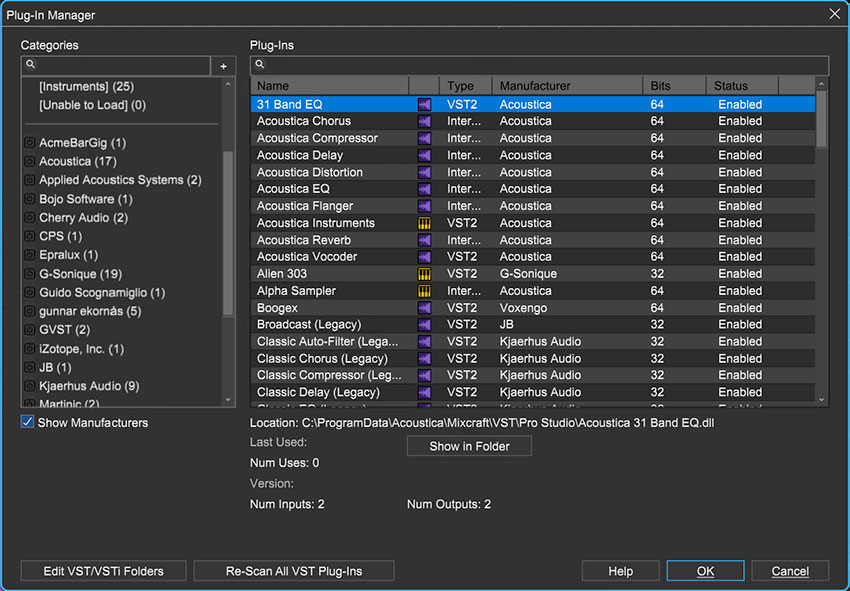
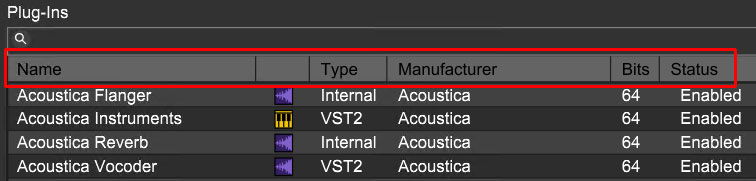
The Plug-Ins window on the right displays built-in and third-party installed virtual instruments and effects plug-ins. The Categories window filters which plug-ins are displayed. The green checkboxes next to each plug-in enable or disable individual plug-ins. (For instance, you might want to disable older versions, plug-ins that are causing issues, or plug-ins that you’re not currently using.)
When a plug-in is selected, a number of parameters are displayed: VST type, manufacturer, 32- or 64-bit, status, last used, number of outputs, category, and description.
CATEGORIES COLUMN
CATEGORY SEARCH
The magnifying glass and text field directly beneath the Categories header allow fast searching for particular categories by typing all or part of the category name.
DEFAULT CATEGORIES
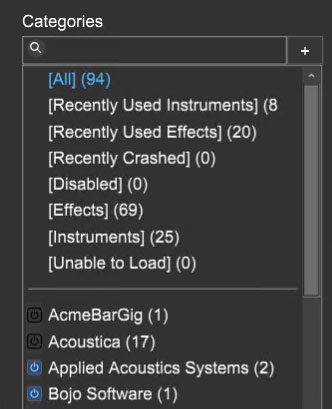
There are eight default categories All, Recently Used Instruments, Recently Crashed, Disabled (more on this one later), Effects, Instruments, and Unable to Load should be self-explanatory.
SHOW AND AND SORT BY MANUFACTURERS
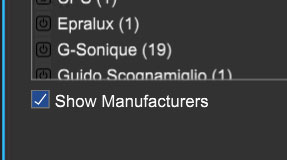
Plugin manufacturers can be hidden or shown by clicking the Show Manufacturers checkbox. Clicking on a manufacturer name will display only plugs from that manufacturer in the Plug-Ins window to the immediate right.
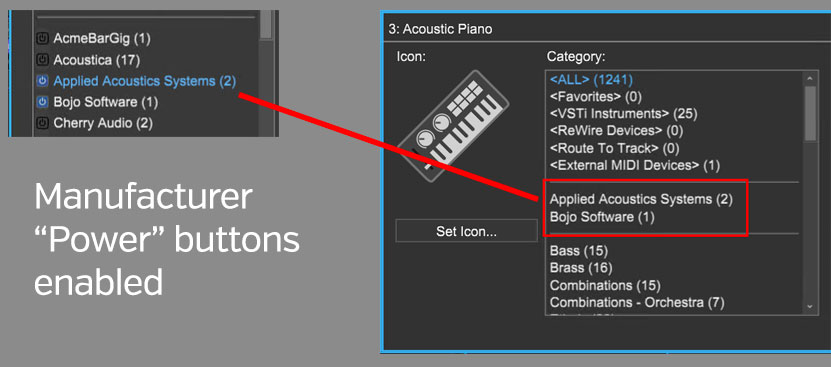
The small blue "power button" to the left of the manufacturer name enables or disables visibility of the manufacturer categories in the effects or instrument list windows as shown above.
PLUG-INS COLUMN
This is where plug-in effects and instruments are displayed, as filtered by the currently selected Categories on the left. To view all effect and instrument plug-ins, select the [All] category.
SEARCHING FOR PLUG-INS

The search field next to the magnifying glass icon at top can be used to find effects by typing in the name of a particular plug-in (or part of the name).
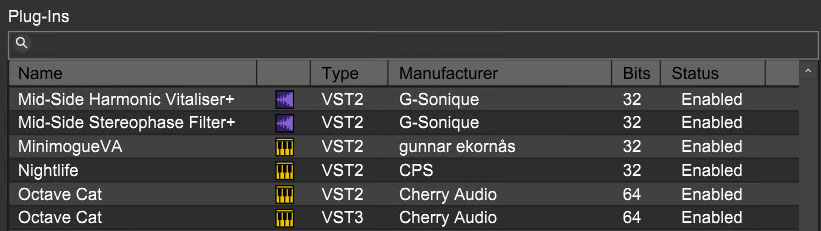
PLUG-INS COLUMN HEADERS
Name | plug-in name |
(blank header) | instrument or effect plug-in icon |
Type | which type of VST (VST2, VST3, internal Mixcraft plug-in) |
Manufacturer | maker of the plug-in |
Bits | 32- or 64-bit |
Status | plug-in enabled or disabled for use in Mixcraft |
RENAME PLUG-IN
Plug-ins can be renamed. This is mainly useful if a plug-in has long name and it's getting abbreviated in a way that you don't like in the mixer or channel plug-in displays. (We won't judge you for being OCD.)
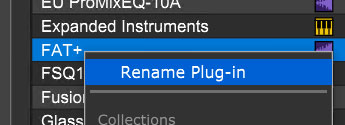
To rename a plug-in, right-click on its name in the Plug-Ins section, type a new name, and hit [RETURN] or click away from the name.

To un-rename, that is, return the plug-in to its exact original name, right-click the plug, and select Revert to Original Name. (See? We thought of everything...who's OCD now?!?)
AUTO-SCALE TO MATCH MONITOR SCALE
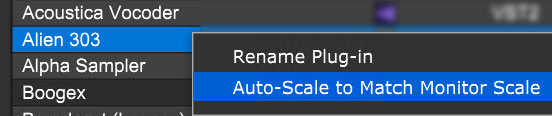
When checked, following Mixcraft restart, if a plugin is opened on a display that's not scaled to 100%, the plugin interface is automatically scale the window to match the display scale. This will make plugin windows larger on scaled displays (at the expense of a bit of sharpness).
ENABLING AND DISABLING PLUGS
Plug-ins can be globally enabled and disabled, that is, they'll be entirely "shut off" in Mixcraft. This is useful for troubleshooting if a plug-in is potentially causing issues.

To enable or disable a plug-in, left-click (not right-click) on the word Enabled or Disabled and select. The plug-in will automatically appear in the [Disabled] category at right.
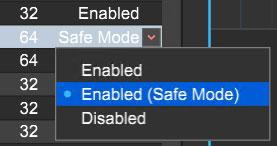
When enabling or disabling a 64-bit plug-in, you'll see a third choice: Enabled (Safe Mode). This allows potentially problematic 64-bit VST2 plug-ins to run in a separate process - this way, the plug-in won't corrupt memory in Mixcraft. If you have a plug-in that's crashing frequently, Enabled (Safe Mode) is a potential solution.
CREATING PLUG-IN COLLECTIONS
To create a plug-in collection, open the Plug-In Manager by clicking the top-left File menu, and select Plug-In Manager. Choose an effect category to be displayed in the Plug-Ins list.
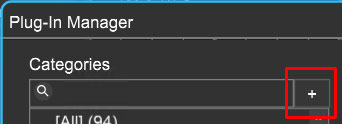
To create a new collection, click the + sign button.
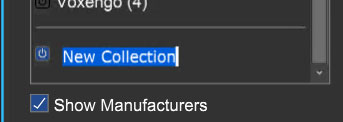
You'll see New Collection at the bottom with a flashing cursor - type a name for the collection and hit return. We recommend names like Tracking, Mixdown, Guitar, Vintage Synth, etc.
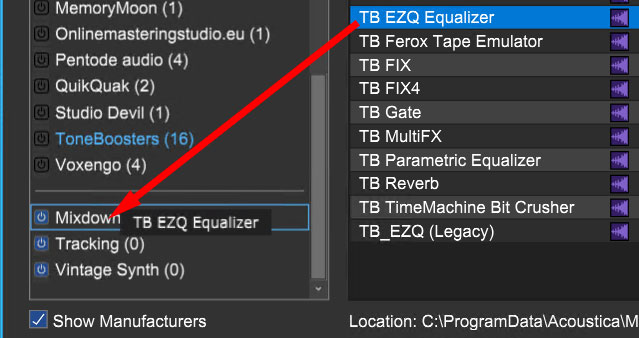
Now select a category above (the name will turn blue) and drag the effects you’d like in your newly created collection onto the collection name below.
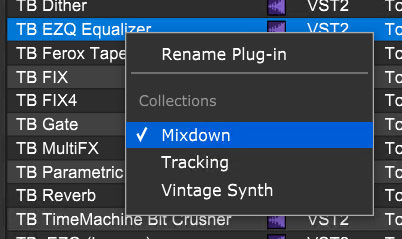
Alternatively, plug-ins can be added to a collection by right-clicking the effect name (TB EZQ Equalizer in the above example) and select the desired collection.
You can add as many plug-ins as you’d like into a collection. You can also mix virtual instrument and effect plug-ins, but only the appropriate type of plug-ins will display when viewing and loading plug-ins into a track. In other words, if you’ve clicked a track’s keyboard icon to load a virtual instrument, only virtual instruments within a collection will be displayed (or vice versa). You can place the same effect or instrument into as many collections as desired.
REMOVING A PLUG-IN FROM A COLLECTION
To remove a plug-in from a collection, right-click on the plug-in name in the right column, and click the name of the collection. The check mark will disappear.
DELETING PLUG-IN COLLECTIONS
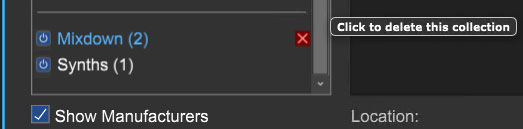
To delete a collection, simply highlight it and click the X button.
USING EFFECT AND INSTRUMENT PLUG-IN COLLECTIONS
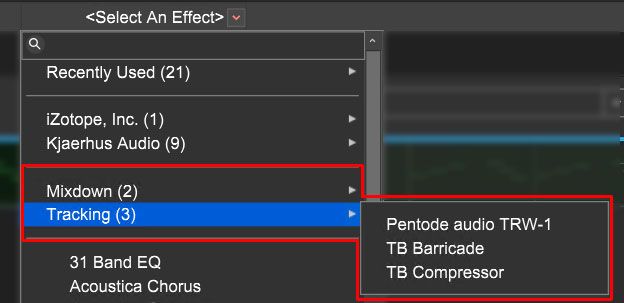
To access an effects plug-in collection, click the track’s fx button, then click <Select An Effect>. Collections will appear at the top of the plug-ins list, and hovering over the collection name will display the plug-in names; click on a plug-in’s name to open it.
To access an instrument collection, click the track’s piano keyboard icon. Instrument collections are visible in the second section beneath the main categories.
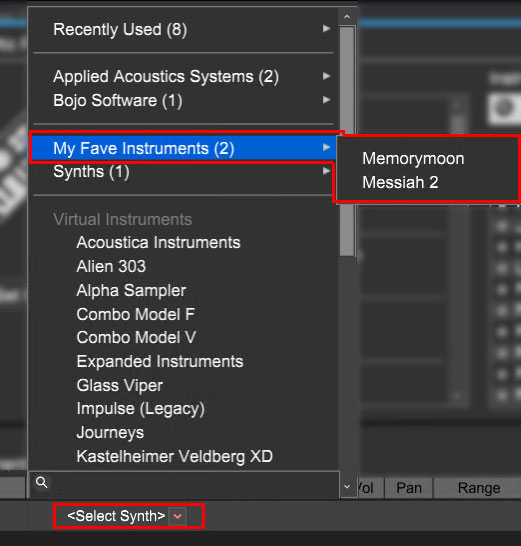
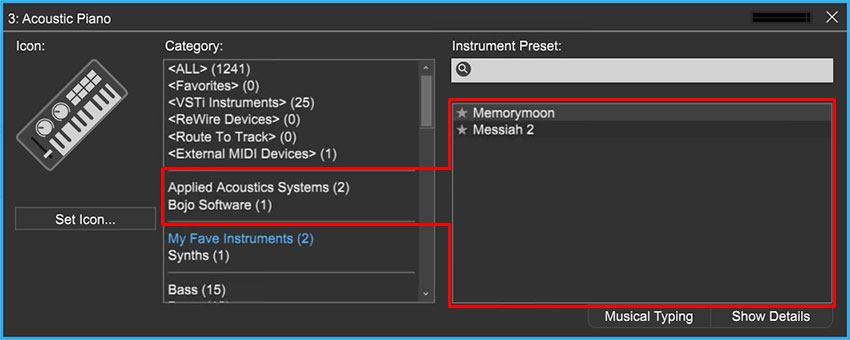
Instrument collections can also be accessed via <Select Synth> pop-up menu beneath in the instrument list (make sure the Show Details tab at bottom right has been selected). Collections appear at the top of the plug-ins list; hovering over the collection name will display the plug-in names. Click the plug-in name to open it.