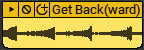
AUDIO CLIPS
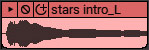
Audio clips contain audio recordings and always display a waveform in their lower section. Existing audio can be added to Mixcraft, or new audio clips can be created by recording audio into Mixcraft. MP3, OGG, WMA, WAV, or AIF format audio files can be loaded into Mixcraft. New recordings will be saved as WAV or OGG files and stored in the current project folder.
ADDING AND LOADING AUDIO CLIPS
There are several ways to add audio clips to a project.
• Sound Menu

Click Sound > Add Sound File… from the Main Window menus. Navigate to a folder, select the sound, and click Open. The sound will be placed at the current Caret location. Alternatively, use [CTRL]+H or click the Add Sound button on the Main Window Toolbar.
• Double-Click An Empty Area of the Main Clip Grid
Double-clicking in an empty area to the right of an audio track in the Main Clip opens a dialog for importing audio. The selected audio will be placed at the current Caret location.
• Add a Sound From Mixcraft’s Loop Library
Click the Library tab at the bottom of the Mixcraft window. Select a sound from the library, position the Caret where you’d like the sound to go, then click the + button next to the sound. Alternatively, you can drag the sound directly into the Main Clip Grid.
• Drag In a Sound From Windows File Explorer
Open a Windows File Explorer window and navigate to the sound or sounds to be added. Select the sound(s) in Windows File Explorer and drag them into the Main Clip Grid.
AUDIO CLIP PROPERTIES
These settings govern how Mixcraft displays and plays back individual audio clips.
• Channel
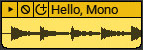
If a clip contains a mono audio file, the clip will display one waveform. (With one caveat - a stereo clip can be set to play its left or right channel only via the Sound>Properties>Channels menu, in which case it displays a single waveform. It will say Left or Right next to the clip name.)
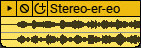
If a clip contains a stereo audio file, the clip displays two waveforms atop one another.
If the track height is reduced to a small size, stereo clips will display a single waveform, but don’t worry, it’s still playing back in stereo. (Track height can be restored to normal size by selecting Track > Properties > Track Height > Normal in the Main Window menus.)
To play back only the left or right channel of a stereo sound, highlight the audio clip and select Sound > Properties > Channels > Left Channel or Right Channel. To restore stereo playback, select Sound > Properties > Channels > Stereo. If a stereo clip is set to play one channel only, Mixcraft adds [Left Channel] or [Right Channel] to the clip name and only one waveform is displayed.
• Phase
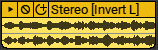
The Phase setting allows the inversion of either or both channels in a stereo file. This is useful if you’re experiencing frequency cancellation as a result of poorly placed mics, and can also be used
to eliminate monophonic audio content, such as drums, bass, and lead vocals, in complete mixes. Here are the Phase options for clips:
• Sound menu > Properties > Phase > Normal
• Sound menu > Properties >Phase > Invert Left Channel Only
• Sound menu > Properties > Phase > Invert Right Channel Only
• Sound menu > Properties > Phase > Invert Both Channels
• Normalize
Normalizing a sound locates its loudest peak, raises it up to “full scale” (i.e. loudest level before clipping), and proportionately raises the volume of the rest of the clip.
To normalize a clip, highlight and select Sound > Properties > Normalize. Like all Mixcraft, normalization is not “destructive,” so it doesn’t permanently alter the sound stored on your hard drive. To disable normalization, simply go back to Sound>Properties and uncheck Normalize.
Note: Normalizing essentially makes clips as loud as possible without clipping, but does not affect dynamic balance like a compressor or limiter.
USING AN EXTERNAL WAVE EDITOR
Mixcraft can work in conjunction with external sound editing software to apply permanent changes or edits to the sound. External editing software can be useful for functions not available in Mixcraft, such as editing out crackles, pops, clicks, and other noises associated with Rice Krispies™.
Before you can edit a sound using an external editor, Mixcraft needs to know what sounding editing app you’ll be using.
• Configuring An External Wave Editor
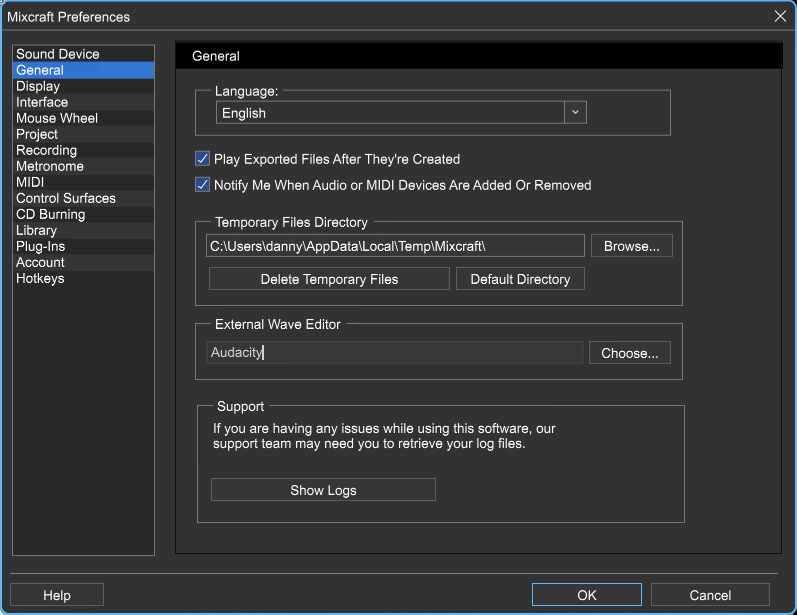
To configure an external Wave editor, select File > Preferences > General. If you haven’t configured Mixcraft’s external editor setting, you’ll see this danger-Will-Robinson dialog:
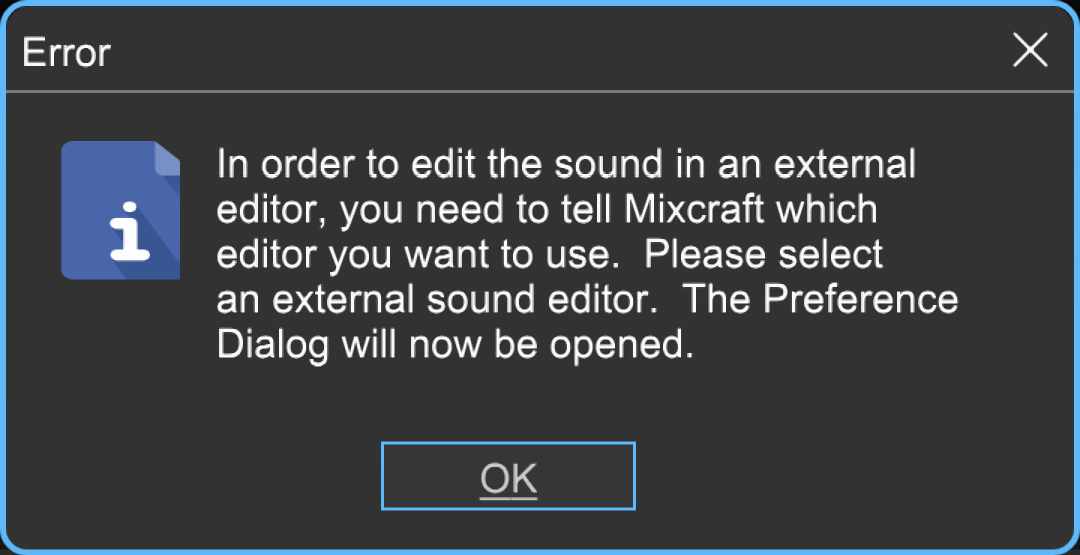
Clicking OK also opens the Mixcraft also opens File > Preferences > General window; beneath External Wave Editor, click the Browse… button and navigate to the app you’d like to use, and click to select it.
• Editing A Sound In An External Wave Editor
Once the editor is configured, choose Sound > Edit In External Editor from the main window menus, or by right-clicking the clip. You’ll be greeted by this dialog, scientifically engineered for people who really like reading:
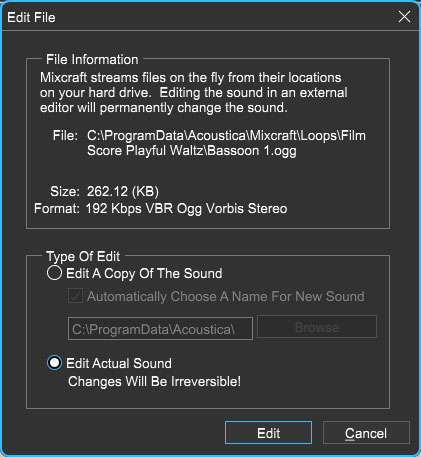
You’ll have the option of editing the original sound or a copy of it. If the original sound is edited, any changes made to it will be permanent. This is known as “destructive editing.”
CROSSFADING BETWEEN CLIPS
Crossfading with Mixcraft is so easy that, for all intents and purposes, it’s automatic. Simply drag one sound over another and a crossfade is instantly and visibly created. The length of the crossfade corresponds to the size of the overlap of neighboring clips.
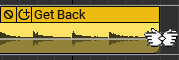
REVERSING CLIP PLAYBACK
Audio clip playback can be reversed by highlighting a clip and selecting Sound>Reverse in the Main Window menus. (Or “unreversed” by reselecting Sound>Reverse.) If clip automation has been applied, remember that envelope points won’t move - they stay in their original location. Reverse sound playback works especially well with long, decaying sounds such as cymbal crashes or long piano chords (or if you're Ozzy or Priest in 1980 doing that backward masking thing - someone really needs to bring that back ).
FLEXAUDIO™ TIME STRETCHING
FlexAudio™ allows easy time compression and expansion by visually dragging the left or right edge of a clip. While holding the [CTRL] key down, click on the left or right edge and drag left or right.

The cursor turns into two hands when in FlexAudio™ mode. FlexAudio™ works on audio and MIDI clips. For finer control of clip lengths, set the Snap value to Off.
If multiple clips are currently selected, [CTRL]+[SHIFT] will apply FlexAudio™ to multiple clips.
Fast Talkin’ With FlexAudio™
Ever created a 30- or 60-second ad that ran a couple of seconds long? Try time-stretching it with FlexAudio™. FlexAudio™ can also be used to create super fast dialogue like those legal disclaimers at the end of commercials by time-stretching around 75%. You may need to set Snap to Off to set to the desired length.