MAIN WINDOW MENUS
FILE MENU
NEW PROJECT [CTRL]+N
Creates a new project and shows the New Project Settings dialog.
OPEN PROJECT... [CTRL]+O
Opens or loads an existing project or template.
REVISIONS...
Starting in Mixcraft 10.5, this brings up the Revisions dialog allowing you to go back to a previous version. (Assumes that Create Backup File Whenever Project Is Saved is turned on in the Preferences > Project tab).
SAVE [CTRL]+S
Saves the current project
SAVE AS...
Saves the current project or mixes down to an audio file depending on Save As... format selection.
COPY PROJECT FILES TO...
Copies all current project files to a folder or a new ZIP file. This is useful for backing up projects (i.e. to CD), reorganizing project files, or collaboration with others.
MIX DOWN TO
Mixes the current project to an audio or video file format.
SAVE AS MIDI FILE...
Saves the MIDI data of the current project as a Type 1 Standard MIDI file.
BURN CD... [CTRL]+B
Burns an audio CD, compatible with any standard audio CD player.
LABEL CD...
This launches the optional Acoustica CD/DVD Label Maker application for printing CD labels, etching a LightScribe disc, or printing on a direct-to-CD printer.
PRINT... [CTRL]+P
Prints the notation display, if currently selected.
PREFERENCES
Opens the Preferences dialog.
SET NEW PROJECT DEFAULTS
Opens the New Project Settings window.
MANAGE PLUG-INS…
Opens the Plug-In Management window.
RECENT PROJECTS
Displays the ten most recently loaded or saved projects for quick access. To load a recent project, click on it.
EXIT
This closes Mixcraft. Before exiting, it will prompt you to save unsaved changes.
EDIT MENU
UNDO [CTRL]+Z
This will undo any action up to the point of the last save, load, or new project.
REDO [CTRL]+Y
This will redo any “undone” action.
CUT [CTRL]+X
This cuts or removes any currently selected audio, MIDI data, or video (or parts thereof). The cut operation also stores the cut sounds in the Clipboard for pasting if desired.
COPY [CTRL]+C
This copies audio, MIDI data, or video currently selected or in the selection rectangle to the Clipboard for pasting if desired.
PASTE [CTRL]+V
Pastes or inserts audio, MIDI data, or video currently stored in the Clipboard buffer at the caret location. If necessary, new tracks are created if the Clipboard buffer stored audio, MIDI data, or video spanning multiple tracks.
CROP [CTRL]+Q
The opposite of cut. Cropping something keeps what is selected and discard everything else on the selected clips.
DELETE [DELETE]
This will remove any sounds or parts of sounds that are currently selected or in the selection rectangle. Unlike Cut, this will not store the deleted audio in the Clipboard.
SELECT ALL [CTRL]+A
This selects all clips in the project.
SPLIT [CTRL]+T
This splits selected clips at the current Caret location.
REMOVE SPACES BETWEEN CLIPS [CTRL]+J
Removing space between the clips eliminates gaps or silence between selected clips by moving the selected clips together.
MERGE TO NEW CLIPS [CTRL]+W
Merges the selected clips into a new clip. This functions on a per-track basis and does not combine clips from different tracks.
LINK
The Link submenu allows clips to be linked or unlinked. When clips are linked, they move together when dragging. Linked clips retain their relative offset to each other. The submenu link options are:
• Link Selected Clips
• Unlink Selected Clips
Linked clips will have a button in the title bar. Click this button to unlink clips.
INSERT SELECTED TIME
When a purple selection region is made in the Timeline or Main Clip grid, this function inserts additional time into the selected area. Any clips within the insert area are split and the right halves are advanced. Automation data is also moved to maintain the proper location.
REMOVE SELECTED TIME
When a purple selection region is made in the Timeline or Main Clip grid, this function deletes the time in the selected area. Any clips (or parts of clips) within the area are removed. Automation data in the selected area is also removed.
MIX MENU
PLAY/STOP PLAYBACK [SPACE BAR]
Starts and stops project playback at the Playback Indicator position.
PLAY FROM
Displays a menu allowing playback from project Markers.
REWIND TO START [HOME]
Moves the Playhead to the beginning of the project. If the project is currently playing, the project starts playback from the beginning.
FAST FORWARD TO END [END]
Moves the Playhead to the end of the project. If the project is playing audio, playback is stopped.
RECORD [CTRL]+R
Beings recording on any armed tracks.
SET MASTER VOLUME
Sets the master volume to an exact amount or from 20% to 200%.
MIDI RESET!
Sends a panic message to all virtual synthesizers and external synthesizers instructing them to stop playing any stuck notes. Use this if you can’t a sound to stop.
MIDI CONTROL SURFACE
Configures playback, recording, and other transport functions from a MIDI controller or device.
EDIT MASTER EFFECTS
Opens the Master Effects window. Use to apply and edit effects on the Main Mix two- track bus.
ADD REWIRE APPLICATION
Choose a ReWire application to control, if available.
ADD TEMPO/KEY CHANGE
Adds a marker at the current Playhead position and opens the Marker Edit window where a tempo, key, or time signature change may be added.
MARKERS
Opens a submenu to add, edit, or delete Markers.
TRANSPOSE KEY CHANGES
Opens a submenu with Up or Down options for the global transposition of a project, including all Markers containing key changes.
METRONOME AND COUNT-IN SETTINGS [M], [SHIFT]+M
Toggles the metronome on and off independently for playback and recording, and specifies the number of count-in measures prior to recording.
LOOP PLAYBACK MODE [L]
Loop playback of a selection or the entire project.
USE RECORDING TIMER
Sets the recording timer allowing recording to stop after a specified duration.
AUTOMATION RECORDING MODE
Selects the behavior of automation recording when using a control surface.
• Overwrite Mode
Continuously writes the current fader or V-Pot position for the duration of recording, overwriting existing automation data as it records.
• Touch Mode
When used with a control surface with touch-sensitive faders Touch Mode overwrites automation data only when the fader is being touched. When used with control surfaces with non-touch-sensitive faders, recording of automation initiates only after Mixcraft detects a fader has been moved. From this point on, automation writing behaves the same as Overwrite Mode, overwriting as it goes until Mixcraft is stopped.
TRACK MENU
ADD TRACK
Adds a new Audio Track [CTRL]+G, Virtual Instrument Track [CTRL]+E, Video Track, Send Track, SubMix Track or Output Bus Track to the end of the project.
INSERT TRACK
Inserts a new Audio Track, Virtual Instrument Track, Video Track, Send Track, SubMix Track, or Output Bus Track above the currently selected track.
DELETE TRACK [CTRL]+[SHIFT]+D
This deletes the currently selected track.
SHOW MASTER TRACK
Click to show or hide the Master Track.
PROPERTIES
These submenus contain numerous track options.
• Mute [CTRL]+M
Mutes or unmutes the selected track. A checkmark indicates that the track is muted.
• Solo [CTRL]+L
Solos or un-solos the selected track. A checkmark indicates the track is soloed.
• Set Volume
Sets the volume for the selected track to either an exact amount or from 20% to 200%.
• Set Pan
Sets the pan position of the selected track. If the clip on the track is a stereo file, pan will act as a left/right balance control.
• Track Color
Selects a color for the track and its clips.
• Track Height [CTRL]+ ~ (tilde)
Adjusts the selected track height to Small, Normal, Large or Extra Large.
• Cycle Track Height [CTRL]+ ~ (tilde)
Moves the track height options above.
• Choose Image...
Opens the Track Image dialog allowing the use of custom track list images.
LANES
The Lanes submenu lets you add, delete, and mute clip lanes.
• Add [ALT]+L
Add a new lane to the currently selected track.
• Delete
Delete the currently selected lane and any clips on it.
• Delete Empty Lanes [ALT]+K
This removes unused lanes from the currently selected track.
• Mute All
Mutes all clips on the selected lane.
• Unmute All
Unmutes all clips on the selected lane.
• Select All
Select all clips on the selected lane.
ARM FOR RECORDING [CTRL]+B
Arms the selected track.
MONITOR
Allows you to hear audio as it records, including any effects on the recording track.
ARM RECORDING CHANNEL AND DEVICE
Selects the recording input source for an Audio Track, Virtual Instrument Track, or MIDI Track.
RECORDING MODE
Selects Overdub, Takes, or Replace mode for the currently selected track.
GUITAR TUNER
Activates the Guitar Tuner on the current track [Audio Tracks only]. Unlike previous versions of Mixcraft, the track does not need to be armed to use the Guitar Tuner.
FX...
Displays the Effect List for the selected track.
SHOW/HIDE AUTOMATION LANE
Shows or hides automation lane[s] for the selected track.
MIX TO NEW AUDIO TRACK
Mixes the selected track to a new audio track with current effects applied. The original track is retained and muted after the new audio track is created. This can be useful if effects are using excessive CPU resources or RAM and compromising performance.
DUPLICATE TRACK
This copies and pastes all clips and settings of the current track and and creates a new track beneath the selected track with the same clips and settings. Useful if you’d like to make serious edits but would like to maintain an “untouched” version.
FREEZE TRACK [CTRL]+[SHIFT]+F
Freezes the selected track. This is useful if the project is using too much CPU or RAM.
SELECT ALL CLIPS ON THIS TRACK [CTRL]+[SHIFT]+A
Selects all clips on the selected track.
SOUND MENU
ADD SOUND FILE... [CTRL]+H
Use for adding audio, MIDI data, or videos to the current project. New files will be inserted at the current Caret location.
ADD INSTRUMENT CLIP
This adds a blank Virtual Instrument clip on the closest Virtual Instrument Track. You can also double-click a Virtual Instrument track to create a blank Virtual Instrument Clip.
MIDI EDITING
These submenus contain numerous MIDI editing options including Quantize, Humanize, Transpose, Velocities, Offsets, Durations, Soloize, and Double.
[See “MIDI Editing: Clips” for full details.] LINK HERE
PROPERTIES
These submenus specify individual clip properties. See “Using Clips and The Main Clip Grid“ for full details. LINK HERE
• Mute
Mutes or unmutes the selected clip.
• Channels
Selects the active/audible channel for audio clips. (Audio clips only)
• Phase
Selects the phase of the audio clip. (Audio clips only)
• Normalize [CTRL]+K
This sets the volume of all selected sounds to the normalized level. The normalized level is based on the loudest peak. Reselect to deactivate normalization.
• Lock
Locks or unlocks the selected clip(s) to prevent resizing, movement, or other modifications.
ENVELOPES
Submenu for Envelopes, a.k.a. Clip Automation.
• Reset Envelope [CTRL]+[ALT]+T
Restores the current envelope to its default setting for all selected sounds.
• Invert Envelope [CTRL]+[ALT]+Y
Inverts or flips the current envelope vertically for all selected sounds.
• Fade Out
Displays pop-up menu with the following options: Fast, Medium, and Slow. Each option adds a fade-out of the current envelope type to all selected sounds. Note that the fade is applied to the selected area. If there is a selection rectangle, the fade only occurs in the selection rectangle
• Fade In
Displays a pop-up menu with the following options: Fast, Medium, and Slow. Each option adds a fade-in of the current envelope type to all selected sounds. If there is a selection rectangle, the fade only occurs in the selection rectangle.
• Boost
Displays a pop-up menu to boost all selected sounds by a set percentage for the current chosen envelope type. If there is a selection rectangle, the boost is applied only to the selected area.
• Reduce
Displays a pop-up menu to reduce all selected sounds by a set percentage for the current chosen envelope type. If there is a selection rectangle, the reduction is applied only to the selected area.
LINK
The Link submenu allows clips to be linked or unlinked. When clips are linked, they move together when dragging. Linked clip retain their relative offset to each other. The submenu link options are:
• Link Selected Clips
• Unlink Selected Clips

Linked clips will have the button in the title bar. Clicking the button will unlink clips.
SPLIT [CTRL]+T
This splits selected clips at the current Caret location.
REMOVE SPACES BETWEEN CLIPS [CTRL]+J
Removing space between the clips eliminates gaps or silence between selected clips by moving the selected clips together.
MIX TO NEW CLIP [CTRL]+W
This merges the selected clips into a new clip. This functions on a per-track basis and does not combine clips from different tracks.
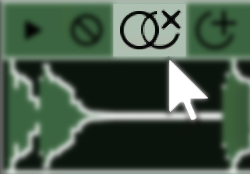
REVERSE
This makes audio clips play backwards, which is almost always awesome.
CONVERT AUDIO TO MIDI (MIXCRAFT 10 PRO STUDIO ONLY)
Any audio clip containing single-note melodic content can be converted to a MIDI file by right-clicking and choosing Convert Audio To MIDI. This is really convenient for doubling up vocal lines or instrumental solos.
This semi-miraculous feature does have some limitations - it only works correctly with single-note lines (it won’t work with chords), and it works best with clean, unprocessed sound - audio with a lot of effects such as reverb or delay won’t work too well. You may also notice that some notes are converted to the correct note but in the wrong octave. This is easy enough to fix in the Piano Editor.
ADD TO LIBRARY
Adds the audio clip to the sound library, for easy future use.
SET LOOP TO CROP
Sets the loop point on a clip to its current crop. (Audio clips only)
TRIM SILENCE [CTRL]+I
This removes any silence from left and right edges of clips. (Audio clips only)
EDIT IN EXTERNAL EDITOR...
Opens the sound or a copy of the sound in an external third-party sound editor.
VIDEO MENU
ADD A VIDEO FILE...
Adds a video file to the project.
ADD STILL IMAGES...
Add image files to the video track. JPG, BMP, and PNG formats are supported.
ADD TEXT...
Adds text to the Text Video child track.
ADD SCROLLING TEXT...
Adds scrolling text to the Text Video child track.
ALIGN CLIPS...
Aligns image and video clips for creating slide shows or aligning them to the beat.
SET NON-CLIP BACKGROUND COLOR...
Sets the color of the background if no video or image clips are present.
SHOW/HIDE VIDEO WINDOW
Shows or hides the video playback window.
SET PREVIEW WINDOW SIZE
Selects standard video sizes for the Video Window.
LINK
The Link submenu allows clips to be linked or unlinked. When clips are linked, they move together when dragging. Linked clips retain their relative offset to each other. The submenu link options are:
• Link Selected Clips
• Unlink Selected Clips
Linked clips will have a button in the title bar. Click this button to unlink clips.
VIEW MENU
ALL TRACKS HEIGHT
Opens a submenu for setting the selected track height to Small, Normal, or Large.
TIMELINE MODE
Selects Beats or Timeline viewing mode.
SNAP TO GRID
Disable Snap or choose a snap setting for the Timeline in the pop-up submenu.
SHOW EFFECTS ON TRACKS
Expands the right edge of the track menu to display effects inserted on the channel. This can also be done by clicking and dragging near the right edge of the track list.
SHOW/HIDE DETAILS AREA
Shows or hides the most recently selected details tab. (Project, Sound, Mixer, or Library)
MUSICAL TYPING
Opens the Musical Typing keyboard. This allows MIDI note input using a standard QWERTY computer keyboard.
PERFORMANCE PANEL
Toggles viewing and hiding of the Performance Panel.
ZOOM IN [+]
Zooms into the project for a more detailed view.
ZOOM OUT [-]
Zooms out for a wider view.
ZOOM TO PROJECT [0]
Fits the entire project to the screen.
HELP MENU
HELP FILE...
Opens the Help File. (the thing you’re reading right now - circular logic is deep, man)
CHECK FOR UPDATE...
Checks the Internet for a newer or updated version of Mixcraft.
ENTER REGISTRATION CODE...
If unregistered, use this to enter your registration code.
BUY NOW!
Displays a window with instructions on purchasing and registering the software. (Unregistered versions only)
ABOUT MIXCRAFT...
Displays Mixcraft credits, copyrights, and thanks.