RECORDING A MIDI TRACK
Unlike an Audio Clip, which contains digitized sound data, a MIDI Clip contains no actual audio data. Think of a MIDI Clip as a sort of computerized player piano ... a MIDI Clip primarily contains on/off messages saying, “hey computer instrument, please play these notes at this time!”
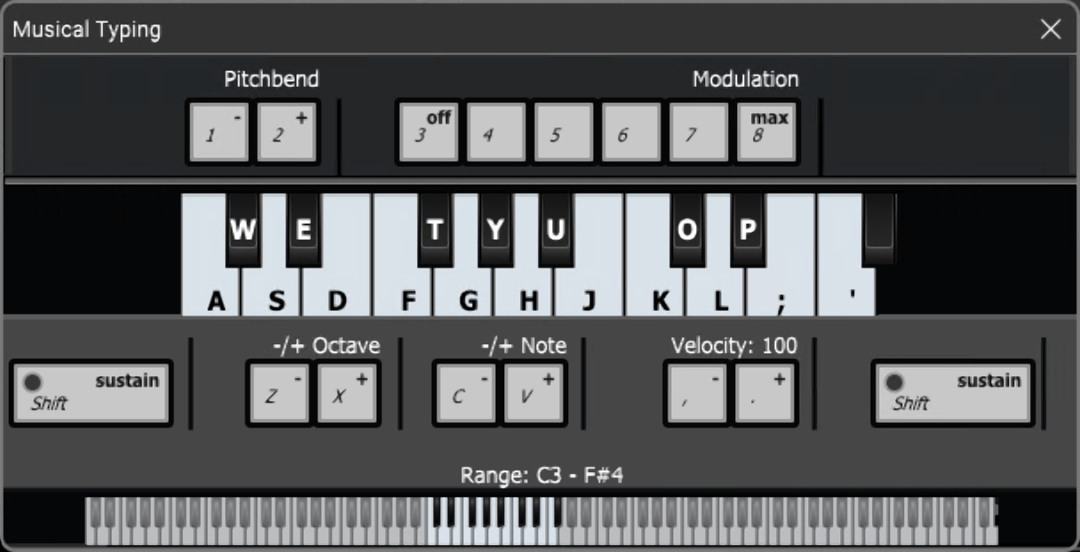
There are a number of ways to create MIDI clips, but the most common way is to plug in a USB MIDI controller keyboard, press the Record button, and tickle the ivories (plastics?). If you have a USB MIDI controller, plug it into an available USB port on your computer. If you don’t have a USB keyboard controller, you can input notes direct from the computer’s keyboard using Musical Typing. This can be toggled on and off by going to the View menu at the top and selecting Musical Typing, or by using the key shortcut [CTRL]+[ALT]+K. Musical typing uses the computer’s QWERTY keyboard to play musical notes. When activated, the layout shows the mini music keyboard below including octave, transpose, velocity, and other relevant parameters. For more information, check out the “Musical Typing Keyboard (MTK)” section.
Now that we’re playing some kind of keyboard, we’ll select one of Mixcraft’s built-in Virtual Instruments. A Virtual Instrument is like having a keyboard instrument that lives inside the computer. Nifty, right?
First, create a new virtual instrument track. Click the +Track button at the top left, and select Insert Virtual Instrument Track. Now click the track’s piano keyboard icon. This opens a dialog box where instruments can be selected:
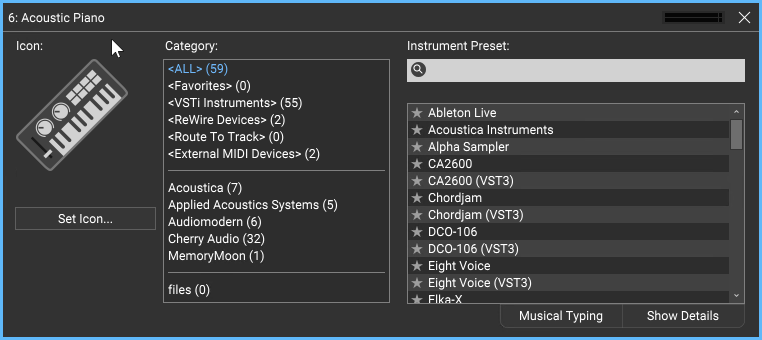
We’ll go with our old friend Acoustic Piano, but feel free to scroll through the list and choose something saucy, like Space Walk. Once you’ve made your selection, click on the red X in the upper right corner.
There’s Already A Piano, Man
New MIDI Tracks default to an acoustic piano sound, so you really don’t need to select an instrument to play MIDI notes, but we thought you might want to know so you wouldn’t be stuck with all piano, all the time!
Before we record a MIDI performance, let’s turn on Mixcraft’s metronome. This lets you play in time with the project’s tempo. To turn on the metronome, click the metronome button in the middle of the transport:
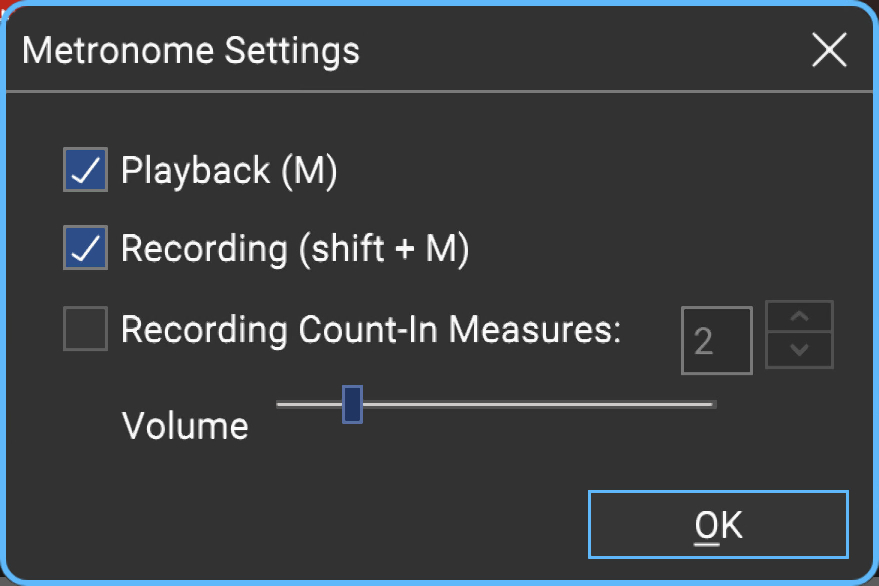
Check the Recording box to make the metronome click during recording. Checking the Playback box makes it click during playback, but we can leave this off for now. If it’s not already checked, check the Recording Count-In Measures box.
Upon pressing the Record button, this gives a “countdown” before recording begins. The number selector lets you choose the length of the countdown. Unless your computer and MIDI keyboard are really far away from each other, choosing 1 bar should provide enough time to get those fingers poised. Hit OK when you’re done. Once you’ve configured when the metronome plays, you can quickly toggle it on and off by pressing the M key on the computer keyboard.
We’re almost there! Let Mixcraft know where to begin recording by positioning the Caret in the grid. This can be done by either clicking on the timeline at the top of the main window or by clicking anywhere in the Main Grid. We recommend positioning the Caret exactly on a number (e.g., 1, 2, 3).

To simplify positioning the Caret, make sure Snap To Grid is selected in the Snap menu at the top of the screen.
Make sure the track is armed for recording - if it’s not red, click on it. Now click the red Record button in the transport (that’s the one with the red dot), wait four clicks for the recording to begin, and lay down the rock. When you’re done, click the Record button again to stop (you’ll notice the red circle turns into a square while recording), or just hit the space bar. You should see something like this:

To create more MIDI tracks, select empty tracks in the Track List on the left of the screen and add more instruments as described above.