COMMON TRACK CONTROLS AND COMMANDS
Most of the following controls and commands are shared by all track types.
VOLUME + INPUT/OUTPUT METER

Track volume is adjusted by the horizontal slider with a built-in level meter. Click down on the slider and move it left or right to decrease or increase volume. Volume can be set from 0% to 200% (-Inf dB to +6 dB).
To set an exact track volume, choose Track>Properties>Set Volume>Set Exact Value… from the Main Window drop-down menu and enter the desired volume. This can also be accessed by right-clicking on the track.
Tip: Hold down [ALT], [SHIFT], or [CTRL] and click-drag the slider for finer and more accurate adjustment.
The horizontal volume fader contains an integrated level meter. In standard playback mode, this displays the output level as the track plays. If the track is in record arm mode (The arm button will be red), the meter functions as an input level meter.
PAN

The track’s pan control is the small horizontal slider to the left of the track volume control. Adjust the pan control by clicking and dragging it to the left or right. Pan is adjustable from 100% left to 100% right. The pan controls default to the center position - this means that the sound is equally balanced between the left and right channels. Track panning can also be set in the main window drop-down menu Track>Properties>Set Pan>Set Exact Value … This menu is also accessible by right-clicking a track.
Tip: For finer and more accurate pan adjustment, hold down [ALT], [SHIFT], or [CTRL] while dragging the pan slider.
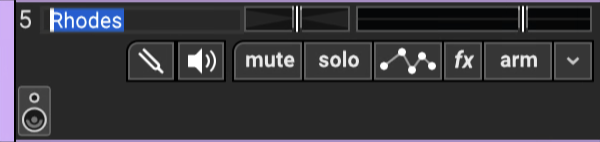
MUTE


Tracks can be temporarily silenced by clicking the track Mute button. Once muted, the solo button turns blue, and all clips on the track turn gray with diagonal lines. Tracks may also be muted using the shortcut [CTRL]+M, or by right-clicking the track and selecting Properties>Mute. If multiple tracks are selected, all selected tracks are muted simultaneously.
If multiple tracks are muted, [CTRL]-clicking an unmuted track unmutes all others and mutes the clicked track (sort of a mute “solo” function). If multiple tracks are muted and one of them is [CTRL]-clicked, all are unmuted.
Mute and Solo Button [CTRL] + Click Shortcuts
If multiple tracks are soloed or muted, you can unsolo or unmute all tracks in project by [CTRL] + clicking on a solo or mute button. Multiple tracks cannot be Han Soloed.
SOLO

To hear a single track’s audio, click the Solo button. Multiple tracks may be soloed. For example, to hear how the bass and guitar sound together without drums, solo the bass and guitar tracks. Once soloed, the track’s solo button turns blue and all other tracks turn gray with diagonal lines. If multiple tracks are selected, all selected tracks are soloed simultaneously.

The currently selected track can also be soloed using the shortcut [CTRL]+L, or by right-clicking the track and selecting Properties>Solo.
If multiple tracks are soloed, [CTRL]-clicking a non-soloed track disables solo on all other tracks and soloes the clicked track. If multiple tracks are soloed and one of them is [CTRL]-clicked, solo is disabled for all tracks.
ARM BUTTON AND MENU (DOWNWARD ARROW)
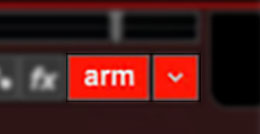
Clicking the Arm button readies an audio or MIDI track for recording. (the button turns bright red). If nothing else is armed, the currently selected track is automatically be armed for the duration of the recording. More than one track can be armed for simultaneously recording to multiple audio or MIDI tracks.
Clicking the downward arrow to the right of the Arm button opens a menu where recording parameters are specified. This menu will look a little different for audio tracks or MIDI tracks - check out the Audio Track or Virtual Instrument/MIDI Track sections for detailed information.
SELECTING A TRACK
Clicking on a track header will select it. The tracker header outline changes to the currently selected track color; the default color varies depending on the track type, but its color can be changed (see “Track Color” section below).
MULTIPLE TRACK SELECTION
[CTRL]+click will select multiple tracks simultaneously, [SHIFT]+click selects all tracks between any two selected tracks. Selecting multiple tracks is handy for moving or deleting multiple tracks. Additionally, Volume, Pan, Mute, Solo, Arm, and other operations apply to all selected tracks.
Note:When multiple tracks are selected, Volume and Pan changes are relative. As an example, changing a volume level on one track won’t cause all selected tracks to jump to the same volume; instead, selected tracks maintain their volume settings relative to each other but move up and down as a group. The same applies to Pan settings.
LINKING TRACKS

Multiple tracks can also be linked together; this gangs up the volume, pan, mute, solo, and send controls. It’s particularly useful if you have a group of similar tracks (like drums, or multiple backing vocals). You may have as many separate groups of tracks linked as you like. Linked tracks will display “chain” icons next to the track name, and each Link group will have uniquely colored color bars at the far left of the track.
To link two or more tracks, select tracks as detailed in the previous section then choose from the following Link options:
• Link Selected Tracks
Choose Track> Link>Link Selected Tracks from the main menus, or right-click one of the selected tracks and and choose Link>Link Selected Tracks to link currently selected tracks.
• Unlink All
This disables linking for all tracks in the current Link group (one track within the group must currently be seleted before unlinking).
• Unlink
This disables linking for only the selected track in the current Link group. Use this to remove a single track from the Link group.
Note: Track linking is overridden for volume, pan, or send if automation locks are enabled for these parameters.
ADDING/MOVING/SIZING/DELETING TRACKS
Drag, right-click, or use key shortcuts to add, delete, move, and duplicate tracks.
MOVING TRACKS
Tracks can be moved by clicking and dragging them vertically within the Track List.
RESIZING TRACKS

Tracks can be resized vertically. Track height can be increased for easier editing, or decreased to fit more tracks on the screen simultaneously. To resize a track vertically, move the mouse to the bottom of a track and drag it up or down. When the mouse is
in the correct location for resizing, the cursor will become an up/down cursor. Alternatively, you can click Track>Properties>Track Height and choose a size of small, normal, large, or Super Big Gulp X-Treme™. [CONTROL]+ ~ (that’s a tilde, the squiggle at the top left of your keyboard) is a handy keyboard shortcut for cycling through track heights.
RESIZE ALL TRACKS
You can resize all tracks at once by clicking on View>All Tracks Height and choosing a new size. To resize all tracks to a specific size, hold down the [SHIFT] key, click on the bottom of a track, and drag it up or down. All tracks will resize upon mouse release.
DELETING TRACKS
Click on a track to select it. Then click Track>Delete Track, or right-click on the track and choose Delete Track. All sounds on the track will also be deleted.
CUSTOMIZING TRACK APPEARANCE

Change the color, icon, name, or size of tracks.
NAME
The default name for newly created tracks will be “Audio Track,” for audio tracks, or “Instrument Track,” for MIDI tracks. Tracks can be renamed by clicking the current name and typing. Hit the Enter key or click in another area of the window to finish.
IMAGE

Each track can have its own icon beneath the track name for personalization as well as organization. Choose from Mixcraft’s included images or import your own.
To change the track image, double-click an existing track image or hover over the track image and click the pop-up button. You can also select Track>Properties>Choose Image… in the main window drop-down menus, or right-click on a track and select Properties>Choose Image...
The Choose A Track Image window opens:
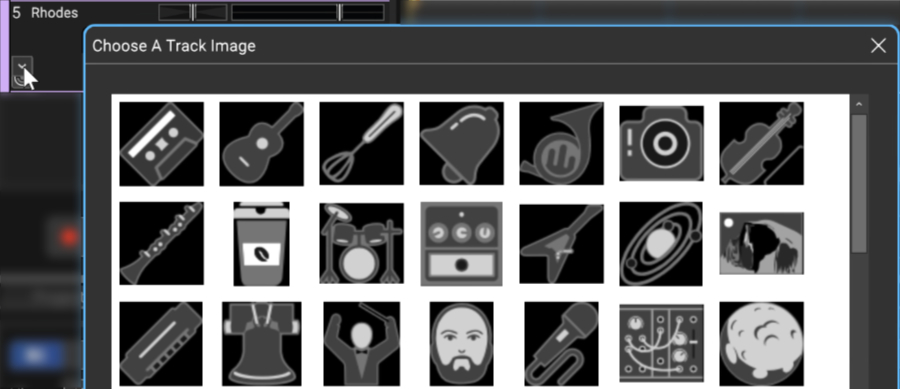
To use an existing image, select one and click OK. To use a custom image, click Add My Own Image File..., navigate to the image to be added, select the desired image, and click Open. The image replaces the existing track image and is added to the list of thumbnail images.
JPG, BMP, PNG, and GIF formats are supported, and custom images are permanently added to the track image library for use in future projects.
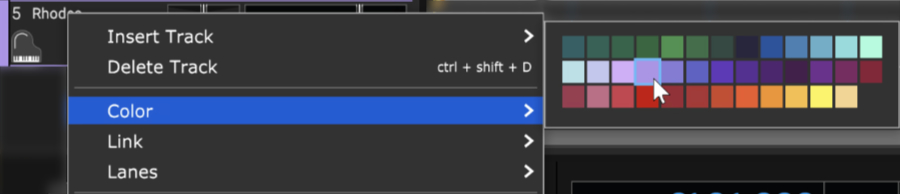
TRACK COLOR
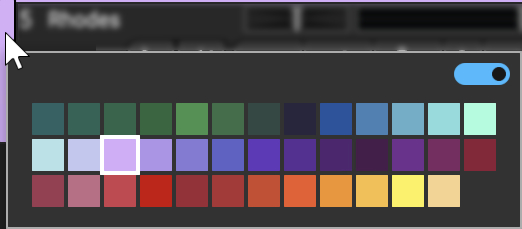
Track colors can be individually set by selecting Track>Properties>Track Color in the main window drop-down menus, by right-clicking a track and choosing Color, or by clicking directly on the vertical color bar at the far left of the track. This affects the track’s highlight color and all clips on the track.