PIANO ROLL AND STEP EDITOR MIDI CONTROLLERS
MIDI controller data can be edited at the bottom portion of the Piano Roll and Step Editors in the Sound tab. The controller display can show one controller type (i.e. MIDI controller number) at any time; the currently displayed controller data type is selected with the pop-up menu to the left. Controller numbers currently containing data are displayed in bold font in the pop-up menu.
CHOOSING THE CURRENTLY DISPLAYED CONTROLLER
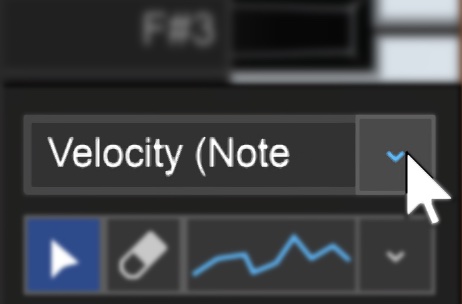
Click the drop-down menu on the left-hand side to pick a specific controller
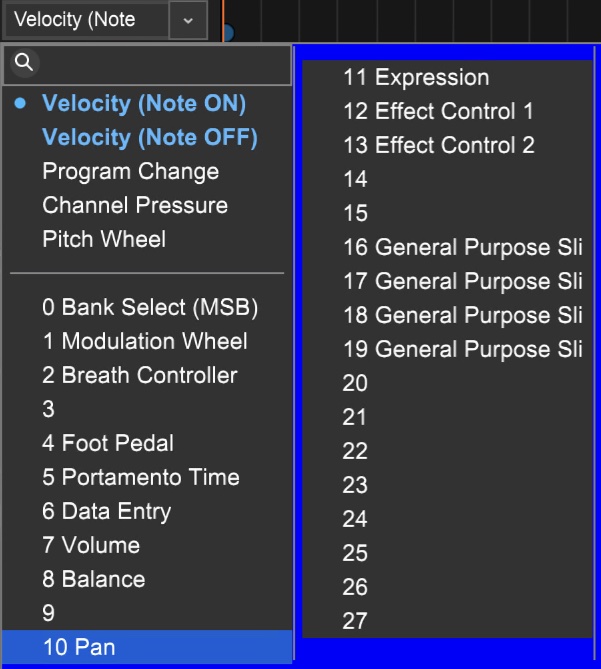
Click in the menu field to select a controller, or type in a controller number from 0 to 127 (the one beneath the keyboard that says Velocity (Note ON) by default). If the clip contains controller information for a specific controller, the controller number appears in bold text in the pop-up list.
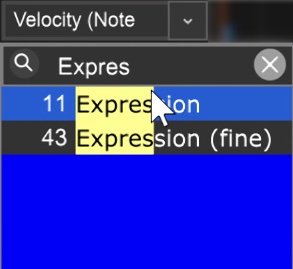
Since there are a lot of MIDI controller numbers, we’ve included a handy search field just below the controller drop-down menu. To search for a specific controller, type into the field and the controller field will only display controllers containing the typed phrase. (Conversely, if the field is only displaying a few MIDI controller parameters, make sure you don’t have a word typed in the field).Daw
CREATING AND EDITING MIDI CONTROLLER DATA
Mixcraft provides a number of tools for creating and modifying controller data.
SELECT TOOL


Use the Select Tool to edit the controller data for a specific note by clicking and vertically dragging an existing controller line, or its associated note in the Piano Edit note grid.
Controller data for multiple notes can be edited by dragging a box around multiple controller lines or notes in the note grid. When multiple controller lines/notes are selected, the yellow and red controller line adjustment tool appears in the controller area - click and drag it up and down to proportionally raise or lower multiple controller lines simultaneously.
FREEHAND DRAWING CONTROLLER DATA
Click the squiggly line next to the Eraser tool and select Freehand. This lets you draw new controller data for the currently selected parameter. As its name implies, values can be freely drawn. Newly created MIDI controller data will be quantized to the current Snap setting. If you’d like to draw controller data at any location, make sure to set Snap to Off.
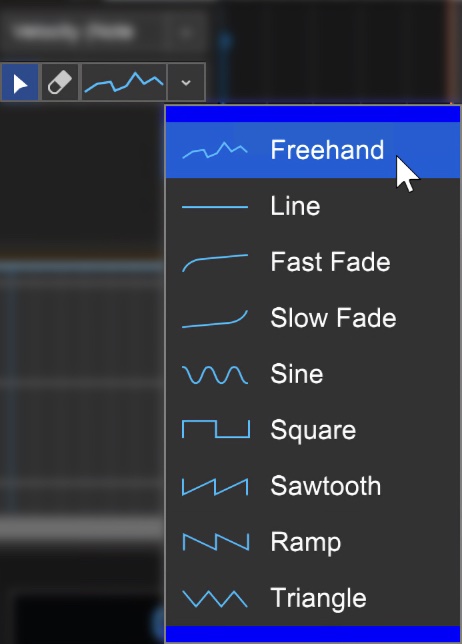
DRAWING CONTROLLER DATA USING SHAPES
In addition to Freehand mode, the pop-up also contains a number of “preset” waveshapes. The Line and Fade shapes enable quick and accurate fade-ins and fade-outs of controller data. The Sine, Square, Sawtooth, Ramp, and Triangle waveforms allow rapid drawing of cycling modulation effects, much like the low-frequency oscillator section of a synthesizer. All shapes work in conjunction with the Snap setting, which makes rhythmically timed modulation of MIDI parameters a cinch.
• Using The Line and Slow/Fast Fade Shapes
When using the Line and Fade shapes, the starting value is defined by the initial mouse click location and the end value is defined by the mouse up location. Start and end points are quantized to the Snap value. If the Snap value is set to Off, fades start and end exactly where the mouse was initially clicked and released.
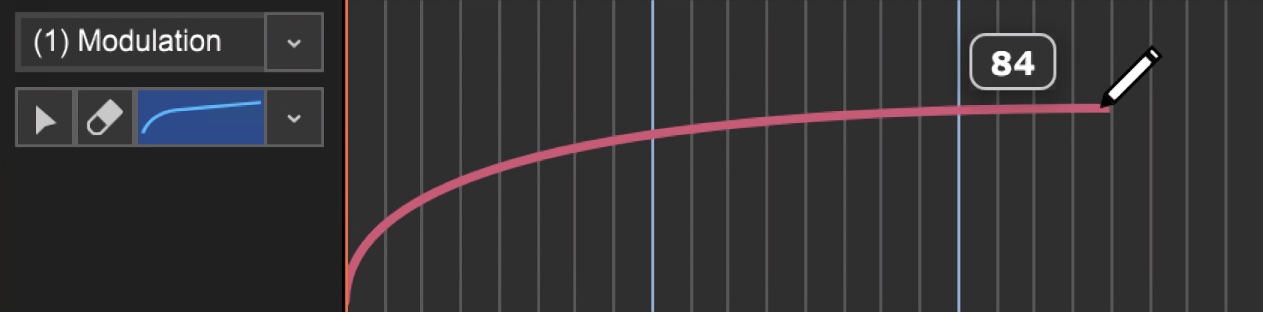
When the mouse button is down, Mixcraft shows a gray preview of the resulting controller data, making it easy to preview the resulting controller data.
• Using The Waveform Shapes
Unlike the Line and Fade shapes, waveform shapes create repeating cycles of the chosen wave shape. The number of cycles is dependent on the distance the mouse is dragged horizontally and the current Snap setting.
The starting value/polarity is defined by the initial mouse click location, and the end value is defined by the mouse up location. Waveform cycle lengths are quantized to the current Snap value. If the Snap value is set to Off, a single waveform cycle is drawn with its length defined by how far the mouse is horizontally dragged.
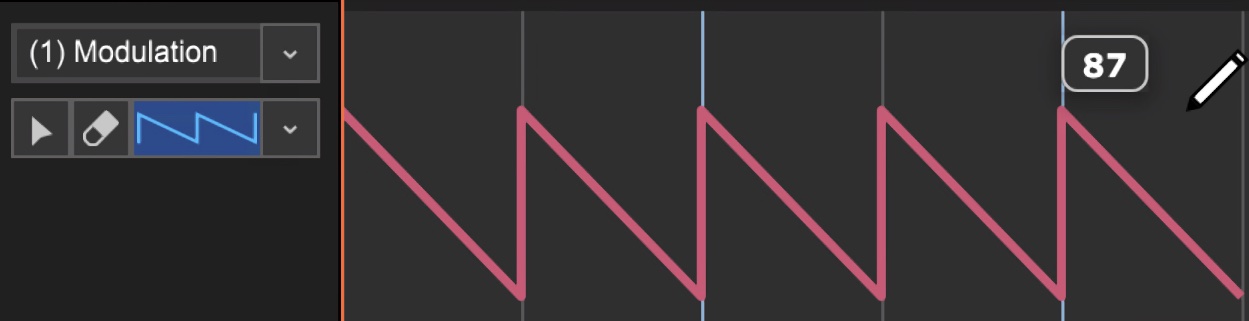
As with Line and Fade shapes, a gray preview of the resulting controller data shows while the mouse button is down, making it easy to preview the resulting controller data.
If these verbal descriptions sound a little complicated, don’t worry, Mixcraft’s controller data shapes are actually really easy and intuitive to use - play around with them for a few minutes and you’ll see!
• Erase Tool

Controller data lines can be removed using the Eraser tool, either by clicking on individual lines, or by click-dragging across multiple lines. The Eraser tool cannot be selected if Velocity (Note ON) or Velocity (Note OFF) is currently chosen This is because all notes must have a velocity, so the velocity can’t be removed.
On The Rise!
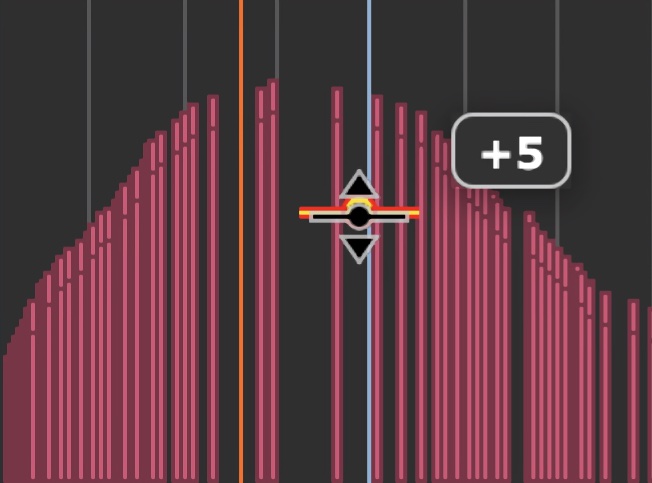
Remember that raising or lowering the amplitude range of entire sections of MIDI controller data is easily accomplished by choosing the Select tool, dragging over a range of controller information and moving the yellow and red Line Adjuster tool up and down.
EDITING VELOCITIES OF SELECTED NOTES
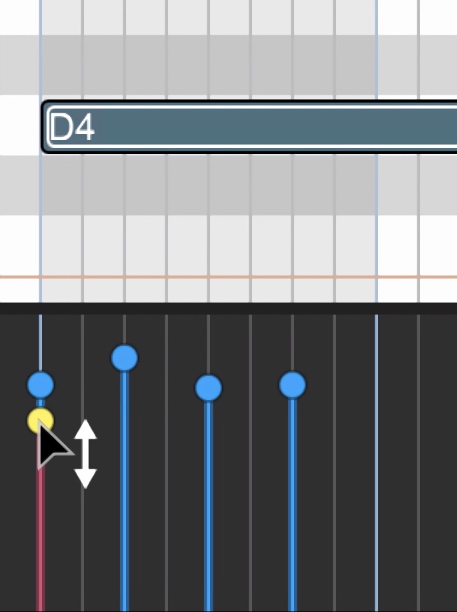
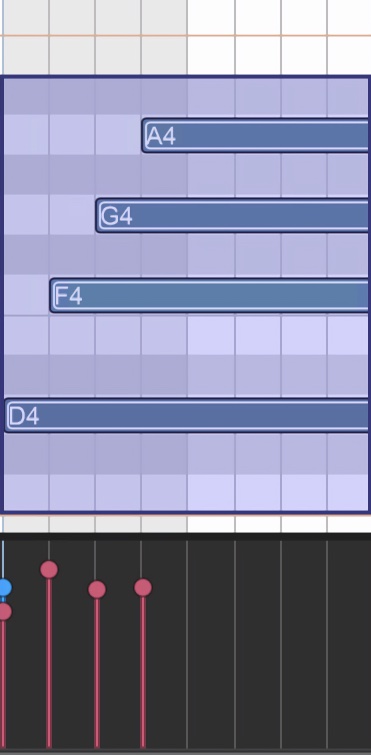
The velocity of a selected note or notes can be edited by holding down the [SHIFT] key while drawing velocities. This can be useful in situations where several notes start at the same time, or in other situations where it can be difficult to adjust the velocity of one note without affecting neighboring notes. In this example, the D5 note has been selected, so [SHIFT]+dragging the vertical line only affects that note.
PRECISE EDITING OF CONTROLLER INFORMATION VIA RIGHT-CLICK MENU
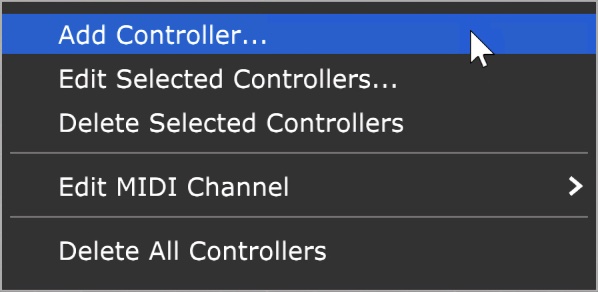
Right-clicking in the controller data field lets you precisely set values or delete controllers.
Note: Right-clicking in the controller data field works does not work for note velocity.
• Add A Controller...
Right-click the mouse in an area with no controller data and select Add Controller to insert controller data at an exact value.
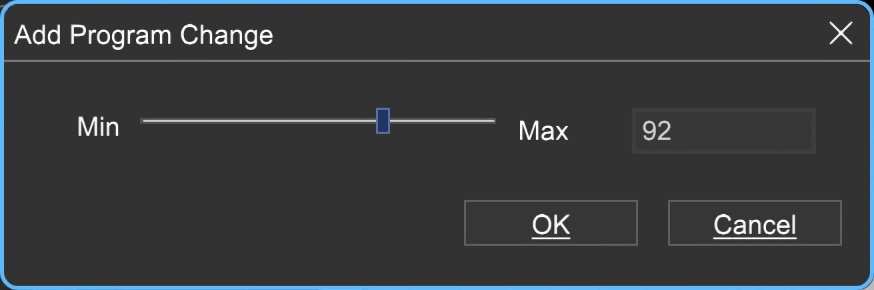
A dialog box opens where specific values can be set with the slider or directly entered. This is particularly useful for sending MIDI program change messages, which can be hard to set by dragging a vertical line.
• Edit Controller...
To edit existing controller data with increased precision, right-click it and select Edit Controller… A dialog box opens and specific values can be entered.
• Delete Previous Controller
Removes all controller data of the current type for the current MIDI clip.
• Edit MIDI Channel
Allows the MIDI channel of the controller to be changed.
• Delete All Controllers
To delete all MIDI controller data for the currently displayed control, right-click anywhere in the controller area and choose Delete All Controllers.