MIXING DOWN TO AUDIO AND VIDEO FILES
Projects can be mixed down to any of the following audio file types:
• MP3
• OGG
• WAV
• WMA
• FLAC
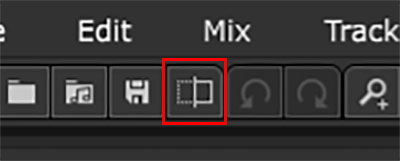
Being by clicking the Mix Down To Audio File button on the toolbar or select File>Mix Down To from the Main Screen menus, followed by selecting the desired format.
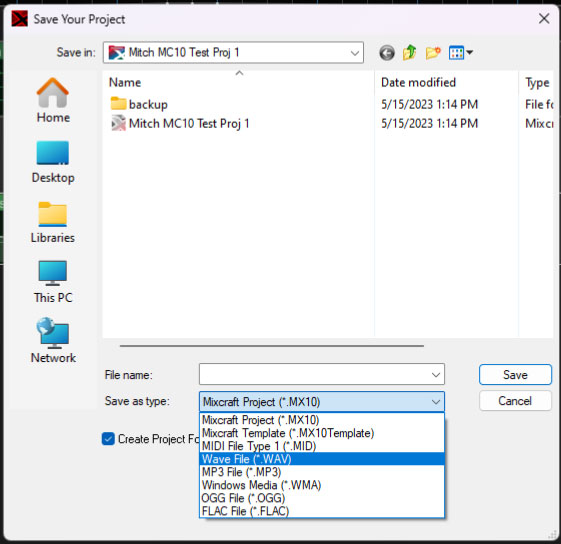
Alternatively, you can choose File>Save As… from the Main Screen menus and then click the Save as type drop-down menu to select the desired format.
Once you’re viewing the Mix Down Project window with the correct format, you’ll see the following dialog window:
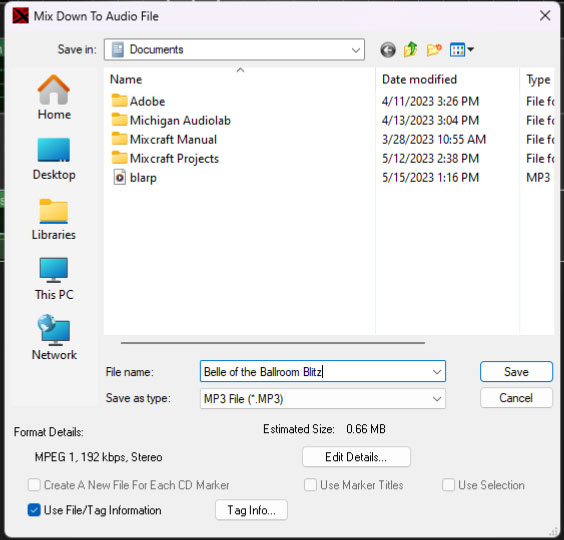
Give the file a name, and choose the preferred audio file format.
FORMAT DETAILS
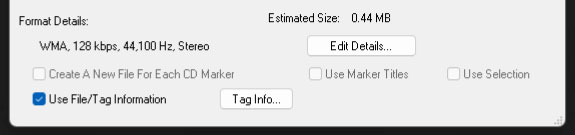
Displays current format details such as bit rate and number of audio channels (i.e. mono or stereo).
• Edit Details...
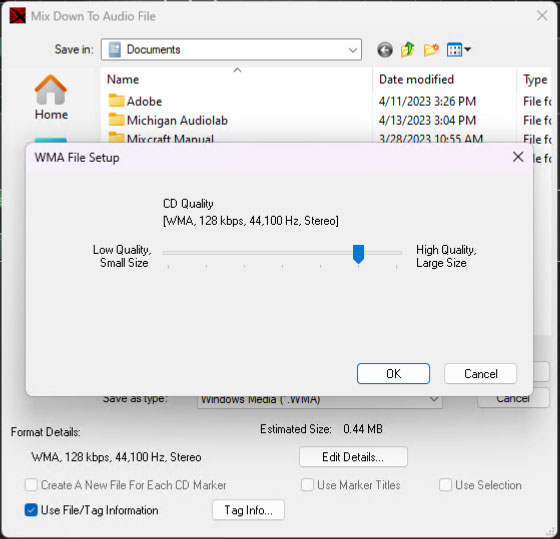
This opens a window where you can set the audio quality of files. Generally speaking, higher quality settings will create larger file sizes. Selecting the Preset Quality radio button simplifies audio quality settings with a single slider. If you’re knowledgeable about audio compression, the Specify Settings radio button lets you set individual digital compression parameters for the selected file type.
• Estimated Size
This shows the approximate size of the resulting mix down file in megabytes.
• Create A New File For Each CD Marker
If you’ve added CD markers to the project, this causes the mix down to create multiple files, one for each CD marker encountered.
• Use Marker Titles
If you’ve chosen Create A New File For Each CD Marker, this option uses the titles in the marker for the name of the file and tag.
• Use Selection
This lets you create a file from a selected region in a project.
• Use File/Tag Information
Choose this option if you want the audio file(s) to be tagged with the project’s author information and CD track names (if set).
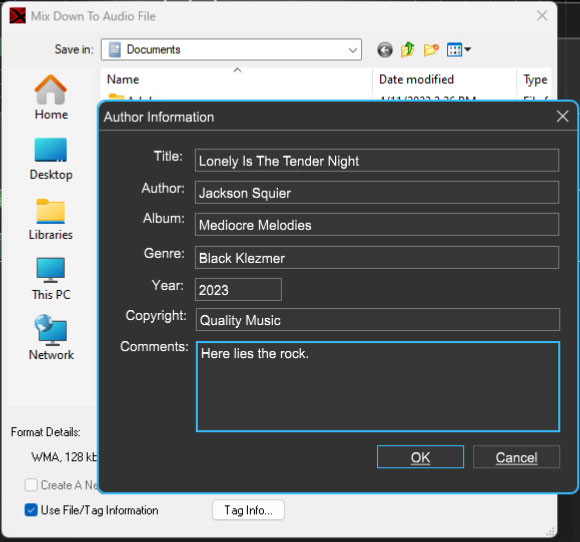
Click Tag Info... to edit the project’s author information.
• Mix Down To Video
Projects containing video can be mixed down to a new video file. Mixcraft supports mixing down to AVI, WMV, and MP4 formats. (Shouldn’t they just call it “MP4-mat?”)
You Down With OGG?
OGG is a lossy audio compression format that delivers better sound quality than MP3 (we think, but this can be debated on your favorite audio forum) and potentially saves
a lot of disk space. Its full name is actually “Ogg Vorbis”. We’re not sure what that means, but we’re pretty sure its creators watched a lot of Star Trek.
For tons of information on how to render and mix down with video please see the Rendering Videos section.
MIX DOWN TO STEMS...
Mix Down To Stems is similar to the standard Mix Down To Audio File function, but instead of creating a single mix file, it creates separate audio files for each individual track. This is useful if you’re handing off a project for mixing (or further composition) to someone who isn’t using Mixcraft; they can simply import the individual audio files into empty tracks in their DAW of choice. Mixing to individual stems can also be useful if you’re producing music for TV or film, as some editors and audio producers prefer to receive music and effects in a separated, unmixed state.
To use Mix Down To Stems, click the File menu in the top-left corner and select Mix Down To Stems.
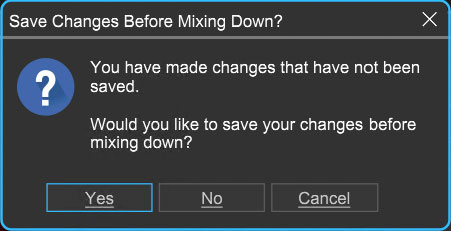
Mixcraft will ask if you’d like to save any changes made to the current project; it’s usually a good idea to do so. Next, you’ll see the impressively thorough Mix Down To Stems window.
CHOOSE TRACKS TO MIX
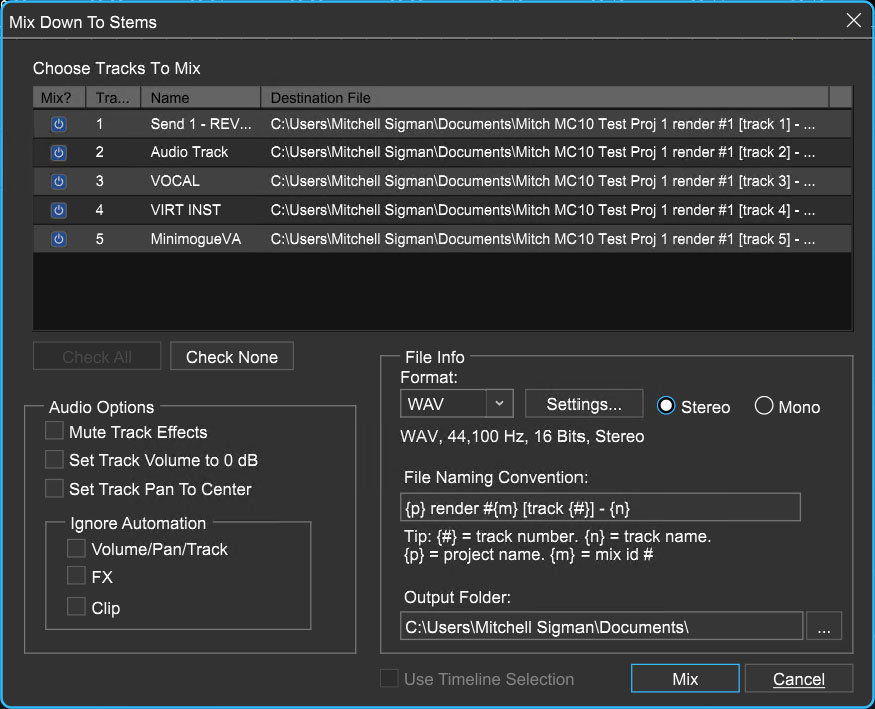
The top portion of the window displays all standard audio tracks, send tracks, submix tracks, and virtual instrument tracks within the current project.
• Mix?
These checkboxes select which tracks will be output to new audio files.
• Track#
This column shows the track numbers in the same order as the tracks in Mixcraft’s main track window.
• Name
Displays the track name.
• Destination File
This column displays where the mixed file will land as well as its full name, as specified in the File Info section below. (the scroll bars at the bottom and right side of the Choose Tracks To Mix window will make it easier to see file names and info).
• Check All
Use this button to quickly check all tracks in a project for export.
• Check None
Conversely, this button unchecks all tracks in a song. This can save a lot of mouse clicks if the song contains many tracks but you’d only like to select a couple of them.
AUDIO OPTIONS
• Mute Track Effects
Selecting this disables insert effects for all exported tracks. If you’re handing off tracks for mixing, it’s good to find out what the mix engineer needs. Most often, mix engineers won’t want compression or EQ types of effects “burned-in” to the files, but they may want time-domain effects such as synchronized delays. As an alternative to simply clicking the Mute Track Effects button, you can customize which tracks retain their insert effects by clicking a track’s fx button and check boxing which effects to engage or bypass.
• Set Track Volume To 0db
This automatically sets all fader volumes to 0db for more uniform levels in the resulting files. Be careful though, because this can potentially create clipped files. Note that Mixcraft’s onscreen faders won’t move; this only affects files as they’re being exported.
• Set Track Pan To Center
Like Set Track Volume To 0 dB, checking this pans mixer channels to center when files are being created. This is useful in couple of ways depending on whether you’re creating mono or stereo files. Let’s say you have a mono tambourine that’s panned hard left. If you output a mono file, the hard left panning could cause the overall mono level to be lower than if it were panned to the center. If you’re outputting a stereo file, the tambourine would retain its hard left orientation in the resulting file, which could potentially be bad for a mix engineer. In a nutshell, Set Track Pan To Center is the safest choice if you’d like to leave panning decisions to the recipient of the individual files.
• Ignore Automation
These checkboxes allow you to temporarily disable all volume, pan, or other track automation, automation applied to effects parameters, or clip automation as applied to individual clips. Again, this can be really important if you’re handing off a project for someone else to mix - they’ll most certainly want automation disabled in order to create their own.
FILE INFO
Here you’ll specify file formats, naming conventions, and the destination folder for newly created files.
• Format
Choose the audio file format here. Options include Wave, FLAC, mp3, OGG, and WMA. For the greatest flexibility and fidelity, Wave is the best choice as it’s a full-fidelity, uncompressed audio format, and can be read by almost any DAW software. But Wave’s uncompressed nature can make for large file sizes, so be aware of this.
• Settings
Opens a window where format-specific preferences can be set. Most of these relate to file size vs. audio fidelity (i.e., larger file sizes = better fidelity and vice-versa. It’s always a tradeoff, right?). The good news is that unless the project is excessively large (like, 100 tracks), uncompressed audio files aren’t considered all that large by today’s standards, so it’s usually best to lean toward quality over compact file sizes.
• Stereo/Mono Radio Buttons
These buttons let you choose whether the outputted files will be mono or stereo.
• Filing Naming Convention
I went to the File Naming Convention in Davenport, Iowa back in ‘87, and boy could those guys party! Kidding aside, if you’ve ever had to rename dozens of files because your dumb computer kept adding useless footers or characters, you’ll love this handy feature.
It looks a little scary, but it’s actually pretty easy to use. You can type any text you like into the white box. Characters inside the brackets will automatically be filled in with the appropriate information as shown in the Tip guide beneath the window.
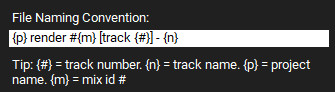
Let’s say we left the File Naming Convention settings as shown above, and our project was called “Hokey Love Song”. If we were to output the first four tracks, the file names would be as follows:
Hokey Love Song render #1 [track 1] - drums
Hokey Love Song render #1 [track 2] - bass
Hokey Love Song render #1 [track 3] - Funk Clav 2
Hokey Love Song render #1 [track 4] - Acoustic Piano
You can rearrange regular text or the location of the bracketed variables however you like. You can also delete any of the bracketed variables, though we recommend keeping at least one so you don’t end up with a bunch of files with the same name.
• Output Folder
Here’s where you’ll set the destination folder for mix stem files. If you’re one of those whiz bang computer genius-types, you can manually type the file path in the field, or if you’re like the rest of us, click on the ellipsis (i.e. three dots) button to the right for a standard file dialog where you can specify a destination directory or create a new one.
USE TIMELINE SELECTION
If you only need to output a section of a project, check the Use Timeline Selection box and highlight a section by click-dragging in the clip area or the ruler above.
TIME TO MIX DOWN!
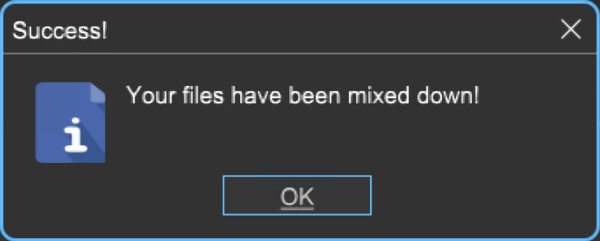
When you’ve set all the necessary parameters, click the Mix button, and soon you’ll see the Success! window below. If you change your mind, you can always click the Cancel button prior to mix down.
Too Much Time On My Hands
By default, Mix Down To Stems outputs all selected audio files beginning at bar one, regardless of clip locations. If a clip doesn’t begin until a later offset, Mixcraft “fills in” the empty space with silence.
If you’re handing off files to someone using a different DAW, this greatly reduces the possibility of timing issues, because they’ll be able to drop all the files on bar number one in their DAW, and the files will play in time (it’s a good idea to let them know the tempo, to insure that bar lines and click will work properly). Because clip locations aren’t stored with audio files,if Mixcraft simply output clips beginning at their actual location in a project (i.e. not at bar one), the recipient would have no way of knowing the proper locations of each file, and the result would be an out-of-time disaster.. I’m talking to you, everybody-who-ever- gave-me-a-ProTools-file to mix!