MIXCRAFT MAIN WINDOW REFERENCE
Think of this section as what you’ll come across when using Mixcraft. Later chapters will explain how to accomplish tasks in Mixcraft in detail. Blue italicized text indicates clickable links that jump to sections with further information.
MAIN WINDOW
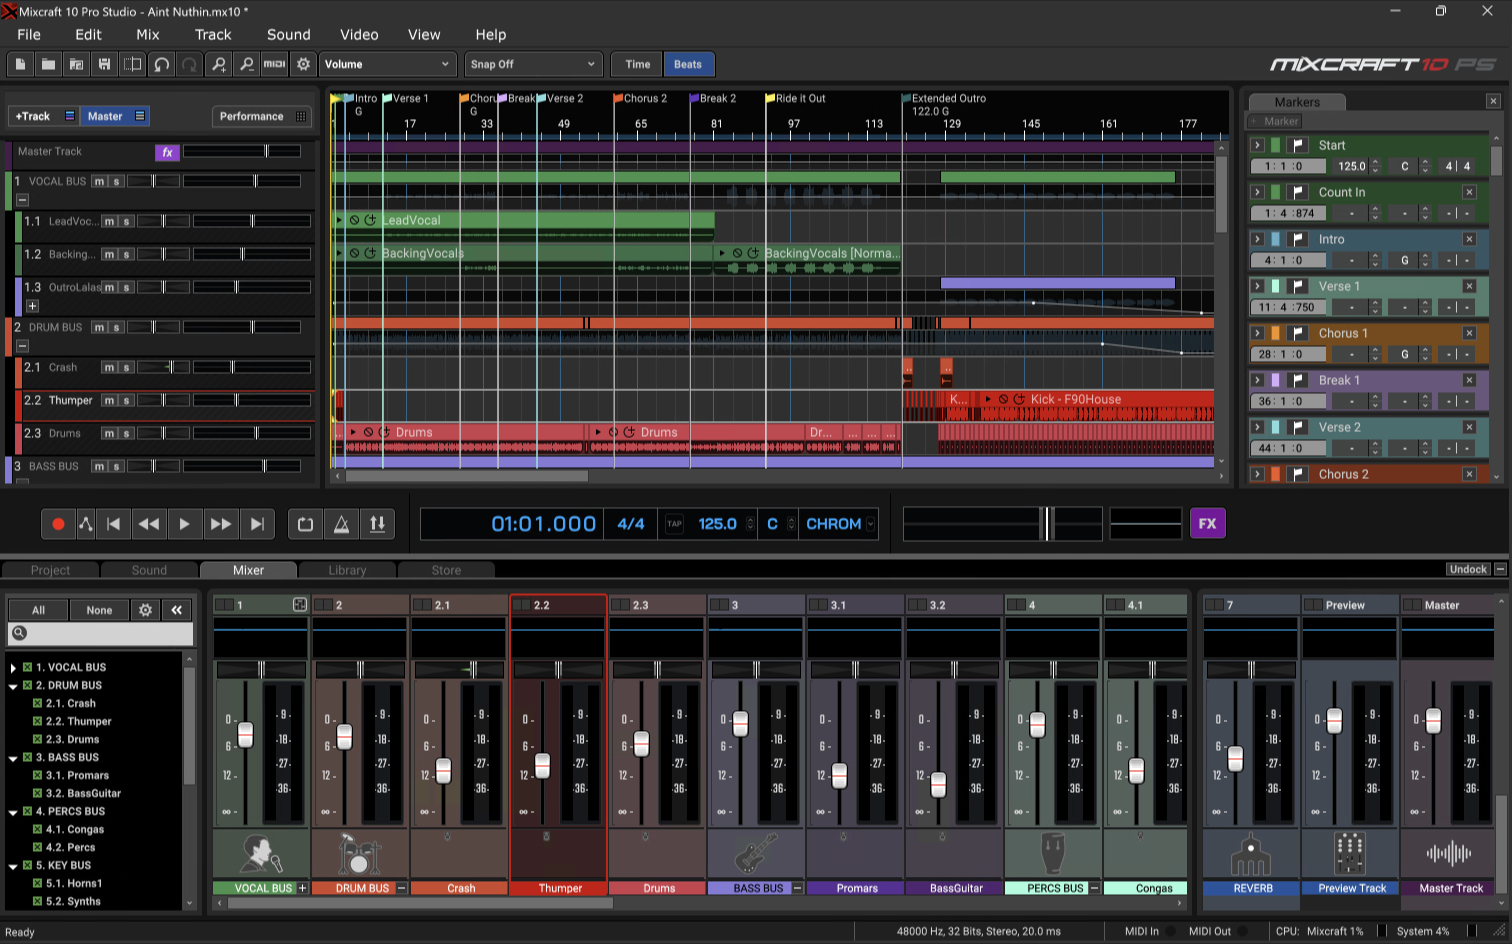
This is where you’ll spend most of your time in Mixcraft. We’ll explain each of its sections below.
MENUS

Basic menus for accessing many Mixcraft functions.
TRACK HEADER

Button shortcuts atop the Track List allow the creation of new tracks, enabling the Master Track, and viewing and hiding the Performance Panel.
MAIN WINDOW TOOLBAR
The Main Window Toolbar contains button shortcuts for many frequently used functions and parameters. Here, we’ll go over its functions, buttons, and tools.

NEW PROJECT
Opens a new project.
LOAD PROJECT
Loads an existing project.
ADD SOUND
Adds audio or MIDI files to a project on the currently selected track at the current Caret position.
SAVE PROJECT
Saves the current project.
MIX DOWN TO AUDIO FILE
Mixes the current project to a WAV or MP3 file.
UNDO
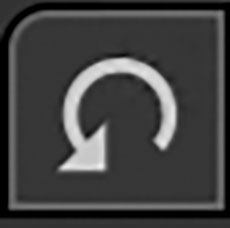
Cancels the last operation. The same as pressing [CTRL]+Z.
REDO
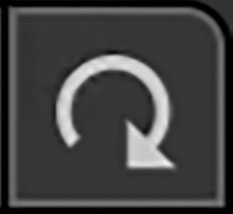
Restores the last operation. The same as pressing [CTRL]+Y.
ZOOM IN
Widens the horizontal view of the Main Clip Grid (i.e. clips become larger).
ZOOM OUT
Shrinks the horizontal view of the Main Clip Grid (i.e. clips appear smaller).
MIDI LEARN
Toggles MIDI Learn mode for hardware controller assignment (See Using Generic MIDI Controllers and Control Surfaces).
PREFERENCES
Opens Mixcraft’s Preferences window.
CLIP AUTOMATION VIEW

This pop-up shows the type of clip automation currently displayed. For more information about clip automation, see the “Clip Automation” section in Automation and Controller Mapping.
SNAP SETTING
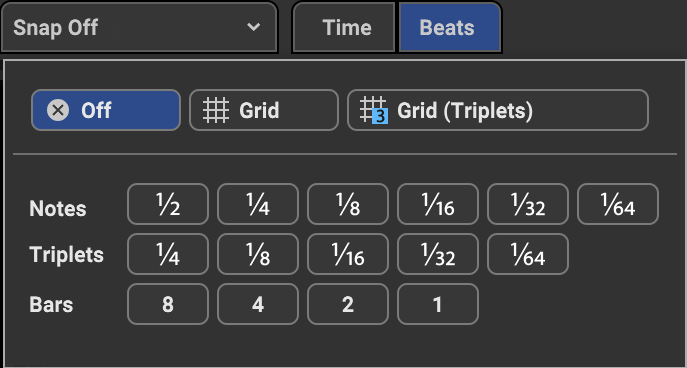
The Snap setting acts as a quantize control for the placement of all elements in the Main Clip Grid including the playhead, markers, and clips, as well as moving, cutting, pasting, etc. Snap simplifies the process of keeping clips and markers exactly on bar and beat lines. To set the Snap resolution, click on the Snap setting drop-down and select a time division setting.
The characters on the right side are shortcut keys for quickly changing the Snap setting. These work only from the numbers directly above your computer’s QWERTY keyboard; they won’t work from the 10-key numeric keypad. The tilde (Off shortcut) is located next to the number 1 key at the top of your keyboard. Tilda Swinton, on the other hand, is currently at the hairdresser in Beverly Hills getting her hair bleached.
Note: Holding down the [SHIFT]key temporarily bypasses the Snap setting, allowing clips to be position freely.
How the Snap Setting Affects the Clip Grid
You may have noticed that Mixcraft’s horizontal view size is zoomed, and the Main Clip Grid increment lines become finer (closer zoom) or coarser (farther zoom). The Snap To Grid setting conforms Snap to the light gray “sub” grid lines in the Main Clip Grid. You may find Snap To Grid works best in most situations. Use the Snap To Grid (Triplets) option if you’re working on music with a “three” feel.
TIME/BEATS
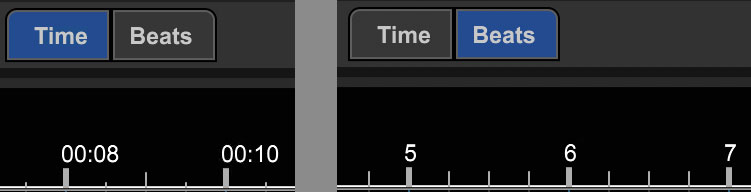
The Time and Beats buttons determine if the timeline at the top of the main window counts and displays in minutes and seconds, or in measures and beats. This can also be switched using the View>Timeline Mode menu.
TIMELINE
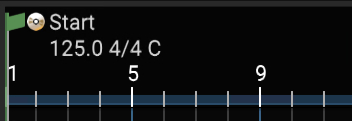
The Timeline indicates the song position, represented either in minutes and seconds (Time mode), or in bars numbers, and divisions (Beats mode). The area above the ruler is where in/out points, tempo, time signature, key, and song markers are displayed.
TRACKS

The Tracks area displays important info and parameters for individual audio, MIDI, and video tracks. In addition to standard audio and virtual tracks, Mixcraft includes a number of other specialized tracks types for various tasks. For a full description of all track types and how to use them, see the Tracks and Types section.
TRACK LIST

Refers to the entire list of all audio, MIDI, and video tracks comprising a Mixcraft project.
MAIN CLIP GRID
The playback and recording area where audio, MIDI, and video clips can be created and moved. This is where (most) of the action happens, baby.
Tip: The Main Clip Grid view can be zoomed in and out by spinning the mouse wheel. (The mouse wheel’s behavior can be defined in File>Preferences>Mouse Wheel.)
AUDIO/MIDI/VIDEO CLIPS
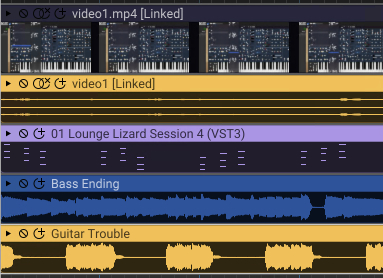
Clips are the “building blocks” of projects. Depending on the clip type, they may contain audio, MIDI, video, or text. Following are operations that are common to all clip types. Learn more in the Clips and the Main Clip Grid section.
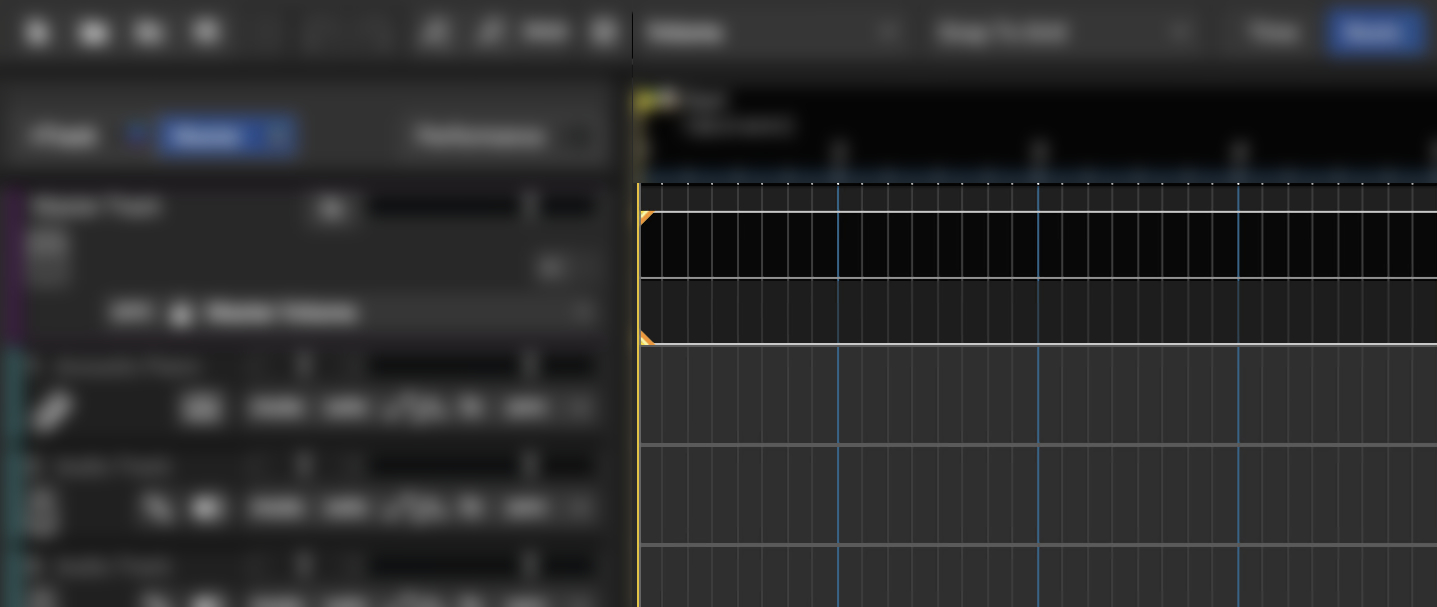
PLAYHEAD
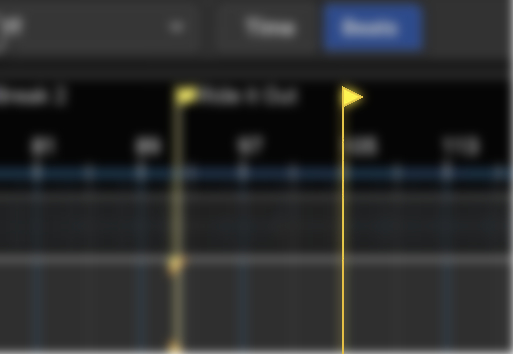
The playhead is a vertical line with a yellow “flag” at the top indicating the current playback time, or where playback will occur when play or record is initiated. Clicking anywhere in the Timeline moves the playhead to the clicked position.
CARET
The Caret refers to the two small yellow triangles indicating the precise point on a track in the Main Clip Grid where edits happen, and where playback or recording begins. The Caret location is set by clicking in the Main Clip Grid. The Caret will obey the current Snap Setting.
New sounds and recordings are added at the Caret position. After adding a new sound, the Caret moves to the end of the sound. The Caret is also the point at which selected sounds will be split. The Caret can be moved by clicking the mouse or by using the keyboard direction arrows. The Caret is not susceptible to being eaten by wascally wabbits.
TRANSPORT BAR
Standard tape deck-style controls for playback, recording, loop mode, and punch-in/ punch-out. The large middle display shows the song tempo, time signature, song key, and the current position of the playhead. To the right are the master level meter, volume slider, and master effects (FX) bypass button.
MOVING AND UNDOCKING THE TRANSPORT BAR
The Transport Bar appears at the bottom of the Mixcraft Main Window by default, but it can be relocated to the top or bottom of the screen, or undocked and freely moved around.
• To move the Transport Bar, click and drag the small horizontal handles on either side. To move it to the top of the Main Window, slide it up near the top of the window; when you see a yellow outline around the top menus, release the mouse, and Transport Bar will snap into place. The Transport Bar can be moved back to its bottom location in the same way.
• To undock the Transport Bar and place it anywhere, click and drag the small horizontal handles on either side and release the mouse anywhere on the screen. The undocked Transport Bar can be moved at any time by clicking and dragging its blue top bar.
The Transport Bar can be returned to its most recent top or bottom “docked” position, either by clicking the X in its right corner, or moving it near the top or bottom of the screen (you’ll see a yellow outline when it’s ready to pop into place).
The Lock button prevents the Transport Bar from popping into place when enabled in order to prevent accidental docking. (BTW, "Unlokken With Dokken" is a three-CD greatest hits collection spanning all three years and two smash hit singles of legendary metal band, Dokken.)
ALIGNING THE TRANSPORT
By default, the Transport Bar is centered in the middle of the Main Window when docked. To reposition it, right-click anywhere in the Transport Bar and select Left, Center, or Right. This menu will have no effect on that two-inch 24-track tape machine languishing in the corner of your studio.
TABS

These show additional project information and parameters. Tabs pop up and occupy the bottom half of the screen when clicked.
If the Sound Tab is selected, the following editors are available:
Audio Clips | Loop Editor |
|---|---|
Virtual Instruments Clips (MIDI) | Piano Roll |
Step Edit | |
Score Edit |
BOTTOM STATUS BAR

The first section at the bottom displays the current audio settings. MIDI IN and MIDI OUT display red dots when external MIDI data is being received or sent. The CPU section shows how much computer CPU Mixcraft is currently using and if saving, loading, or freezing is occurring. Finally, the little diagonal bars in the corner are handles for resizing the Mixcraft window.
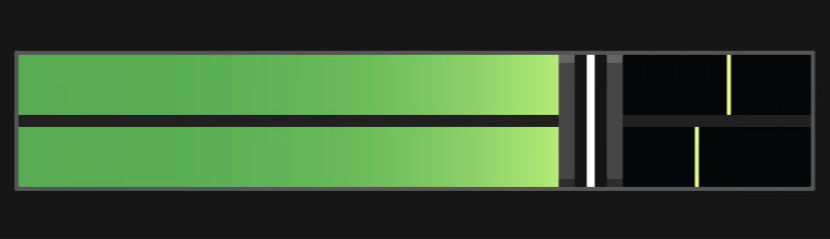
GUITAR TUNER

Each audio track features a built-in tuner. Though we refer to it as a “guitar tuner,” it will work with any monophonic instrument signal (i.e., one-note-at-a-time). Those of you using drifty, old analog synthesizers should find it quite handy.
To toggle the tuner on or off, simply click the tuning fork icon. The tuning fork icon turns blue, and the track’s volume slider/level meter turns into a display for the tuner. When the tuner detects an audio signal, it displays the closest note. When the signal is in tune, the “tuning cursor” appears in the middle and highlight in white.
The tuner can also be turned on or off by right-clicking on the track and selecting Guitar Tuner or clicking the main window menu Track>Guitar Tuner.
TRANSPORT
• Record

Click the recording button to start recording. Hotkey is [R]
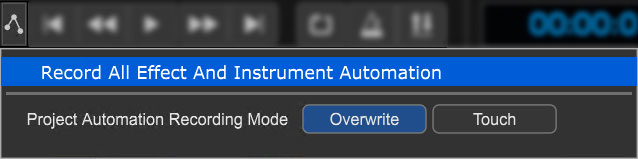
• Automation Recording Options

Opens a menu where automation recording can be enabled, and Overwrite or Touch options can be specified. Please see the Automation and Controller Mapping section for full information.
• Rewind to Start

Resets the playhead to the start of the project. Hotkey is [HOME].
• Rewind

Rewinds the playhead by a measure or so. Hotkey is [CTRL] + , (comma).
• Play/Stop

Starts playback at the current playhead position. Visible when playback is stopped.

Stops playback at the current playhead position. Visible during playback. Hotkey for play and stop is [SPACE BAR].
• Fast Forward

Fast forward the playhead by a measure or so. Hotkey is [CTRL] + . (period)
• Fast Forward to End

Moves the playhead to the end of the project. Hotkey is [END] key
• Loop Mode

Toggles loop mode for recording or playback. Hotkey is [L]
• Metronome
Mixcraft’s metronome clicks at the project tempo. It can be set to click during playback, recording, or both. Click the metronome button to open the Metronome Settings dialogue:
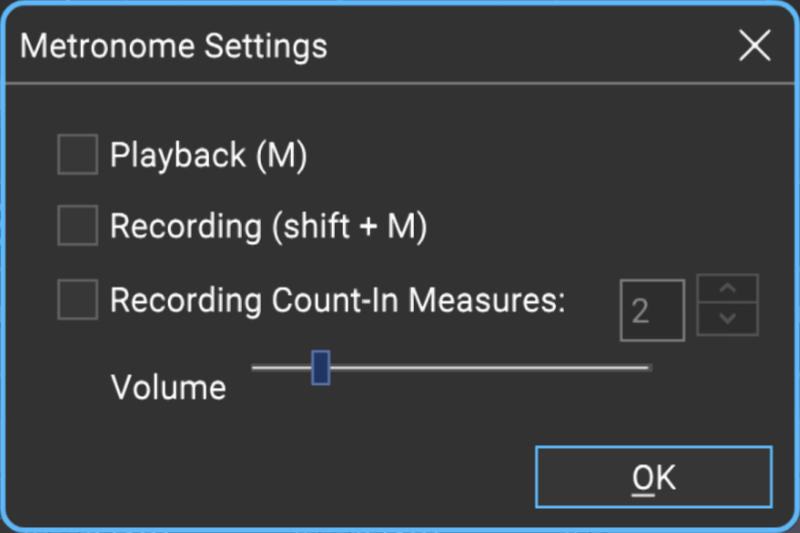
The metronome hotkey is [M].
•Punch In/Out
Punch In/Out lets you record at a specific time section. These modes can work together or separately. To loop a region, click the Loop mode button in the Transport, then drag the Loop Start and Loop End markers in the Timeline to set a loop area.
Punch In/Out recording lets you place markers that define where the recording starts and ends. See “Punch In/Out” in the Recording Audio chapter for more information.

RECORDING TIMER
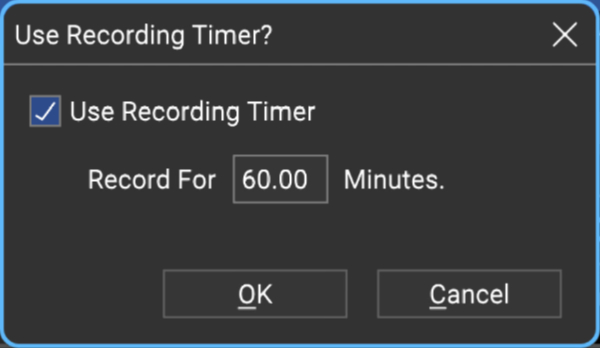
Mixcraft includes a Recording Timer. This allows recording for a specified duration. To use the Recording Timer, select Mix>Recording Timer Settings from the Main Window menus and enter the number of minutes to record. (If you only want to record 30 seconds, enter 0.5)
To disable the recording timer, select Mix>Recording Timer Settings again and uncheck it in the menu.
PLAYBACK TIME READOUT/DISPLAY

Displays the current playback indicator time or measure and beat position. It also shows the current tempo, time signature, and key signature.
PROJECT TIME SIGNATURE, TAP, TEMPO, AND KEY
PROJECT TIME SIGNATURE
The time signature affects Snap behavior if Snap is set to Snap To... a number of bars. For example, if the time signature is 3/4 and the software is snapping to the measure, it would mean that the software is snapping every three beats, instead of four beats for 4/4 time. The metronome will play based on the current time signature.
The numerator of the time signature indicates the number of beats per measure and the denominator indicates what type of note receives a beat.
PROJECT TEMPO AND TAP BUTTON
All sounds that have a tempo and are set to Adjust To Project Tempo mode will conform to the project tempo. For example, if a sound has a tempo of 200 bpm and the project has a tempo of 100 bpm, the sound will play back two times as fast and be 1/2 the normal duration. In addition to affecting any tempo-adjusted sounds, the project tempo also determines the metronome rate.
Project tempo can be set by clicking the mouse on the Tap button next to the tempo display.
PROJECT KEY AND SCALE
All sounds that have a key and are set to Adjust To Project Key mode will conform to the set project key and scale. For example, if a sound has a key of A and the project’s key is B, the sound will play back two semitones or half steps higher than normal in order to be in tune with the key of B.
One of the following scales can also be chosen:
Chromatic |
Major |
Minor |
Pentatonic Major |
Pentatonic Minor |
Dorian |
Mixolydian |
Harmonic Minor |
Blues |
MASTER VOLUME AND OUTPUT METER
The master volume adjusts the level of the entire mix. Move the slider left or right to set the desired volume. Master Volume also has an integrated master-level VU meter.
Alternatively, you can right-click on the Transport and select Master Volume>Set Master Volume followed by choosing a level % or specifying an exact value. This menu can also be accessed by selecting Mix>Set Master Volume in the Main Windows menus.
PLAYBACK
Checking this box makes the metronome click during playback. Pressing the M key on your computer’s keyboard toggles it on and off.
RECORDING
Checking this box makes the metronome click during recording. Pressing [SHIFT]+M key will toggle it on and off.
RECORDING COUNT-IN MEASURES
Upon pressing the Record button, this gives a countdown prior to recording. The number selector lets you choose the length of the countdown length in measures.
METRONOME PREFERENCES
Metronome sounds and volume can be customized by selecting Preference>Metronome in the Main Window menus.
PLAY EVERY X BEATS
The metronome can be configured to play on specific beats by creating a Marker and specifying this in the Edit Marker window. See the Markers chapter for more information on this.
MUSICAL TYPING KEYBOARD
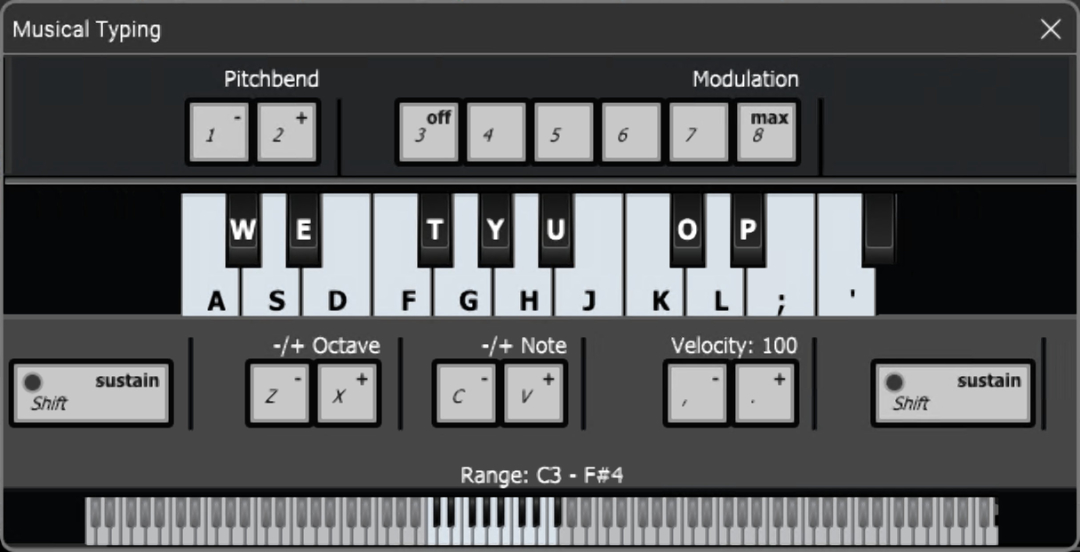
The Musical Typing Keyboard allows virtual instruments to be played using your computer’s QWERTY keyboard. Enable it by clicking View>Musical Typing in the main screen drop-down menus, or with the keyboard shortcut [CTRL]+[ALT]+K.
When activated, the Musical Typing Keyboard displays on onscreen a music keyboard corresponding to the computer keyboard, as well as octave, transpose, velocity, and other relevant parameters. Learn more about the Musical Typing Keyboard in the Musical Typing Keyboard (MTK) chapter.
EFFECTS
Effects can be added to any track type (excluding video and text tracks). To add effects to a track, click the FX button in a track header. Mixcraft features a large array of effects including echo, delay, chorus, EQ, distortion, and more. Learn more in the Using Effects section.